
Install and configure the agent
This section provides information to help you install and configure the CxLink Backup agent in your SAP database server.
Topics
Install the agent in your SAP database server
Full agent installation and configuration takes 5 minutes if your system meets prerequisites from prerequisites section.
Linux
Follow these steps to install the CxLink Backup agent under Linux:
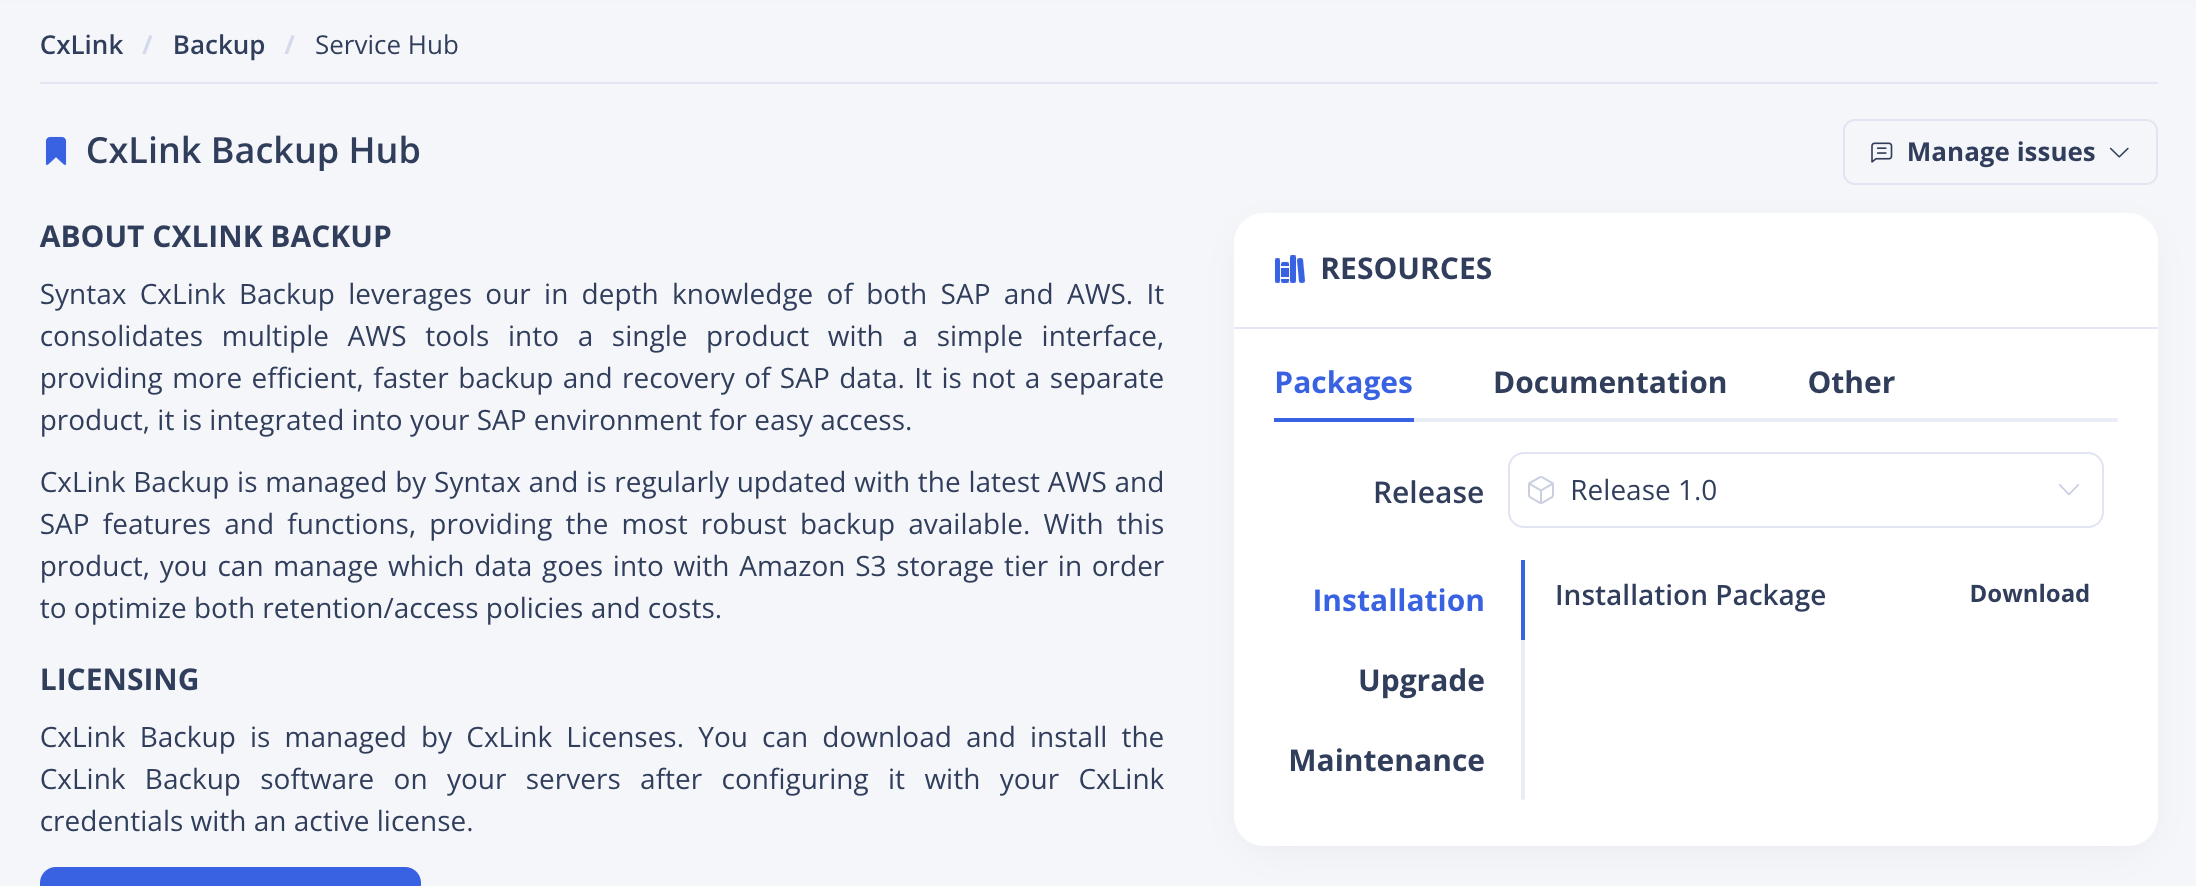
Access the CxLink Backup Service Hub in the CxLink Portal.
In the Resources section, under Packages tab, Select your desired Linux release version and Download the Installation Package from the Installation section.
Save the downloaded file to the
/tmpdirectory (or the one of your choice) in your SAP ServerInstall the package using RPM native tools with root user or sudo permissions.
cd /tmp
rpm -ivh emory-1.0-linux-latest.x86_64.rpm
Alternatively, if your server has internet access, you can directly install it from the repository by executing the following commands as root user.
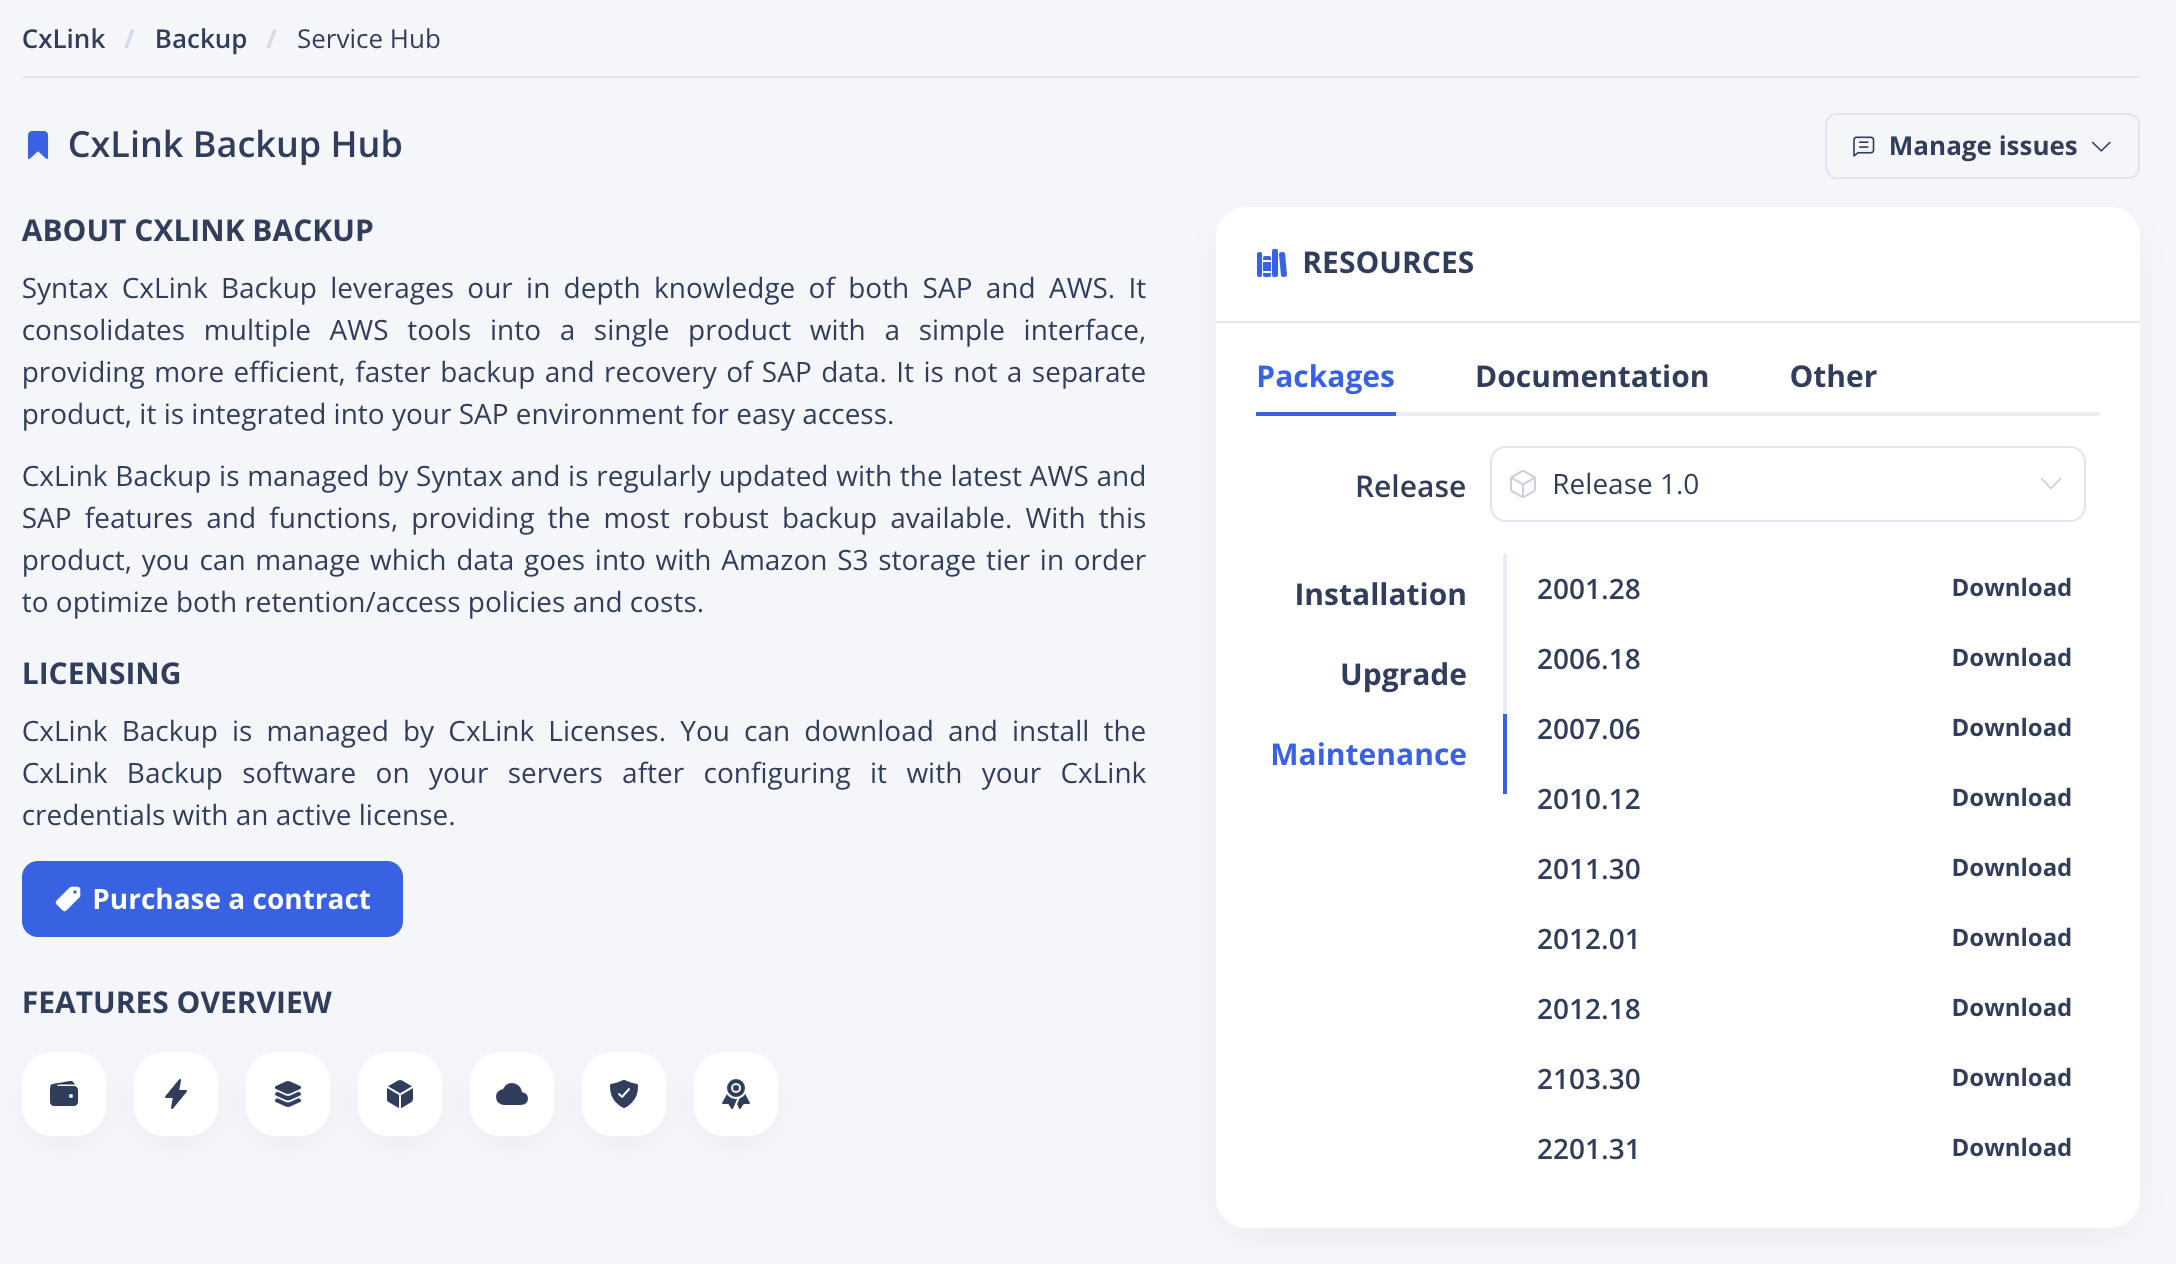
rpm -ivh https://s3.eu-west-1.amazonaws.com/repo.linkeit.com/resources/emory/Linux/1.0/packages/emory-1.0-linux-latest.x86_64.rpmFrom the Resources section of the CxLink Backup Service Hub, Download the available Support Packages from the Maintenance section.
Windows
Follow these steps to install the CxLink Backup agent under Windows:
Access the CxLink Backup Service Hub in the CxLink Portal.
In the Resources section, under Packages tab, Select your desired Windows release version and Download the Installation Package from the Installation section.
Save the downloaded file to the Windows Desktop (or the one of your choice) in your SAP Server
Install the package with Administrator user.
From the Resources section of the CxLink Backup Service Hub, Download the available Support Packages from the Maintenance section.
Create a Storage Provider profile
A Storage Provider profile is a set of configuration values that hold all the information needed to use a Cloud Provider storage service as the target for your SAP Backups. In this section you will be able to define the access to remote storage destination as well as its properties. We will use this providers profiles to store o retrieve our backups.
What is a Storage Provider Profile?
You can find a more detailed information in the Storage Provider Profiles section.
Follow these steps to add a new Storage Provider profile for your backups:
Start the emory settings wizard and choose the
Storage Providers profilesoption:? CxLink Backup: [Use arrows to move, type to filter] > Storage Providers profiles Data storage providers for backups & restores Specific Database configuration for Oracle database License Software Logging settings Syntax Backups Dashboard Backups Lifecycle Debug traces ExitChoose Add a new profile
? Select action to perfom:   [Use arrows to move, enter to select, type to filter]
  List all defined profiles
> Add new profile
  Edit existing profile
  Delete existing profile
  Return
Choose a name for your provider profile (in this example,
development):? Select action to perfom: Add ? Enter provider profile name: developmentSelect your desired provider from the available list:
? Select provider type:   [Use arrows to move, enter to select, type to filter]
> AWS
  Azure
Follow the steps for the specified Storage Provider:
AWS
Use AWS Profile. As described in the previous section, you can choose to use an EC2 Instance Service Role (Instance Profile) or an AWS Cli Named Profile to grant the proper permissions to the target Amazon S3 Bucket.
? Use AWS profile? [? for help] (y/N)- Choose
yif you want to use an AWS CLI named profile instead of the EC2 instance Service Role and enter the name of the profile in theEnter AWS Profile name configured in this servermenu option. - Leave it empty or enter
Nif you want to use EC2 Instance Role attached to the EC2 Instance
- Choose
Use AssumeRole. You can store and retrieve your backups or use different AWS KMS keys to/from different AWS Accounts by assuming roles.
? Use AssumeRole? [? for help] (y/N)- Choose
yif you want to assume a role to grant access to the target Amazon S3 Bucket, and enter the Role ARN. - Choose
Nif you want to use the inline permissions of the EC2 instance.
- Choose
Select storage location Choose the AWS Region where your backups will be stored. The region of your Amazon S3 Bucket.
? Choose AWS Region:  [Use arrows to move, enter to select, type to filter]
  ap-south-1
  eu-west-3
  eu-west-2
> eu-west-1
  ap-northeast-3
  ap-northeast-2
  ap-northeast-1
Select Bucket where your backups will be stored
You can choose one from your backups list
? Choose bucket from the List:  [Use arrows to move, enter to select, type to filter]
> emory-backups-dev
emory-backups-prd
Choose encryption type
Choose the encryption model that you want to use from your SAP Backups:
- AES256 (default) (KMS-managed customer master key (CMK) of your AWS Account. Name: aws/s3)
- aws:kms (AWS Key Management Service) Custom symmetrical CMK stored in KMS.
- None. To not encrypting your backups, or to accept the default S3 Encryption option.
? Choose encryption type:  [Use arrows to move, enter to select, type to filter]
> AES256
  aws:kms
  none
Choose storage class for the backups
CxLink Backup supports the following S3 storage classes. Choose the one that fits your requirements. More information in: https://aws.amazon.com/s3/storage-classes/?nc1=h_ls
? Choose storage class for the backups:  [Use arrows to move, enter to select, type to filter]
> Standard
Intelligent_Tiering
Standard_IA
OneZone_IA
Reduced_Redundancy
Tag S3 Objects with backup information
CxLink Backup can automatically add information to the Amazon S3 objects by adding tags. This information can help you later to manage your backups lifecycle or to identify specific backups. The information currently added in the object tags are:
- backup_id - Unique identified generated by the SAP Database
- backup_type - Full, Log, transaction, incremental, differential, etc..
- start_date - Timestamp of the backup execution
- lifecycle - Daily, Weekly, Monthly, Yearly... (See lifecycle section for additional information). D, W, Y, M
- expiration_date - If you set the lifecycle policy, when the backup is supposed to be deleted.
S3 Downloader/Uploader MemoryBuffer - multipart_chunksize *
S3 Downloader/Uploader Concurrency - max_concurrent_requests *
AWS Documentation
More information in : S3 Configuration Settings
Azure
Azure storage account name Fill in account name to retrieve containers from.
? Azure storage account name: [? for help]Azure storage account key Fill in your account key or leave it empty.
? Azure storage account key: [? for help]Fill in your storage account key to have access to corresponding containers.
Leave it empty if you want to use identity managed system roles.
Select container Choose container where your backups will be stored.
? Choose Azure storage account container:  [Use arrows to move, enter to select, type to filter]
> alehop
  emorydevelopment
  emorydevelopment1
  emorydevelopment2
  emorydevelopment3
Select Access tier class Choose an access tier class for your storage objects.
You can choose one from your backups list
? Choose access tier class:  [Use arrows to move, enter to select, type to filter]
  Cool
> Hot
  Archive
Azure Downloader/Uploader MemoryBuffer - multipart_chunksize
Azure Downloader/Uploader Concurrency - max_concurrent_requests
Tag Azure storage objects with backup information
CxLink Backup can automatically add information to the Azure storage objects by adding tags. This information can help you later to manage your backups lifecycle or to identify specific backups. The information currently added in the object tags are:
- backup_id - Backup unique identifier
- backup_type - Full, Log, transaction, incremental, differential, etc..
- start_date - Timestamp of the backup execution
- lifecycle - Daily, Weekly, Monthly, Yearly... (See lifecycle section for additional information). D, W, Y, M
- expiration_date - If you set the lifecycle policy, when the backup is supposed to be deleted.
Azure Documentation
More information in : Azure storage
Set the Storage Provider profile as default for your backups
In this section we will define in which provider profile to use to store or retrieve the backups.
Note: The first time you execute cxLink settings and create a provider profile as explained in the last section, it is configured as default backups provider profile.
Select
Provider profile to store backups []from the options:? Select : [Use arrows to move, enter to select, type to filter] > Provider profile to store backups [] [DR scenarios] Provider profile to restore backups [] ReturnChoose the profile that you want to use to store backups
? Select :  Provider profile to store backups []
? Select provider profile:   [Use arrows to move, enter to select, type to filter]
  prod
> dev
Ensure that the profile is listed as the selected.
? Select :   [Use arrows to move, enter to select, type to filter]
> Provider profile to store backups [dev]
  [DR scenarios] Provider profile to restore backups [None]
  Return
You can now select Return and Exit to save the configuration if no other action should be taken.
Register the agent with the License Management Console
Backup agent needs a valid CxLink license to perform backups to your storage provider. Follow the guidelines described in the Register an agent section to register your agent.
Prepare your database to work with Backup
As with any Third-Party SAP backup tool, there are additional steps that should be done at the database level to finish the CxLink Backup configuration. Jump into the Database Guide to find out the configuration steps to be done in each specific database: