Go to "Account Settings".
To do so, click on the username in the upper right corner of the screen, and select "Account Settings" on the user contextual menu that appears, or select "CxLink Settings" service from the service selector located in the navigation header, next to the CxLink logo and click on "Account Settings" in the navigation menu.
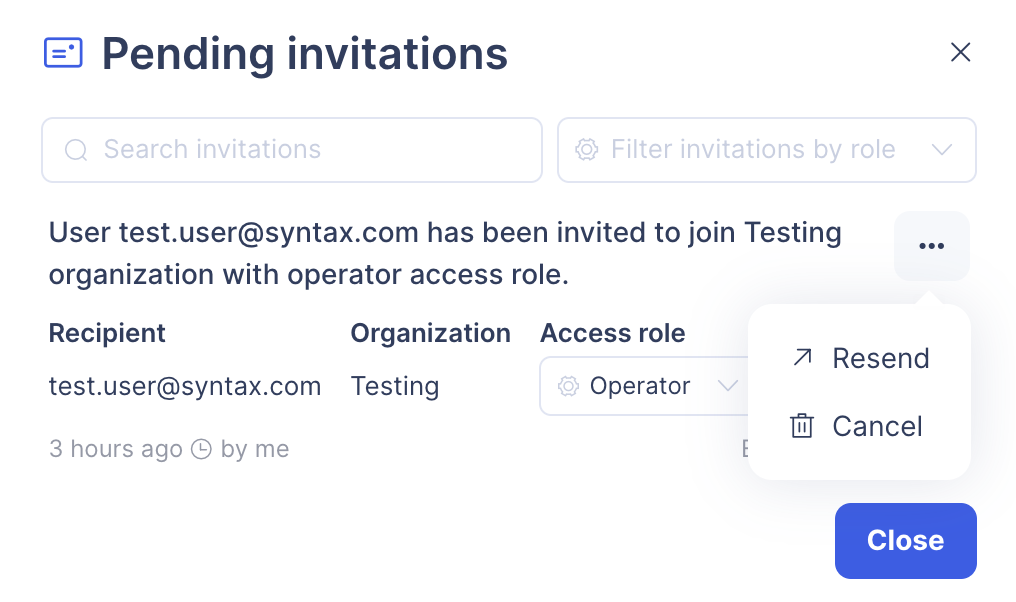
Under the "Organization" section, in the "Pending Invitations" subsection, click "Pending invitations" button.
A new dialog will appear with all pending invitations for the organization. You can cancel or resend the invitation, as well as modify the assigned access role.
Organizations and members
CxLink is structured into users and organizations. You can belong to multiple organizations, and for every organization to which you belong, you will have an assigned access role with a series of permissions that allows you to perform different actions inside the organization scope.
In order to use CxLink, you must belong to at least one organization.
Access Roles and Permissions
You can find all role permissions in the Access role permissions section.
Topics
Organization setup
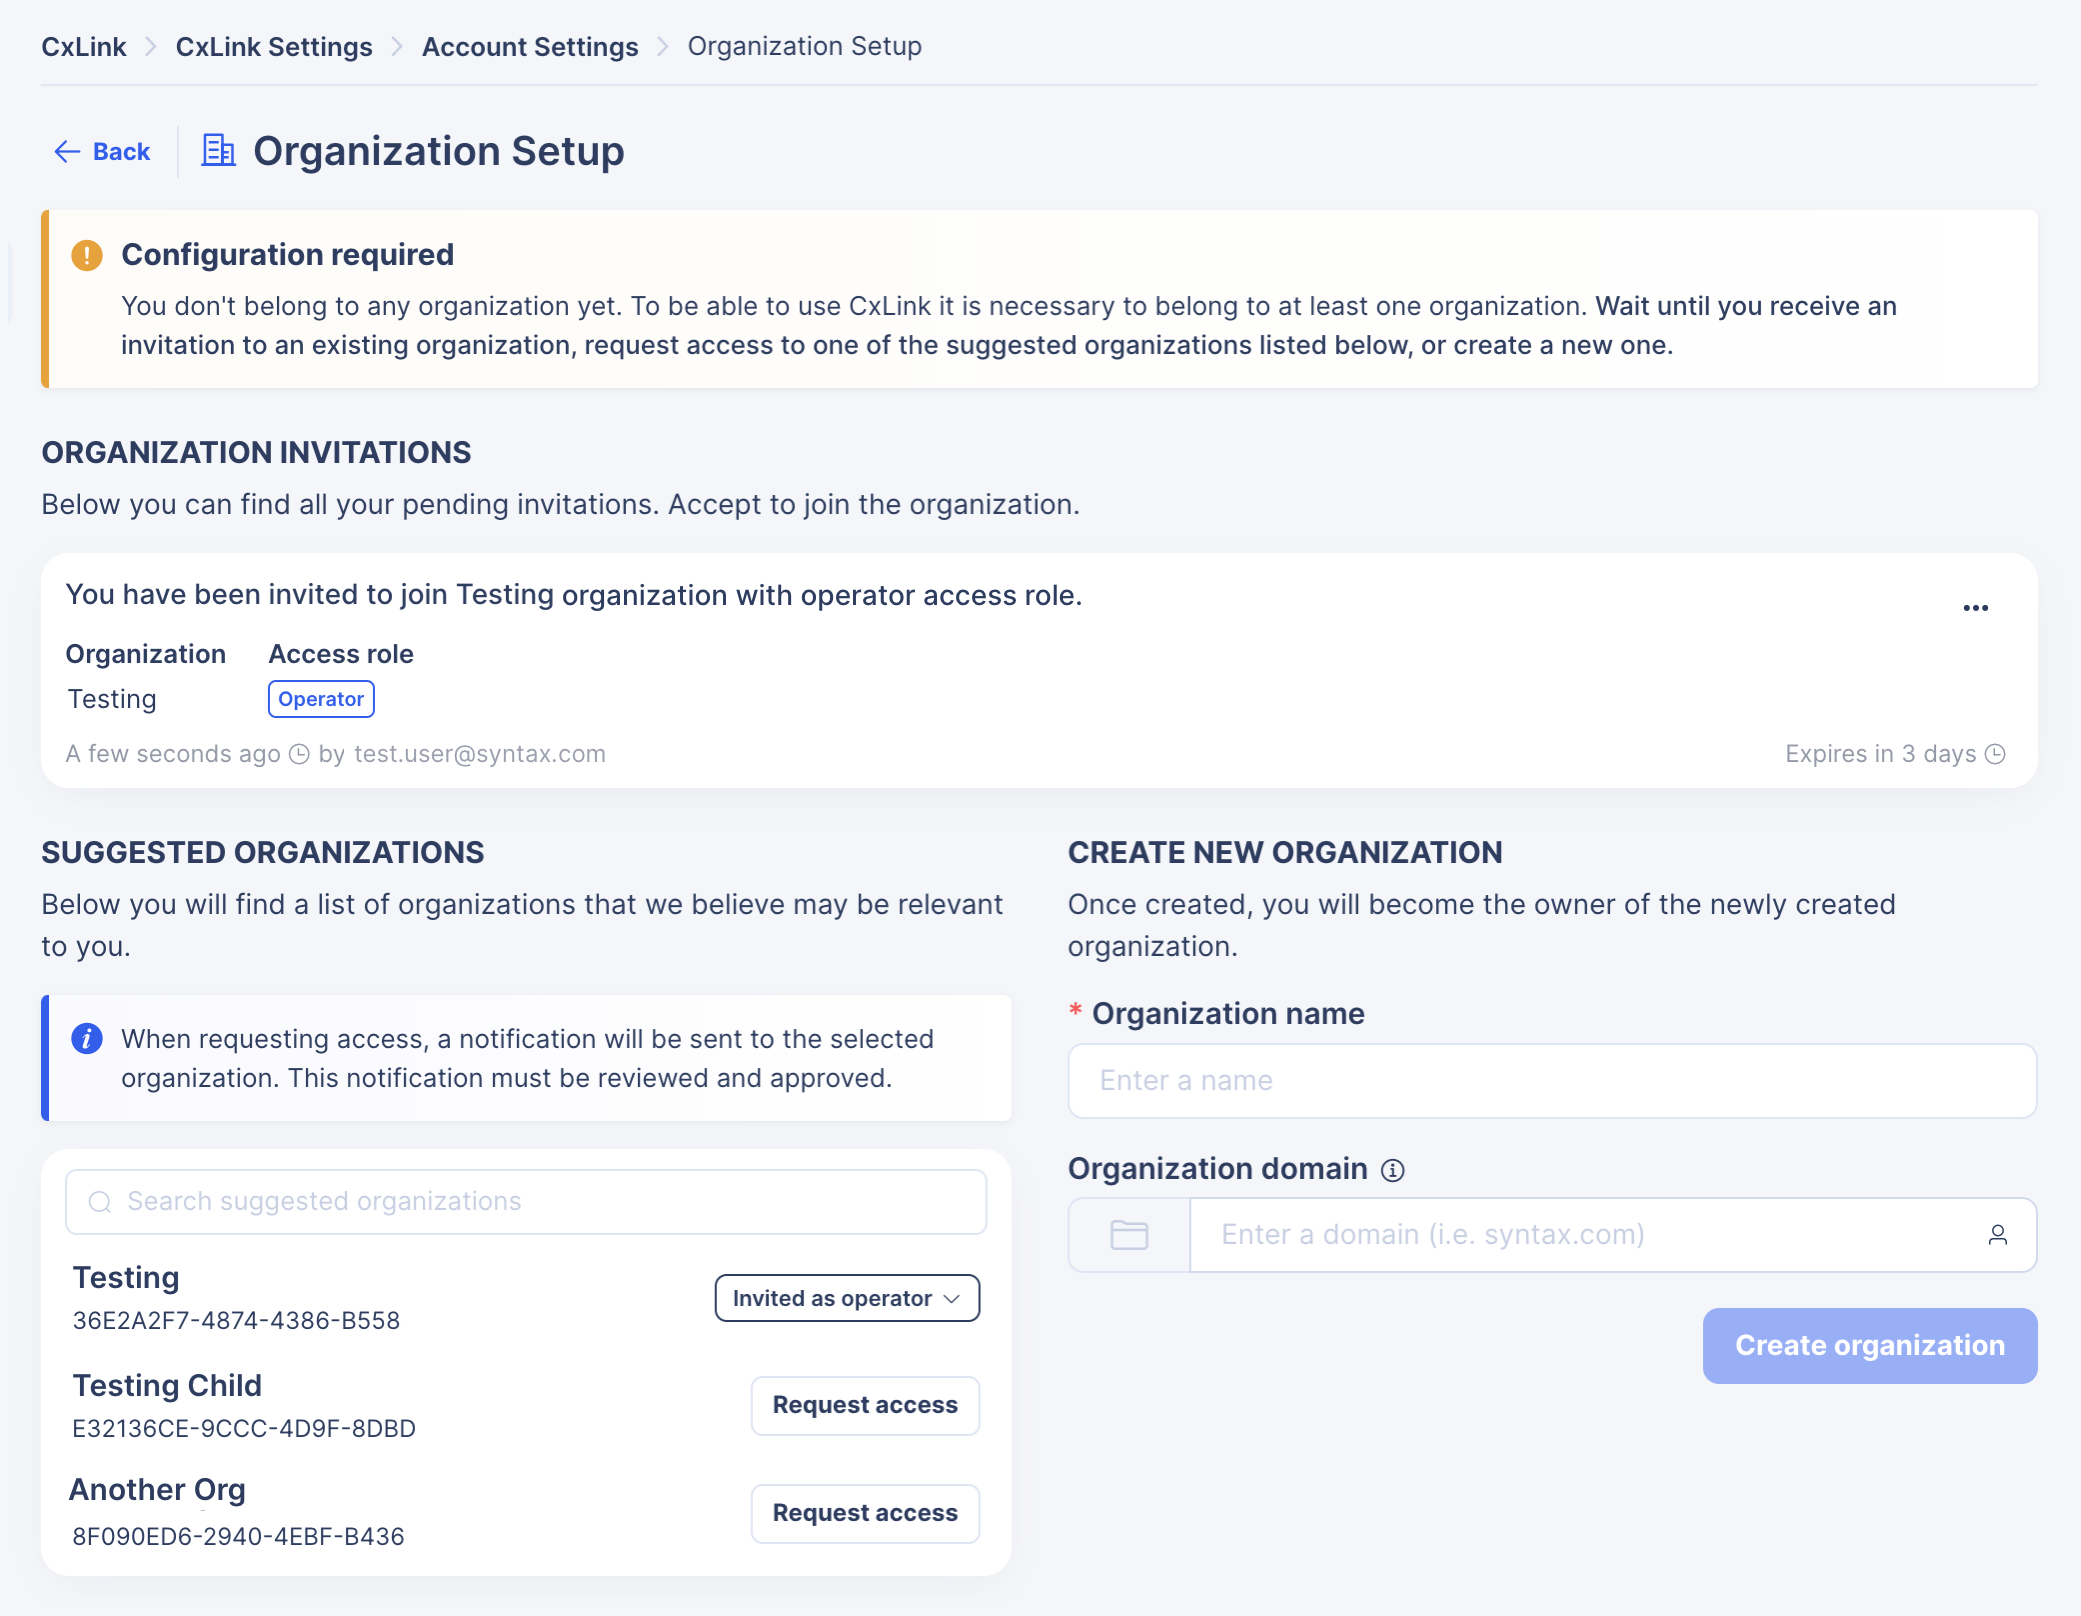
When signing in for the first time, if you haven't accessed through an invitation received in your email inbox (In that case the invitation will be automatically accepted), you will not belong to any organization, and you will be redirected to the organization setup page. On this page, you will find different sections that will allow you to configure your default organization:
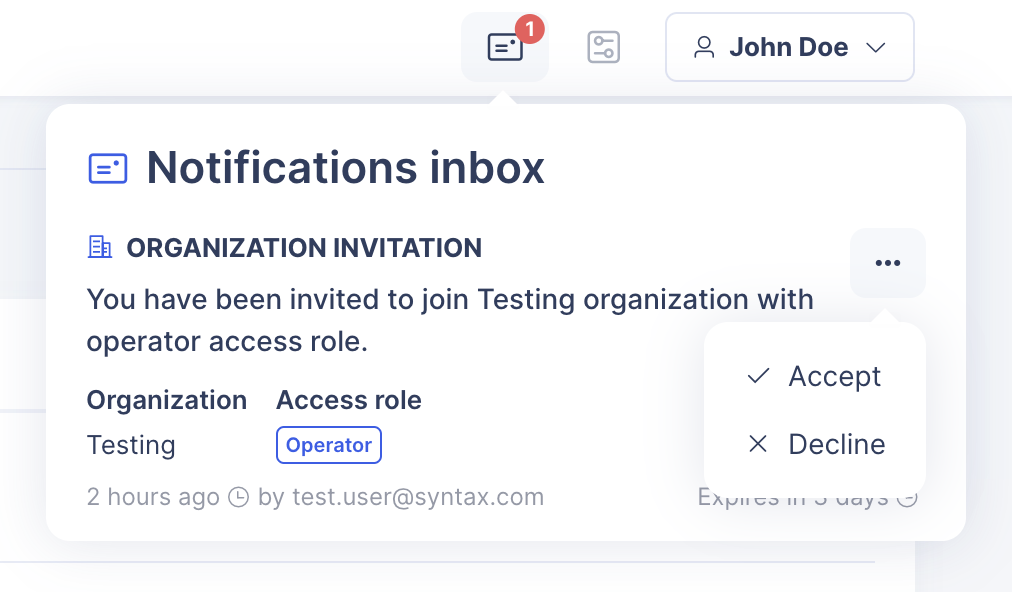
"Organization invitations": From this section you can see, accept or decline your received invitations to existing organizations.
More information in the Invite members to an organization section.
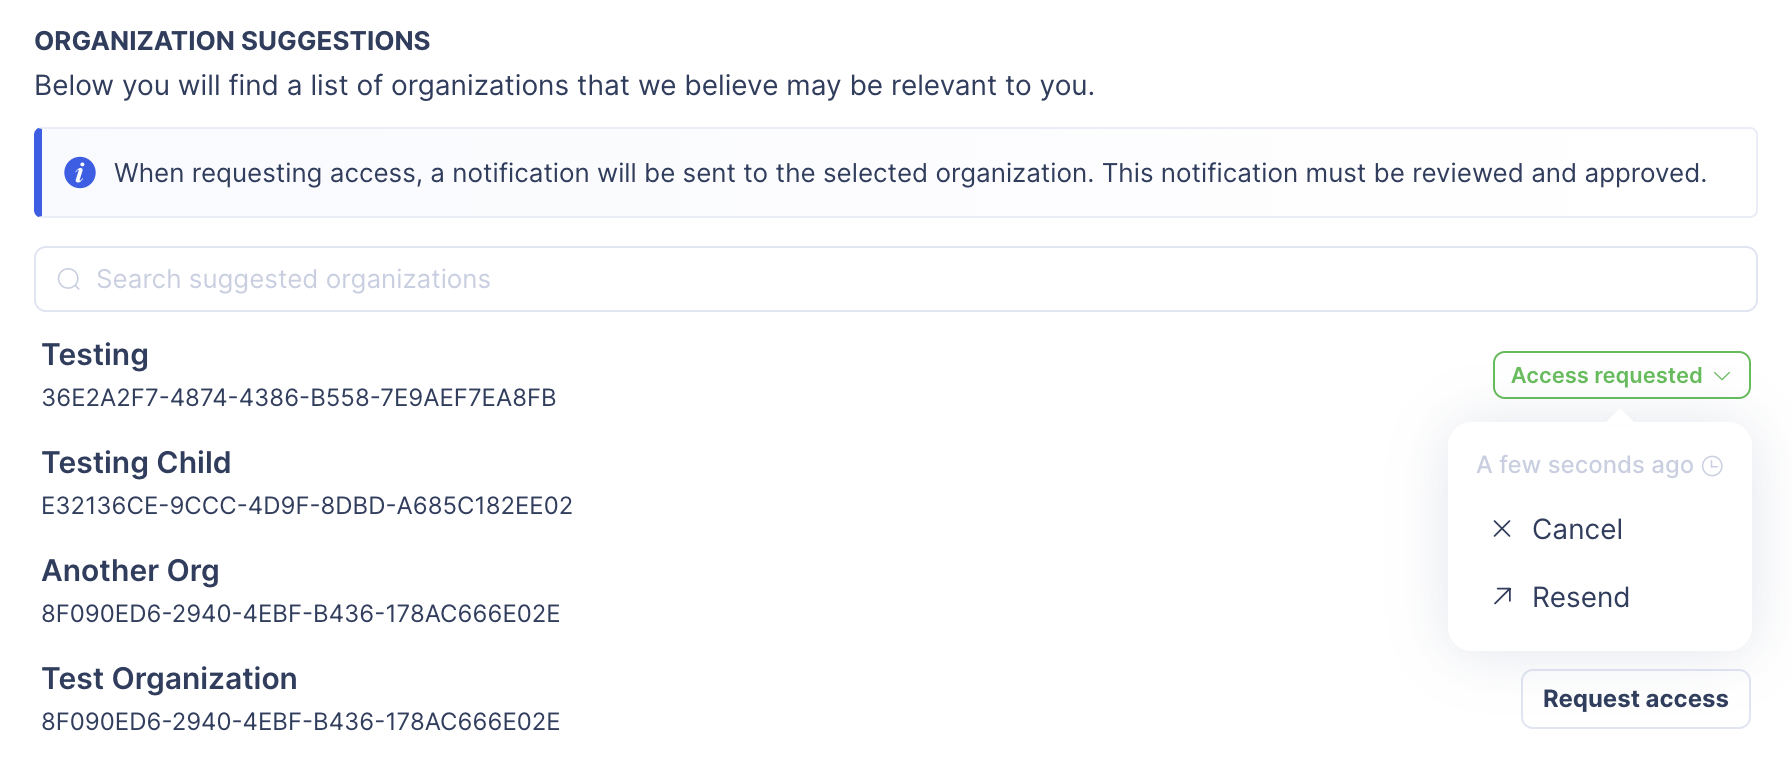
"Suggested organizations": Here you will find a list of suggested organizations to which you can submit access requests. Once you've requested access to an organization, organization owners will receive a notification that they must accept or decline. If your access request has been accepted, the owner will be prompted to assign you an access role to the organization.
You can find more information below, in the Request access to an organization section
"Create new organization": In this section you will find the form for the creation of a new organization.
More information below, in the Creating a new organization section.
Invite members to an organization
Sending an invitation to your current organization
Go to "Account Settings"
To do so, click on the username in the upper right corner of the screen, and select "Account Settings" on the user contextual menu that appears, or select "CxLink Settings" service from the service selector located in the navigation header, next to the CxLink logo and click on "Account Settings" in the navigation menu.
Under the "Organization" section, in the "Invite Members" subsection, write the email address of the user you want to invite in the text field, select the desired access role from the selector and hit the "Invite" button.
If the email address is invalid or the email could not be sent, an error message shall appear under the form. On success, a notification should appear in the top-right corner of the screen.
An invitation to your current organization will be created in the new member's notifications inbox and an email will be sent to the given email address.

Restricted feature
Only organizations members with owner access role can use this feature. You can find more information about the permissions granted by each role from the Access role permissions section.
Review, cancel and modify invitations sent
Restricted feature
Only organizations members with owner access role can use this feature. You can find more information about the permissions granted by each role from the Access role permissions section.
Receiving an invitation
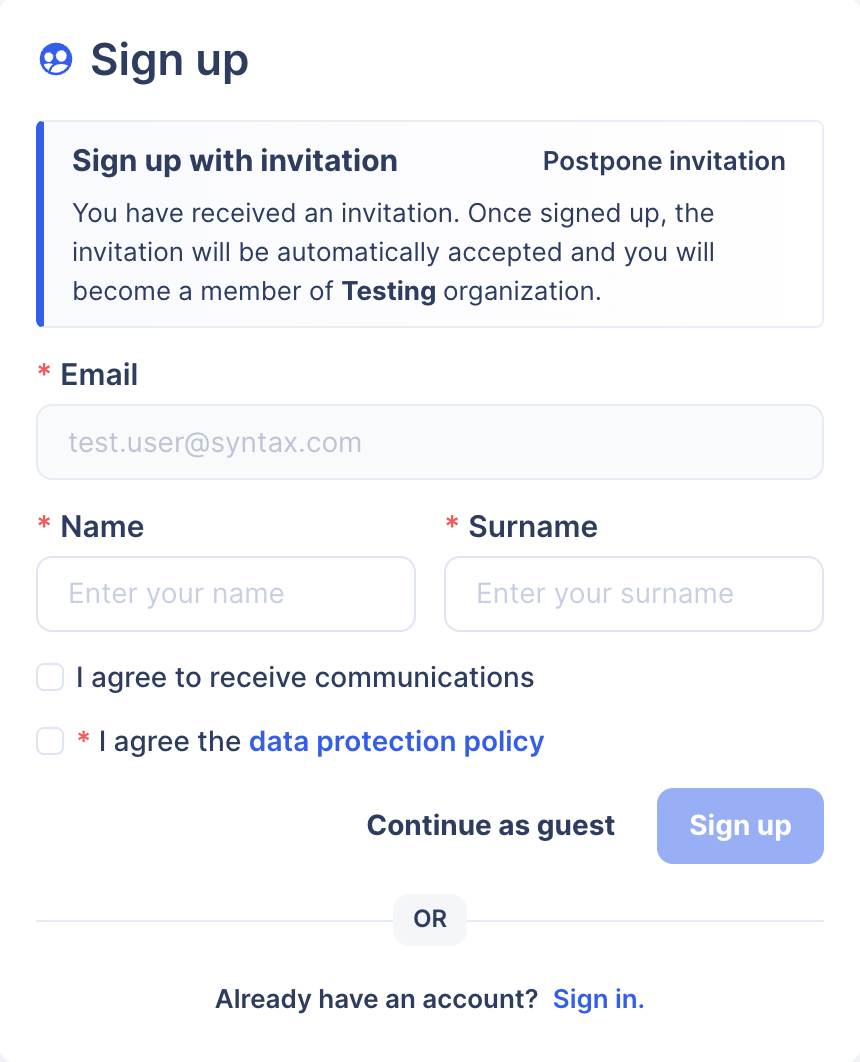
An invited user will receive an email message with a link on it. Following this link will lead them to the CxLink portal authentication page.
From this page, the user can choose between signing in with an existing account or create a new one.
In any case, submitting in this form, the invitation will be automatically accepted, and the user will become a member of the organization.
You can postpone the invitation by clicking the link "Postpone invitation" located in the top-right corner of the invitation banner.
If your invitation was not consumed, either because you did not access through the link received by email or because you postponed the invitation, when you sign in with an account with the same email that the invitation was sent to, you will find the invitation notification in your notifications inbox, and you will be able to accept or decline it.
Request access to an organization
In CxLink you can request access to a suggested organization. You will find the suggested organizations list in the Organization setup page as well as in the "Account Settings" page, in the "Organizations suggestions" subsection, under the "Organization" section.
Sending an access request
Click the "Request access" button for any organization in the list you want to request access. A new organization access request notification will be created. Organization owners will receive a notification that they must accept or decline.
From this list, you can also "Cancel" or "Resend" your access request notifications.
Receiving an access request
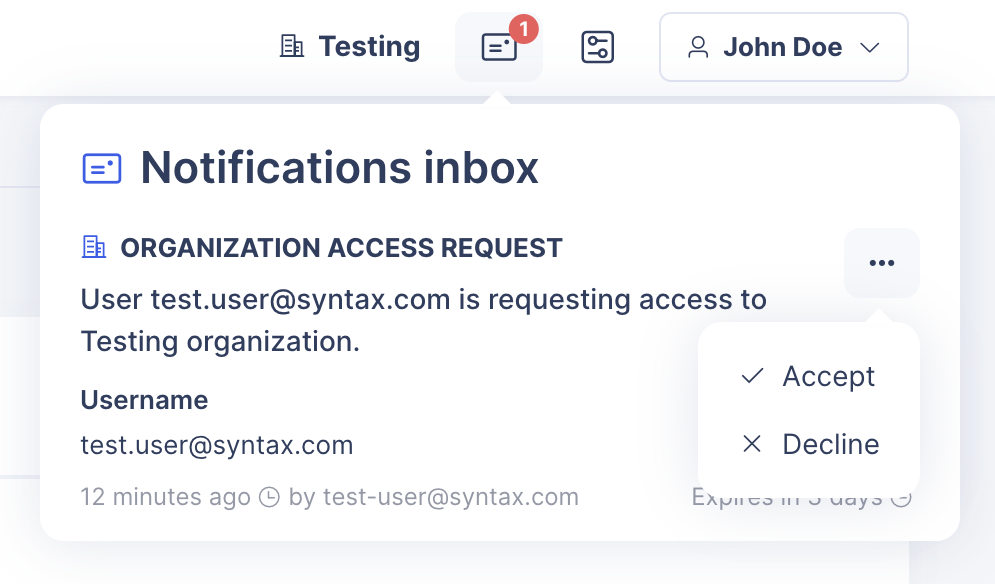
When a user is requesting access to your organization, a new organization access request notification will appear in your notifications inbox. When accepted, you will be prompted to assign a new access role to the new member.
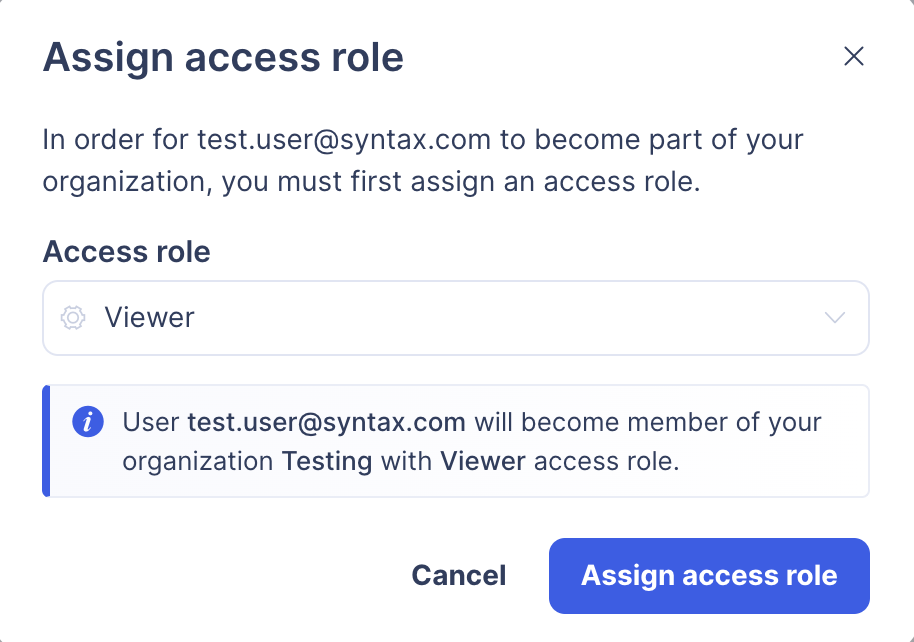
Once you've selected an access role, the new member will be included in your organization with the permissions granted by the selected role.
Restricted feature
Only organizations members with owner access role can use this feature. You can find more information about the permissions granted by each role from the Access role permissions section.
Current organization members list
To view all your current organization members and their corresponding access roles:
Go to "Account Settings".
To do so, click on the username in the upper right corner of the screen, and select "Account Settings" on the user contextual menu that appears, or select "CxLink Settings" service from the service selector located in the navigation header, next to the CxLink logo and click on "Account Settings" in the navigation menu.
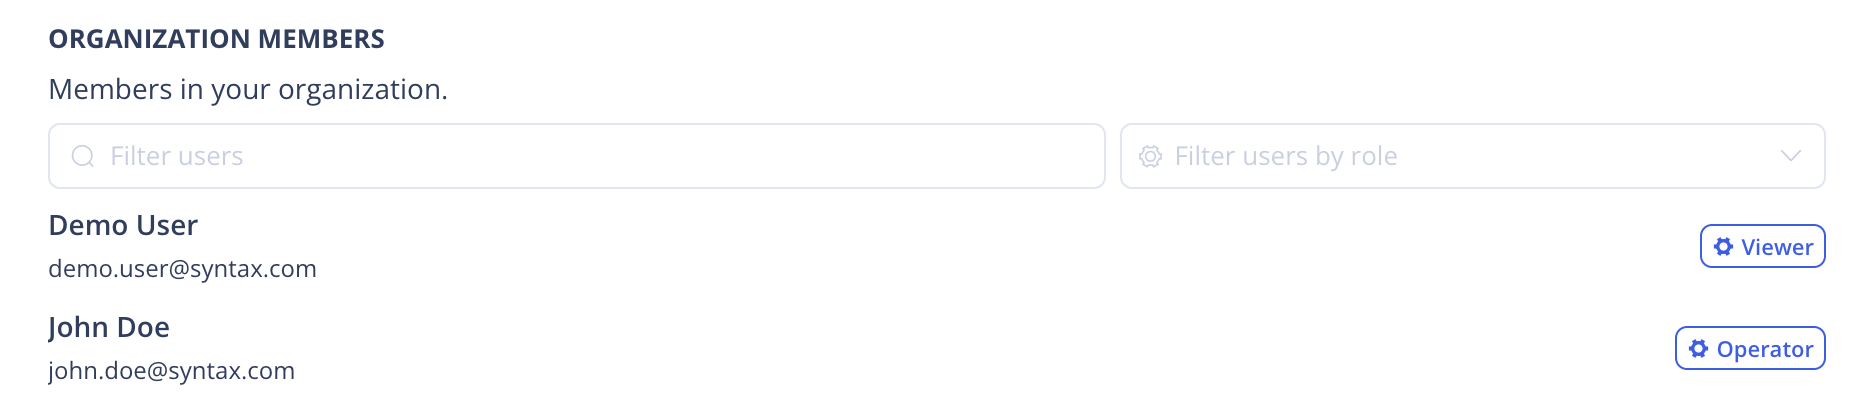
You will find your current organization members list under the "Organization" section, in the "Organization Members" subsection.
Restricted feature
Only organizations members with owner access role can use this feature. You can find more information about the permissions granted by each role from the Access role permissions section.
Creating a new organization
In case you are the first member of an organization, and therefore cannot receive an invitation or request access to an existing organization, from this section you can create a new organization.
In order to create a new organization, you must fill in the new organization form, specifying:
- "Organization name": The name of the organization to create. The organization name must be unique, is required, and currently cannot be modified.
- "Organization domain": An organization domain (e.g. example.com). If provided, allows us to offer suggested organizations to new registered users whose email address domain match the given organization domain. These users will be able to request access to your organization.
Once you have created a new organization, you will automatically become a member with owner access role.
Creating child organizations in your current organization
In CxLink it is possible to create an organizational structure, where child organizations depend on parent organizations. This allows the licenses of a contract acquired by a parent organization to be shared with one of its child organizations. You can find more information regarding license sharing in the License Sharing section.
To create a child organization in your current organization:
Go to "Account Settings".
To do so, click on the username in the upper right corner of the screen, and select "Account Settings" on the user contextual menu that appears, or select "CxLink Settings" service from the service selector located in the navigation header, next to the CxLink logo and click on "Account Settings" in the navigation menu.
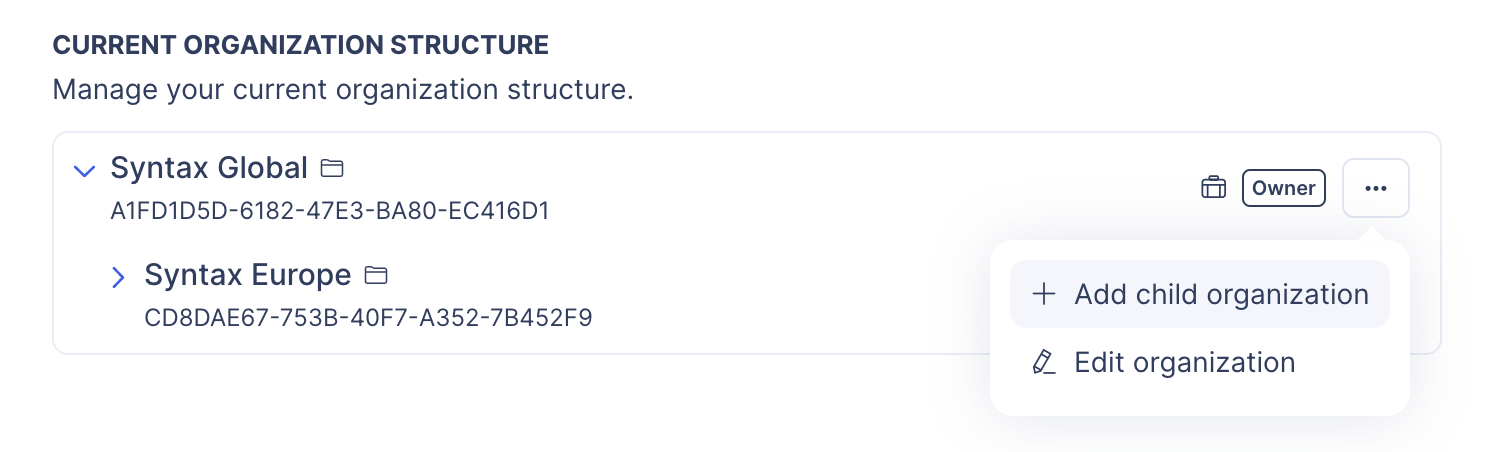
Under "Organization" section, in the "Current organization structure" subsection you will find your current organization children structure.
Open the contextual menu by clicking on the button located at the end of your current organization, and hit the "Add child organization" option.
Fill in the new organization form a hit the "Create organization" button. The created organization will become a child organization of your current organization, and you will become a member with owner access role.
Restricted feature
Only organizations members with owner access role can use this feature. You can find more information about the permissions granted by each role from the Access role permissions section.
Edit your current organization information
If you have the right permissions granted by your access role, to update your current organization information:
Go to "Account Settings".
To do so, click on the username in the upper right corner of the screen, and select "Account Settings" on the user contextual menu that appears, or select "CxLink Settings" service from the service selector located in the navigation header, next to the CxLink logo and click on "Account Settings" in the navigation menu.
In the "Organization" section, you can find two ways to update your current organization information:
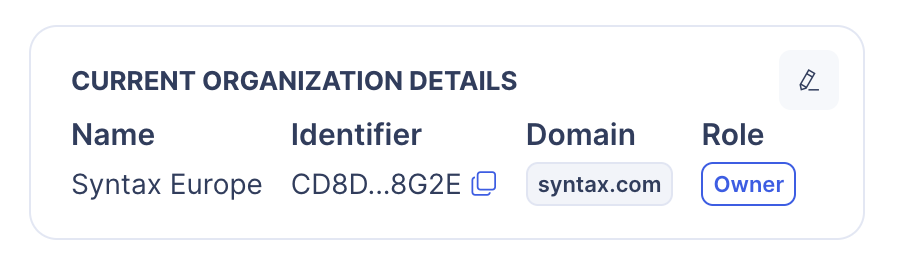
From the "Current organization details" card, using the button located in the upper right corner of the card.
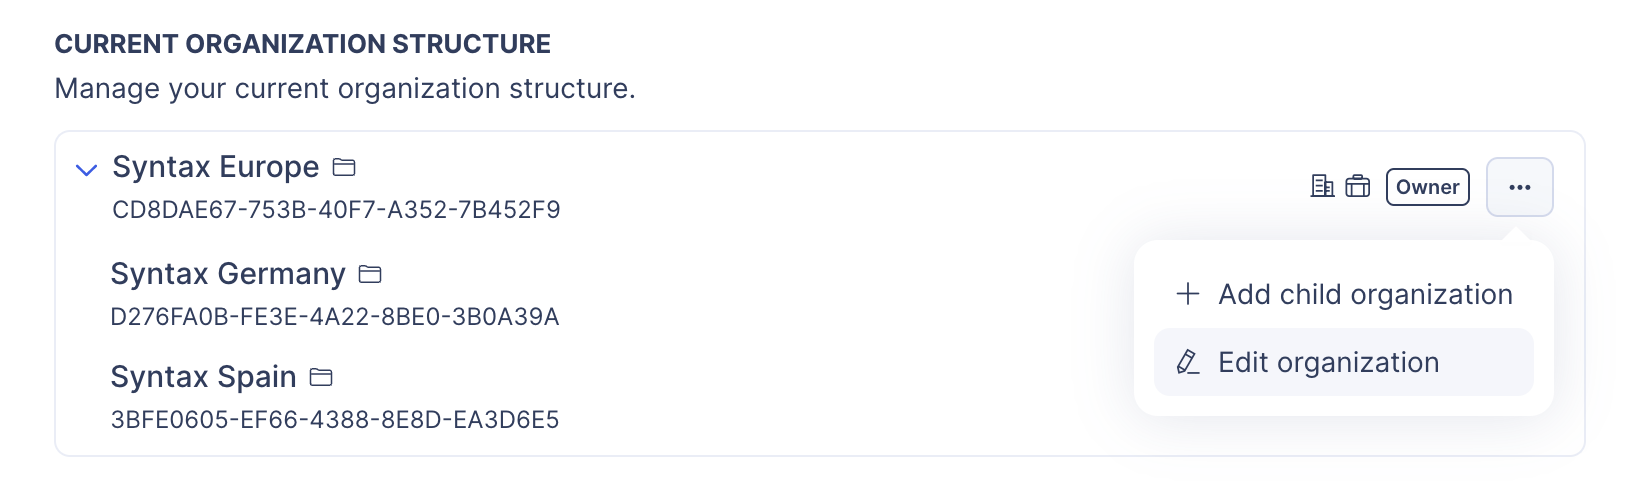
Or from the "Current organization structure" subsection, from the contextual menu, selecting the option "Edit organization".
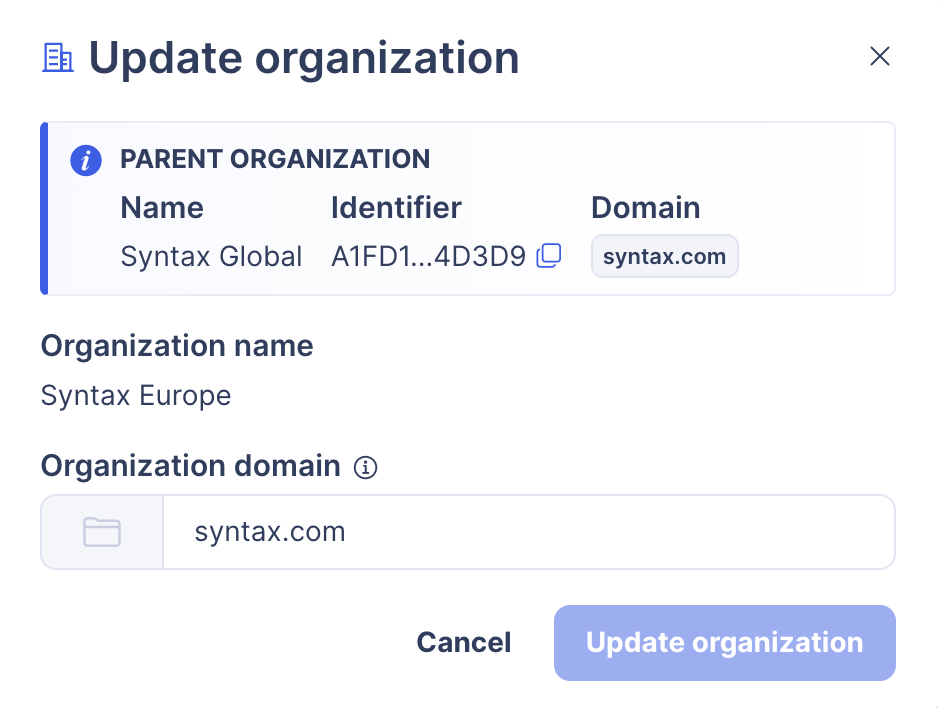
Restrictions on organization editing
Currently, it is only possible to modify the organization domain.
The "Update organization" dialog will appear, fill in the form and hit the "Update organization" button to modify the organization information.
Restricted feature
Only organizations members with owner or operator access role can use this feature. You can find more information about the permissions granted by each role from the Access role permissions section.
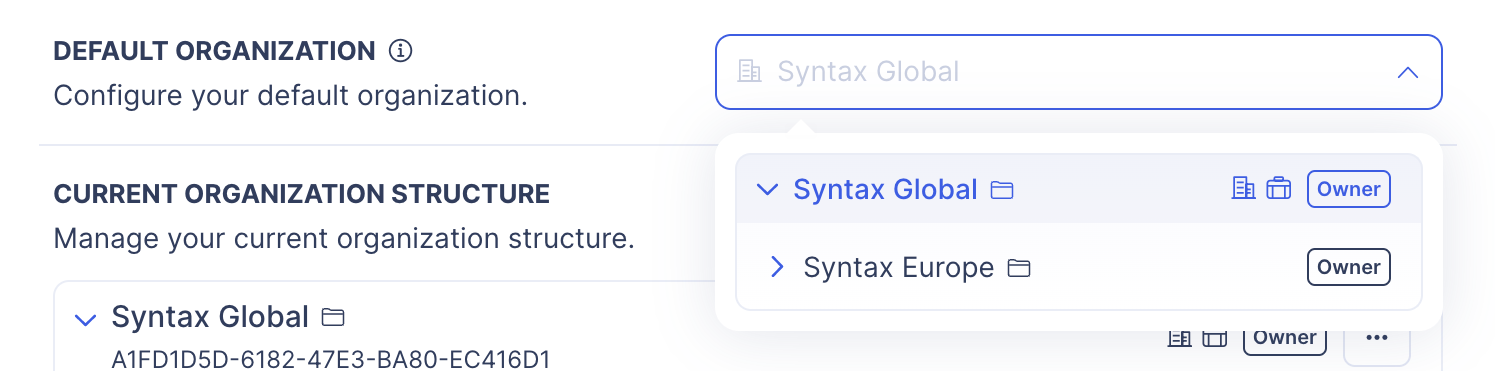
Changing your default organization
Whenever you sign in into the portal after a sign-out, if you have access to more than one organization, you will be automatically switched to your default organization. In order to change your default organization:
Go to "Account Settings".
To do so, click on the username in the upper right corner of the screen, and select "Account Settings" on the user contextual menu that appears, or select "CxLink Settings" service from the service selector located in the navigation header, next to the CxLink logo and click on "Account Settings" in the navigation menu.
Under "Organization" section, in the "Default organization" subsection, select your default organization from the organization selector.