On-demand backups and restores
This section is a detailed guide on how to use CxLink Run application.
Topics
Launch a Backup
A backup can be run from multiple sections:
From contextual menu in backup history
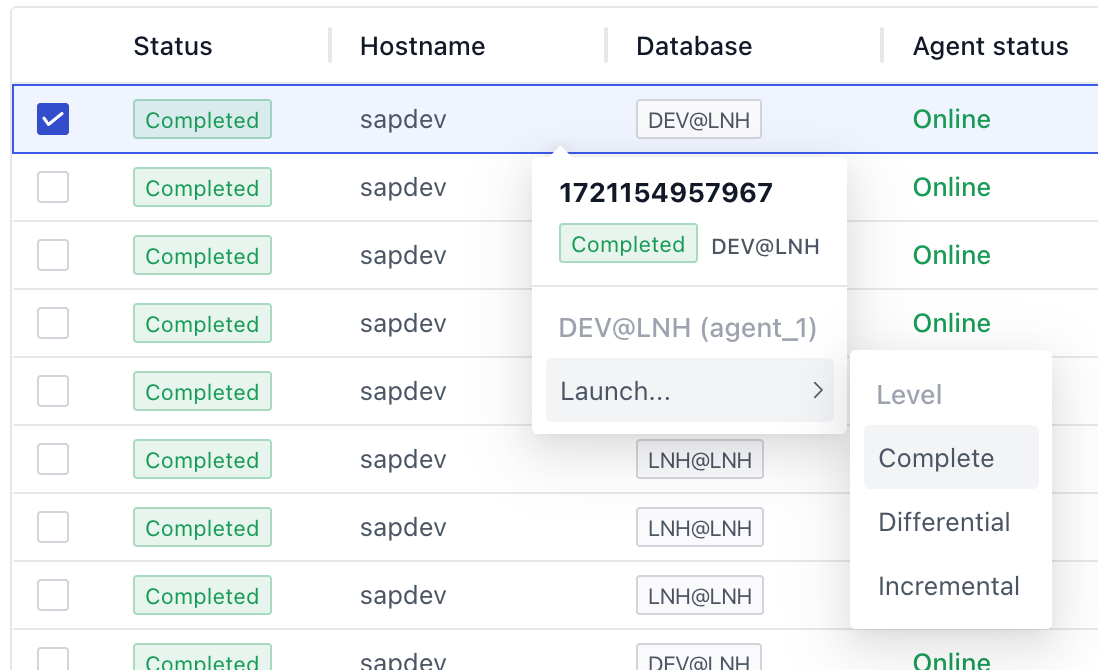
Click right button on a backup and contextual menu will show you a backup exactly like the one selected (a Complete backup of DEV@LNH in the example)
Launch Backup summary will be displayed directly:
TIP: You can change the Backup name in the summary and even the backup level, just click on pencil displayer when you place the cursor over Backup name field
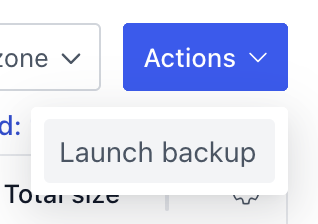
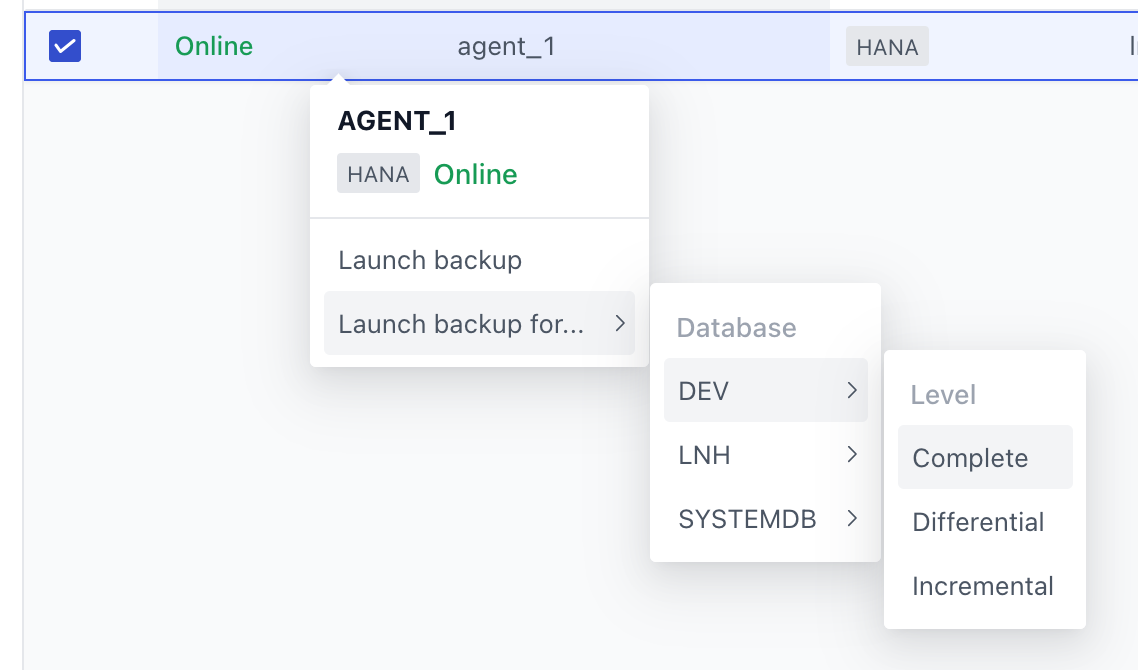
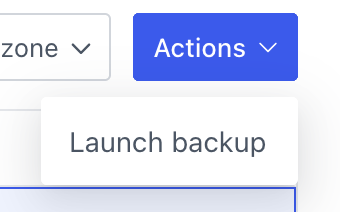
From Actions menu in backup history:
In that case, a Launch Backup wizard will be displayed:
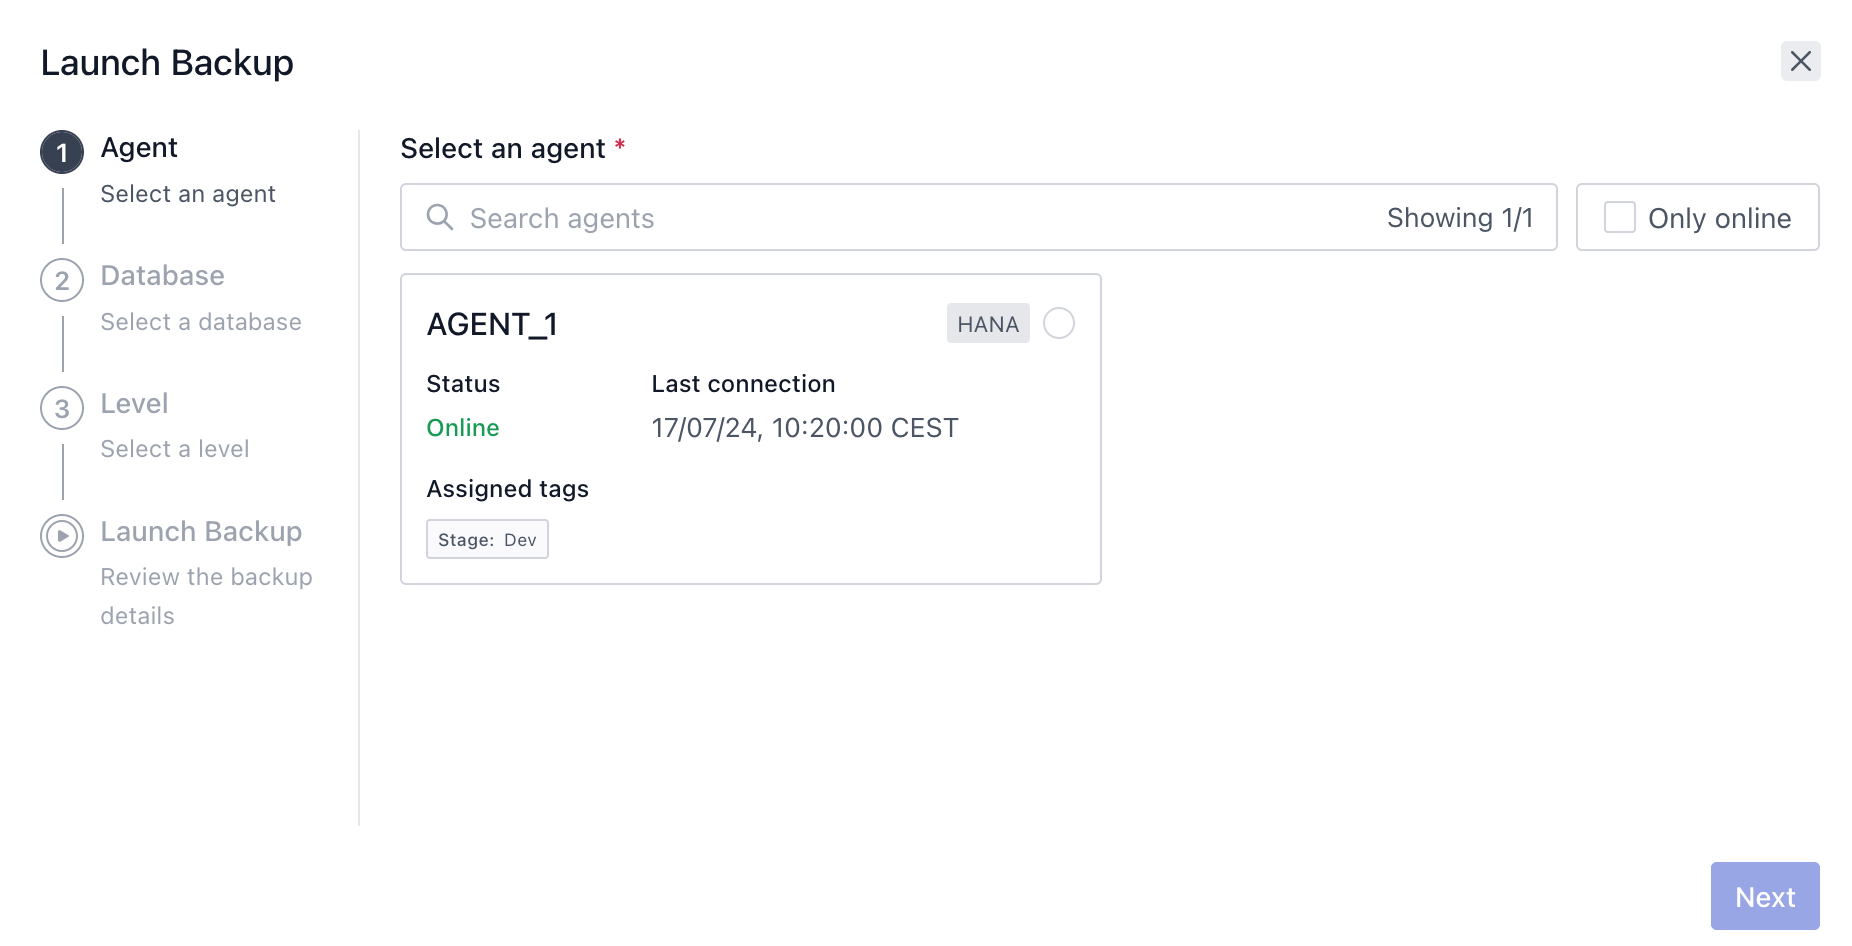
The steps to perform a backup in that way are:
- Select the agent to perform the backup (in the example there is only one but it could be more than one) and agent’s managed databases will be displayed by the wizard:
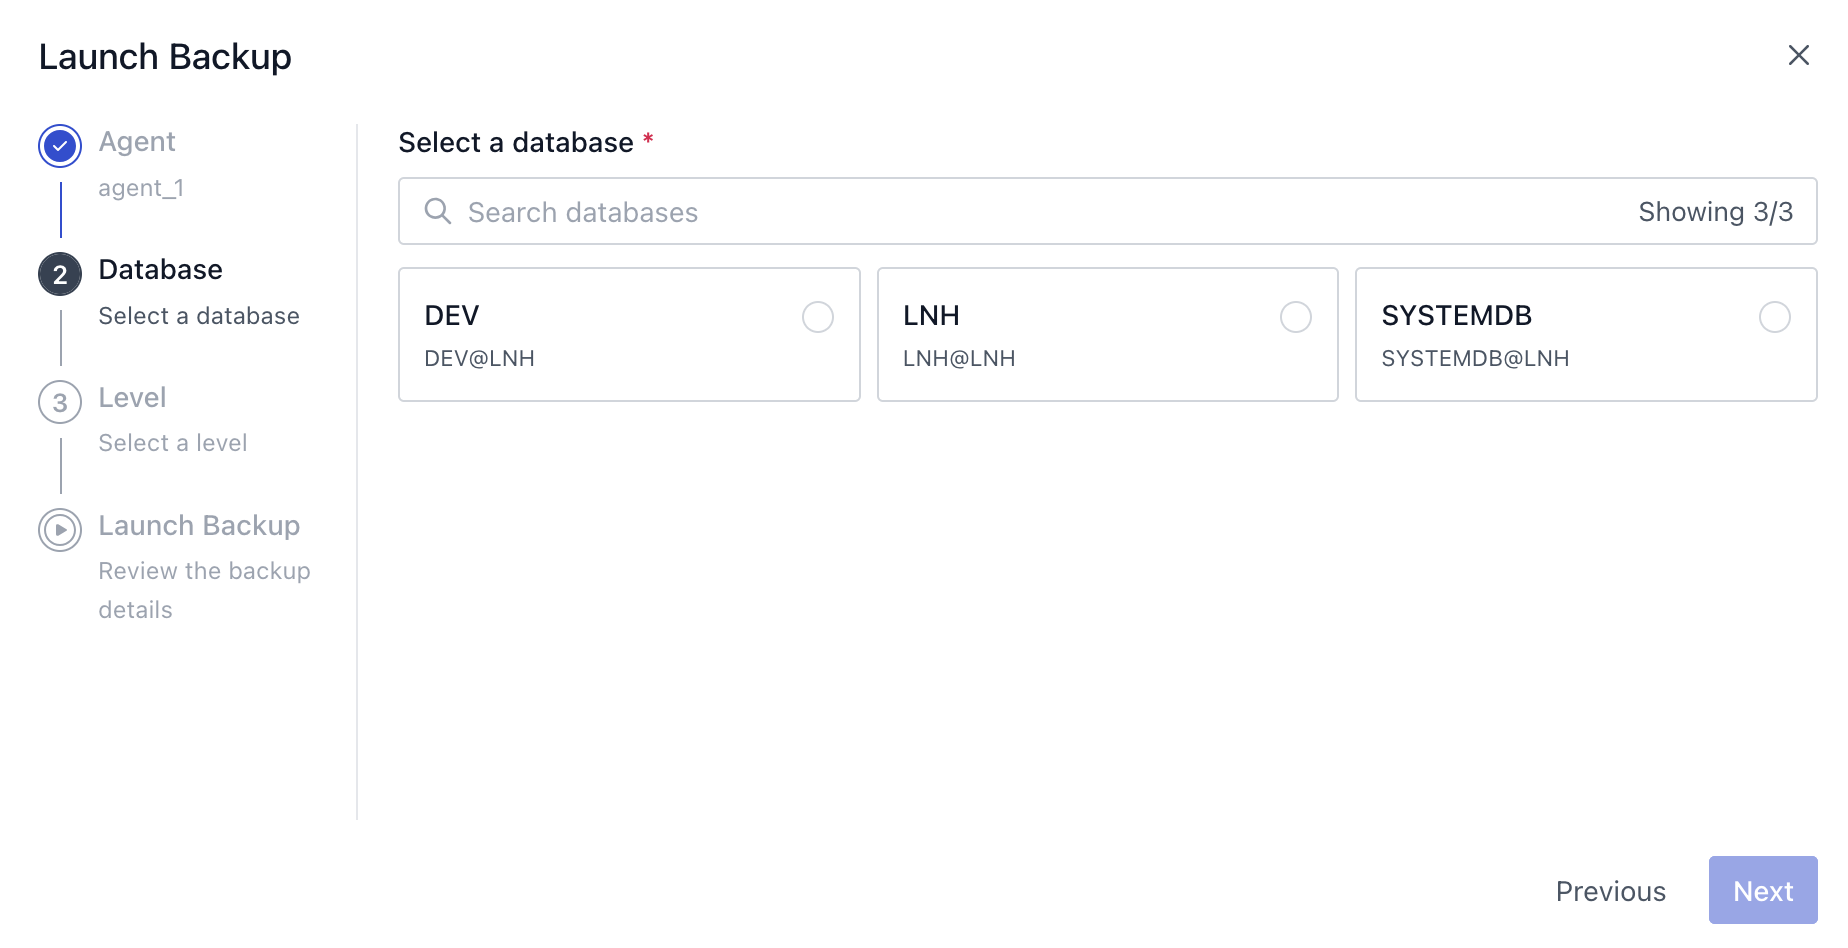
- Select the database you want to run a backup for and backup levels will be displayed:
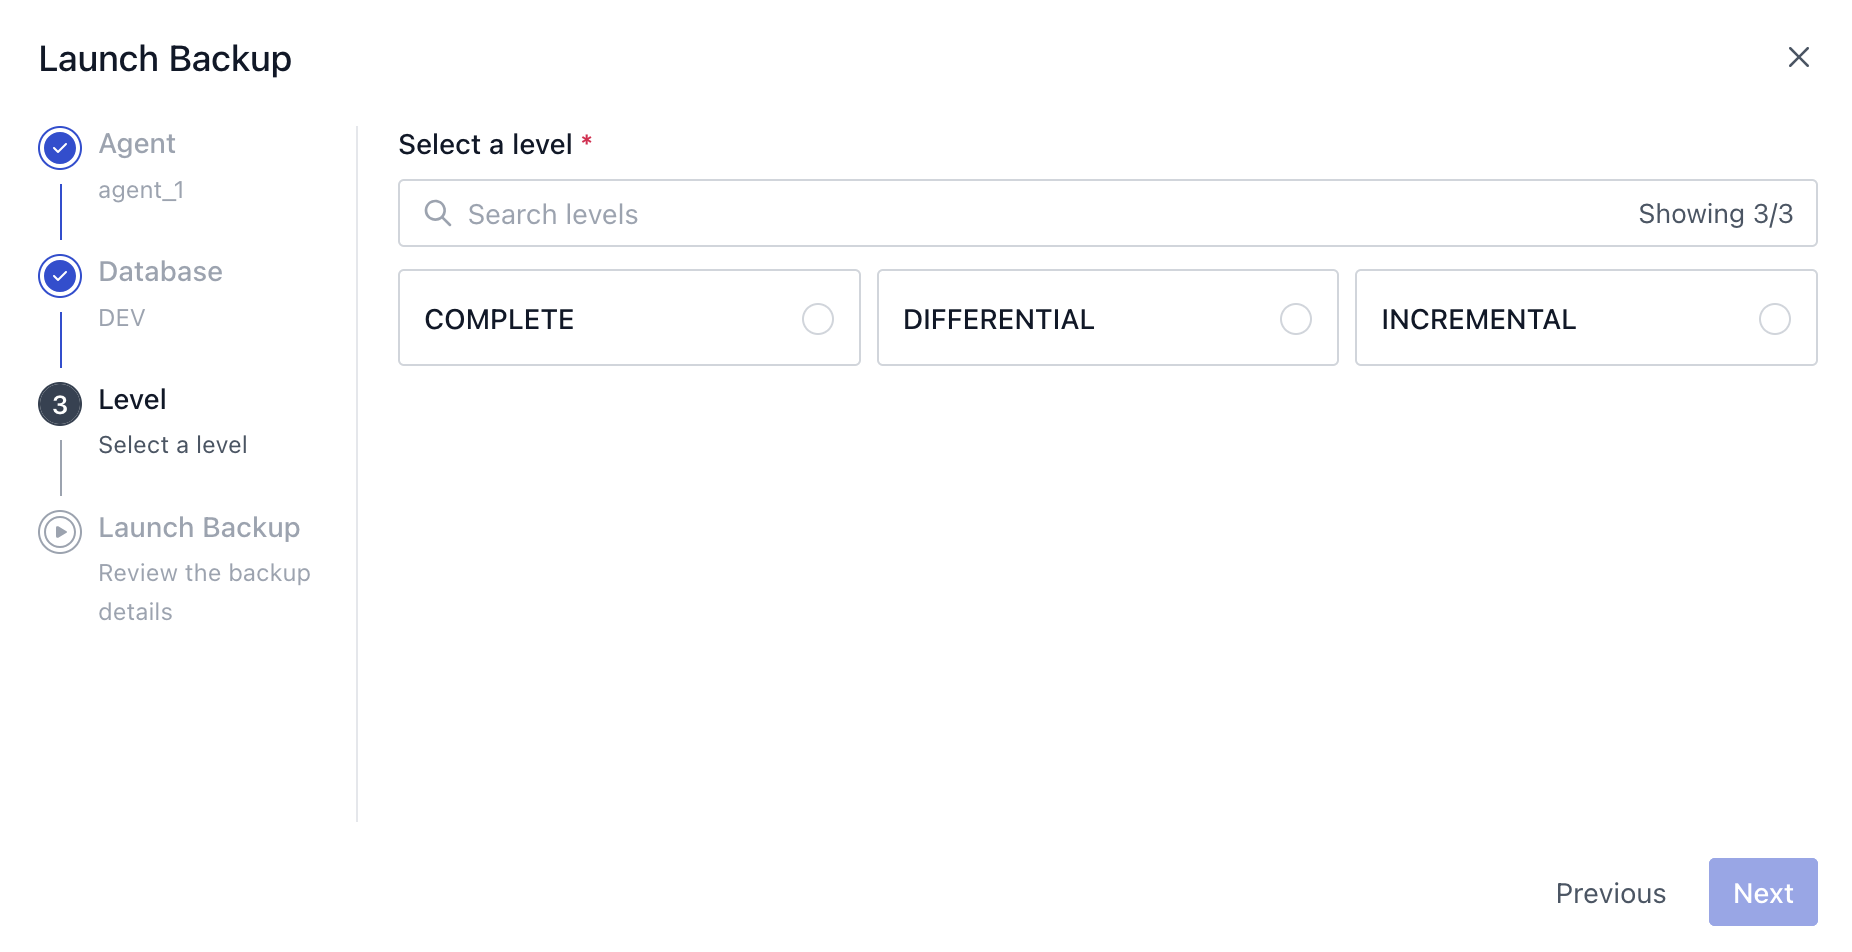
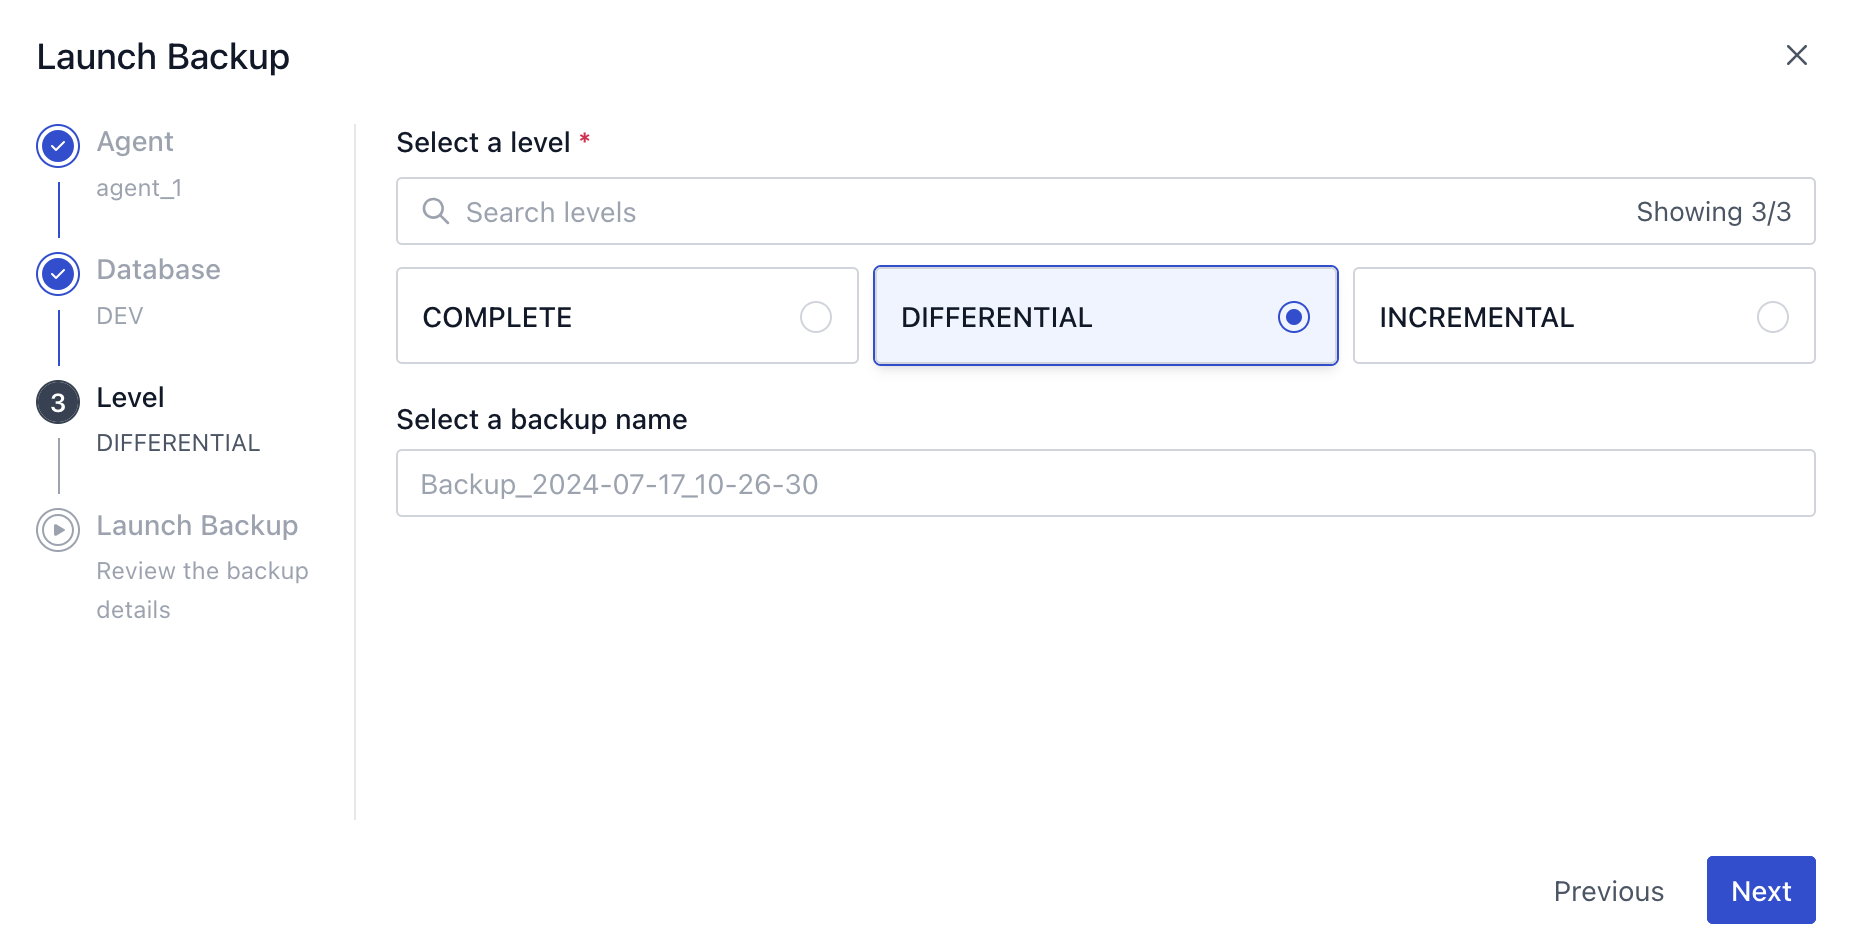
- Select desired backup level and a backup name if you want to change the default one with date and time:
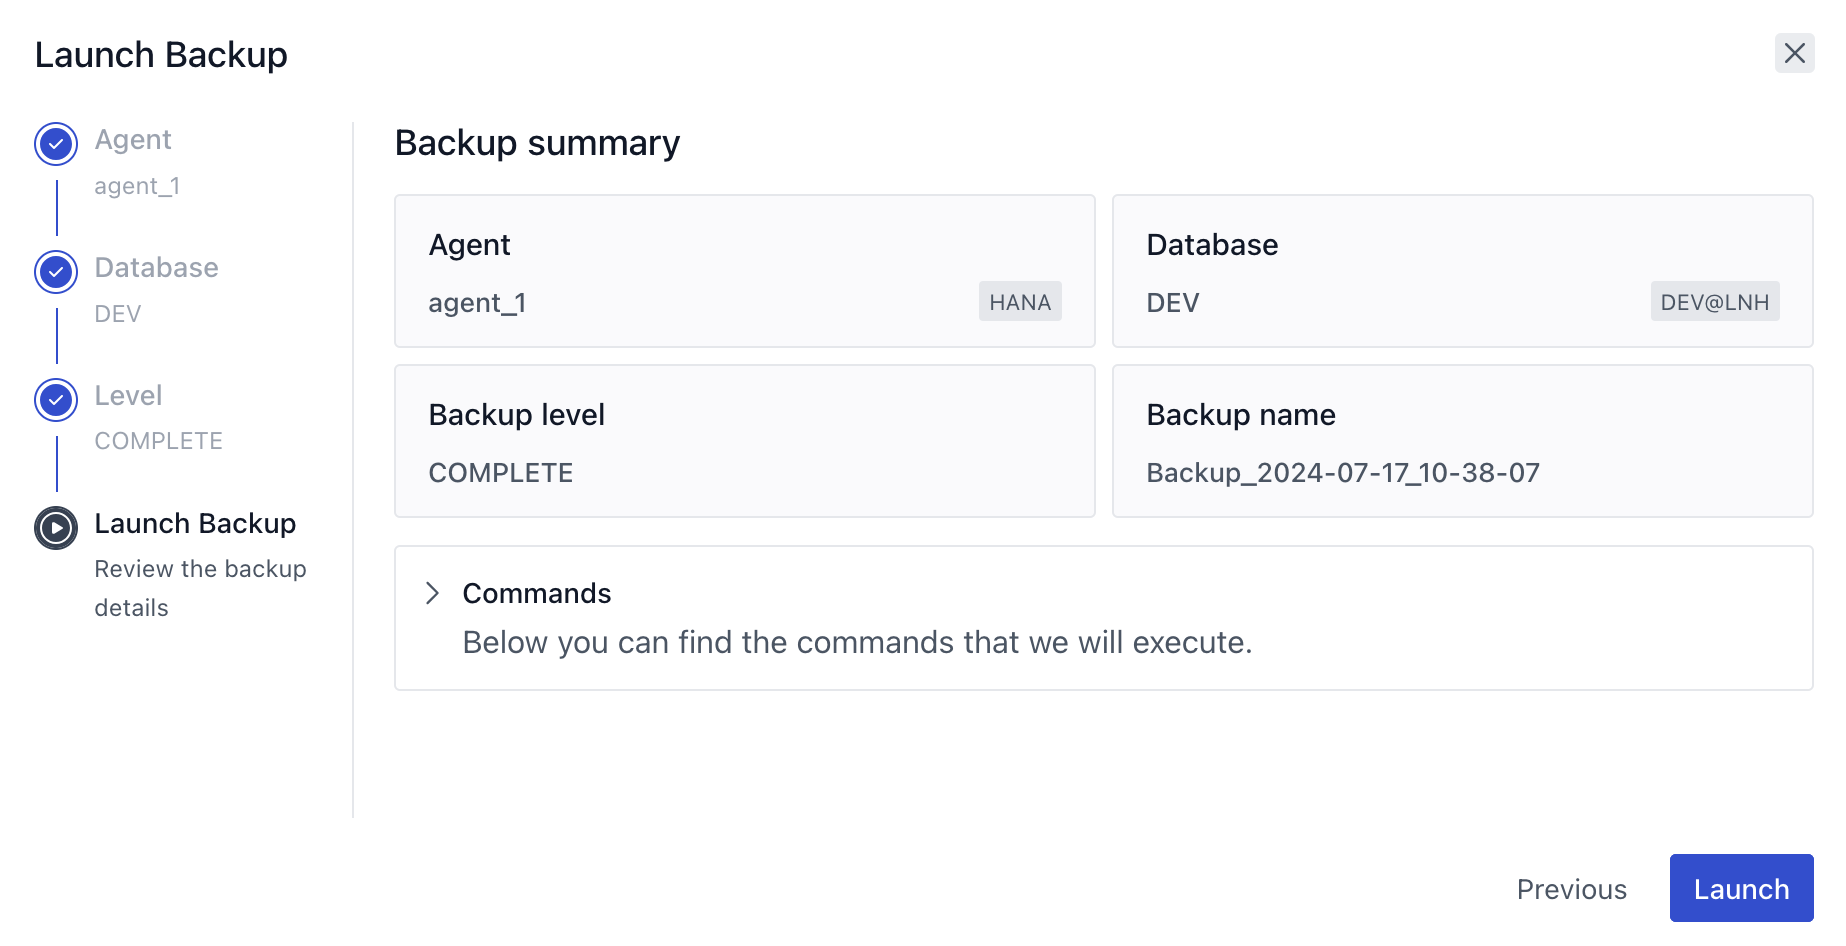
- Last step is a summary with all backup parameters set:

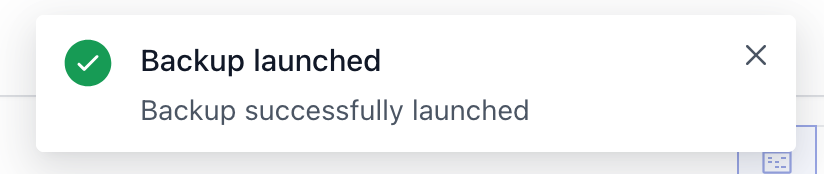
- Click on Launch and backup will be launched. You will see a notification at the top of the page:
And you will see the new backup with status Started in the backup history:

As this is a real-time application, any new backup executed will be notified to all connected members of the organization
From Agents Management contextual menu:
Launch Backup summary will be displayed directly:
TIP: You can change the Backup name in the summary and even the backup level, just click on pencil displayer when you place the cursor over Backup name field
From Agents Management section Actions menu:
From Planning section Actions menu:
The steps won’t be reproduced here as are the same than Backup History Actions menu above.
From Planning section Relaunch button from backup details:

Manage Backup Plans
Backup plans are Agent related.
Backup plans management is executed from Agent section, Planning tab:

There you can:
- Create
- Pause
- Activate
- Delete
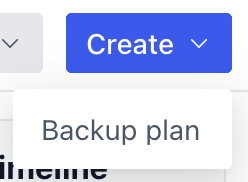
Create a plan
Click on Create menu and select Backup plan:
A Create backup plan wizard will be displayed:
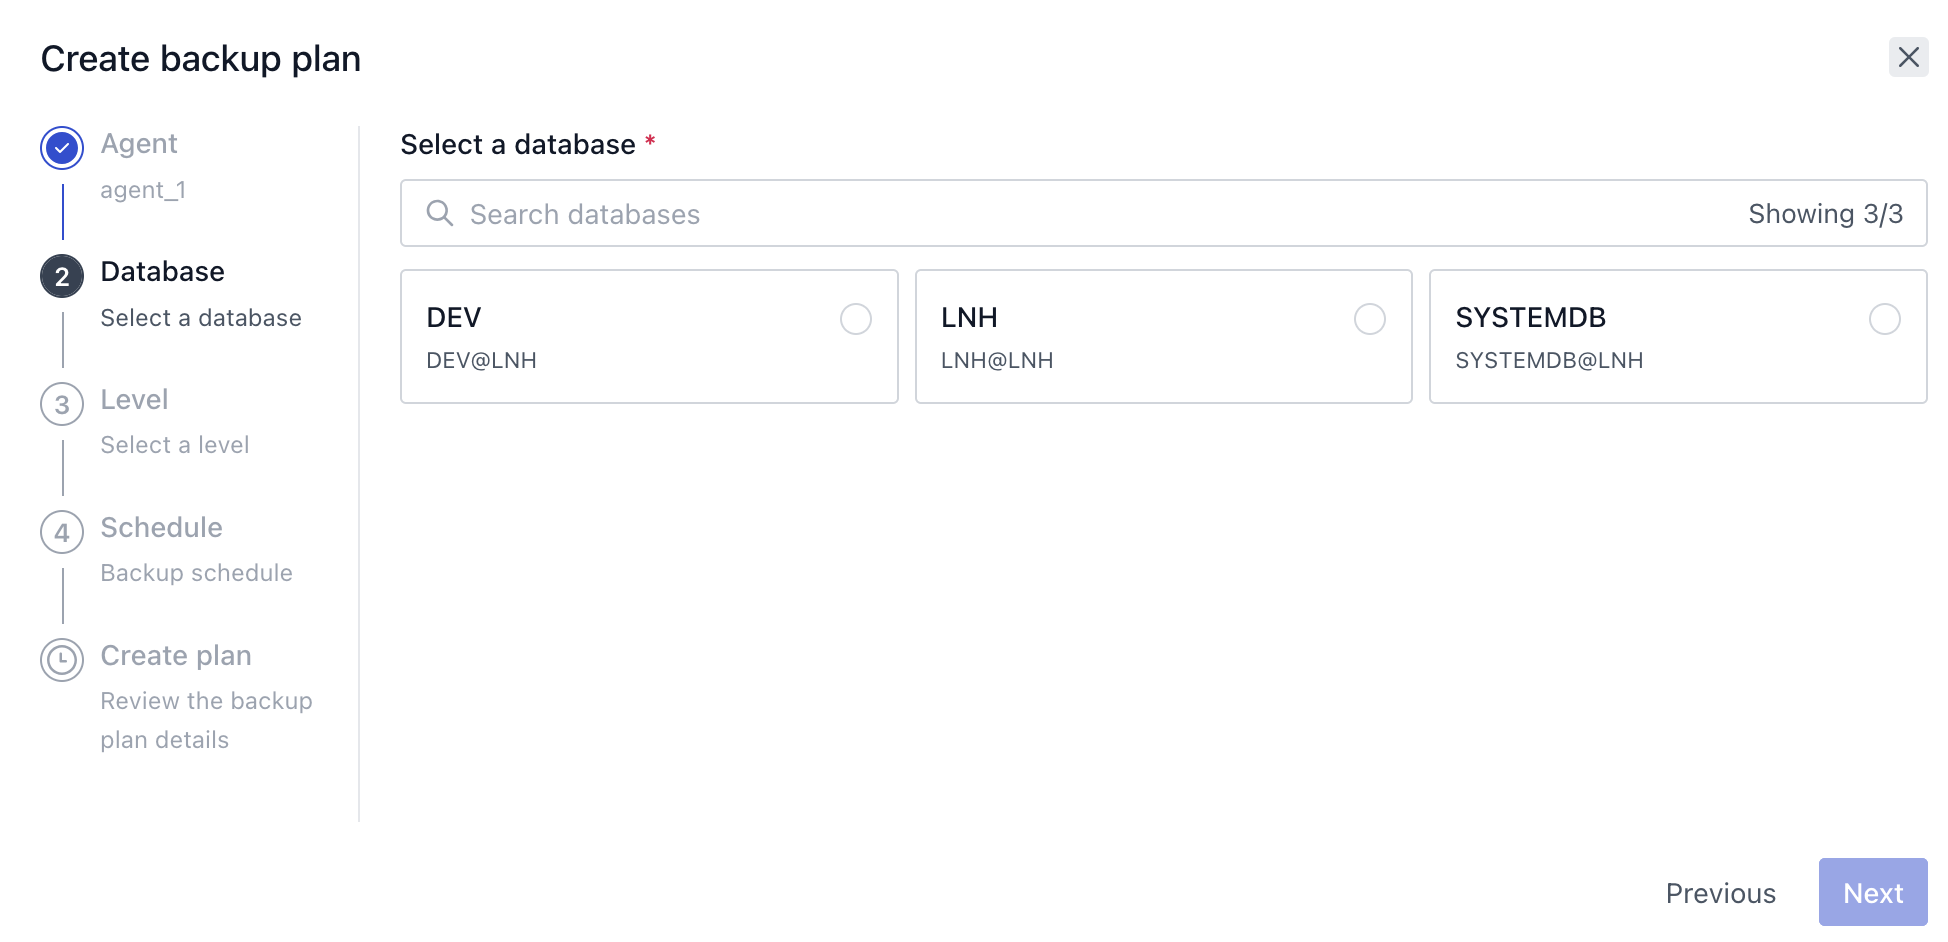
Select the database you want to create the plan for:
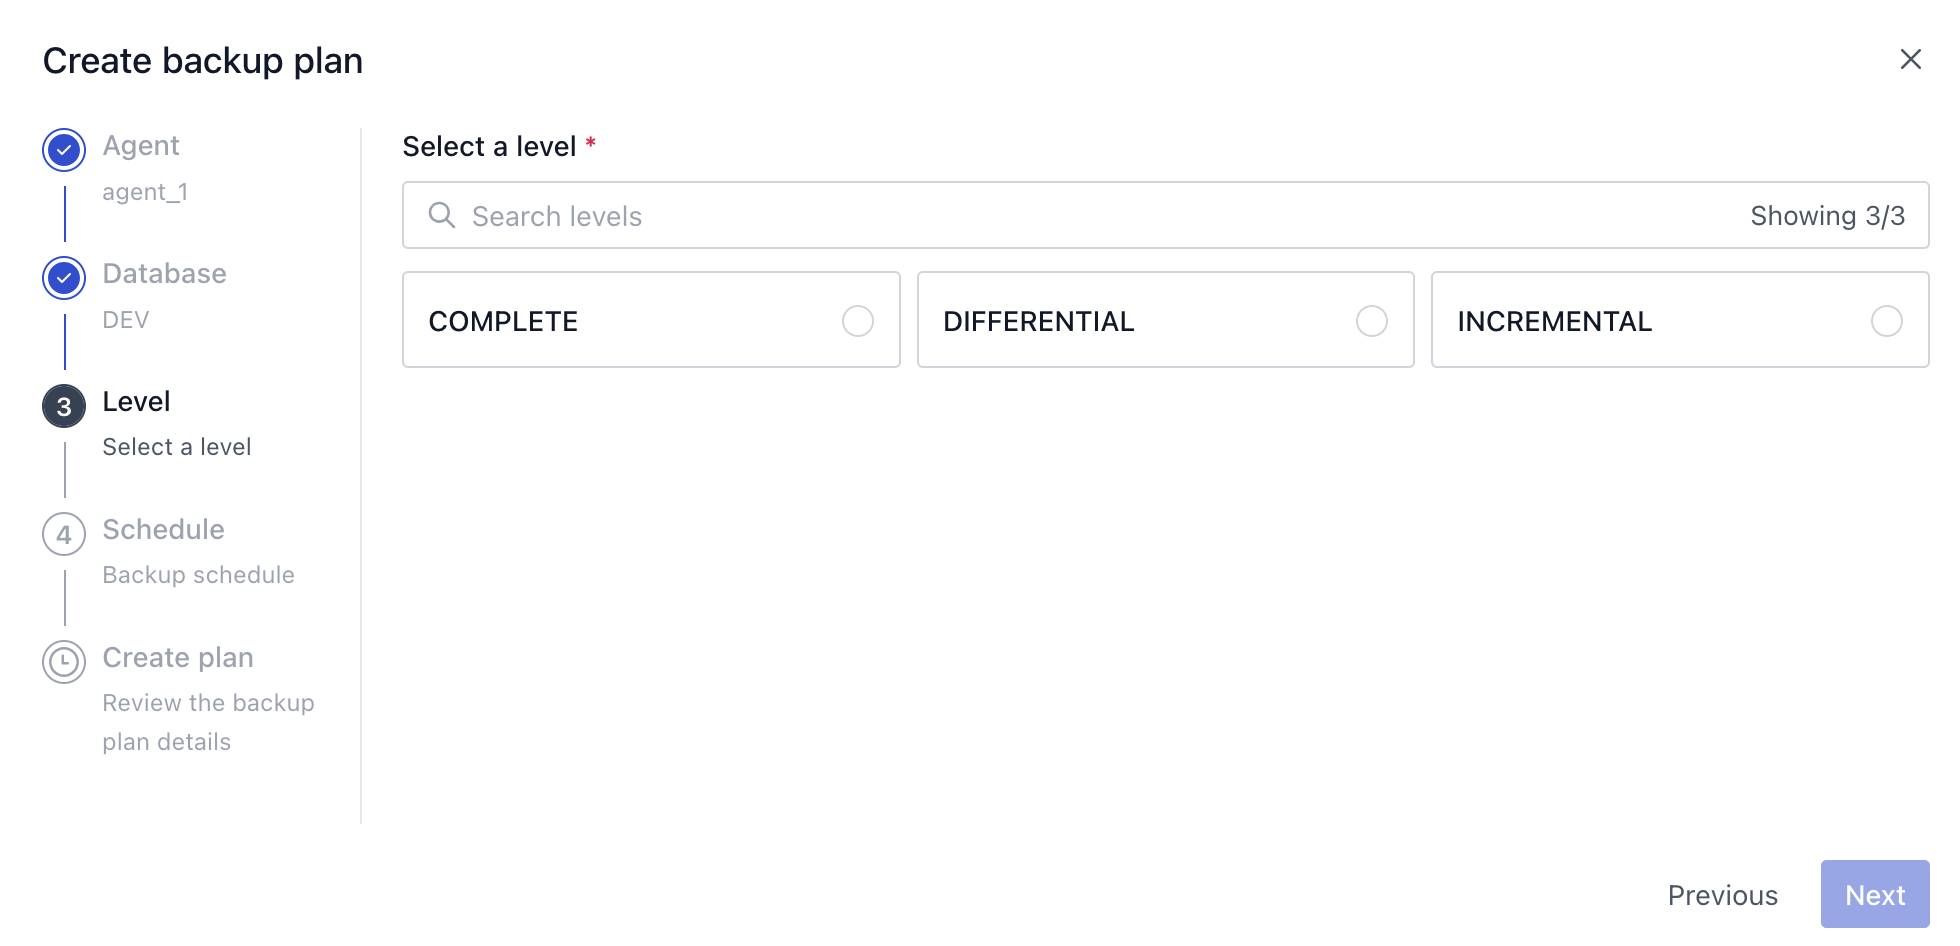
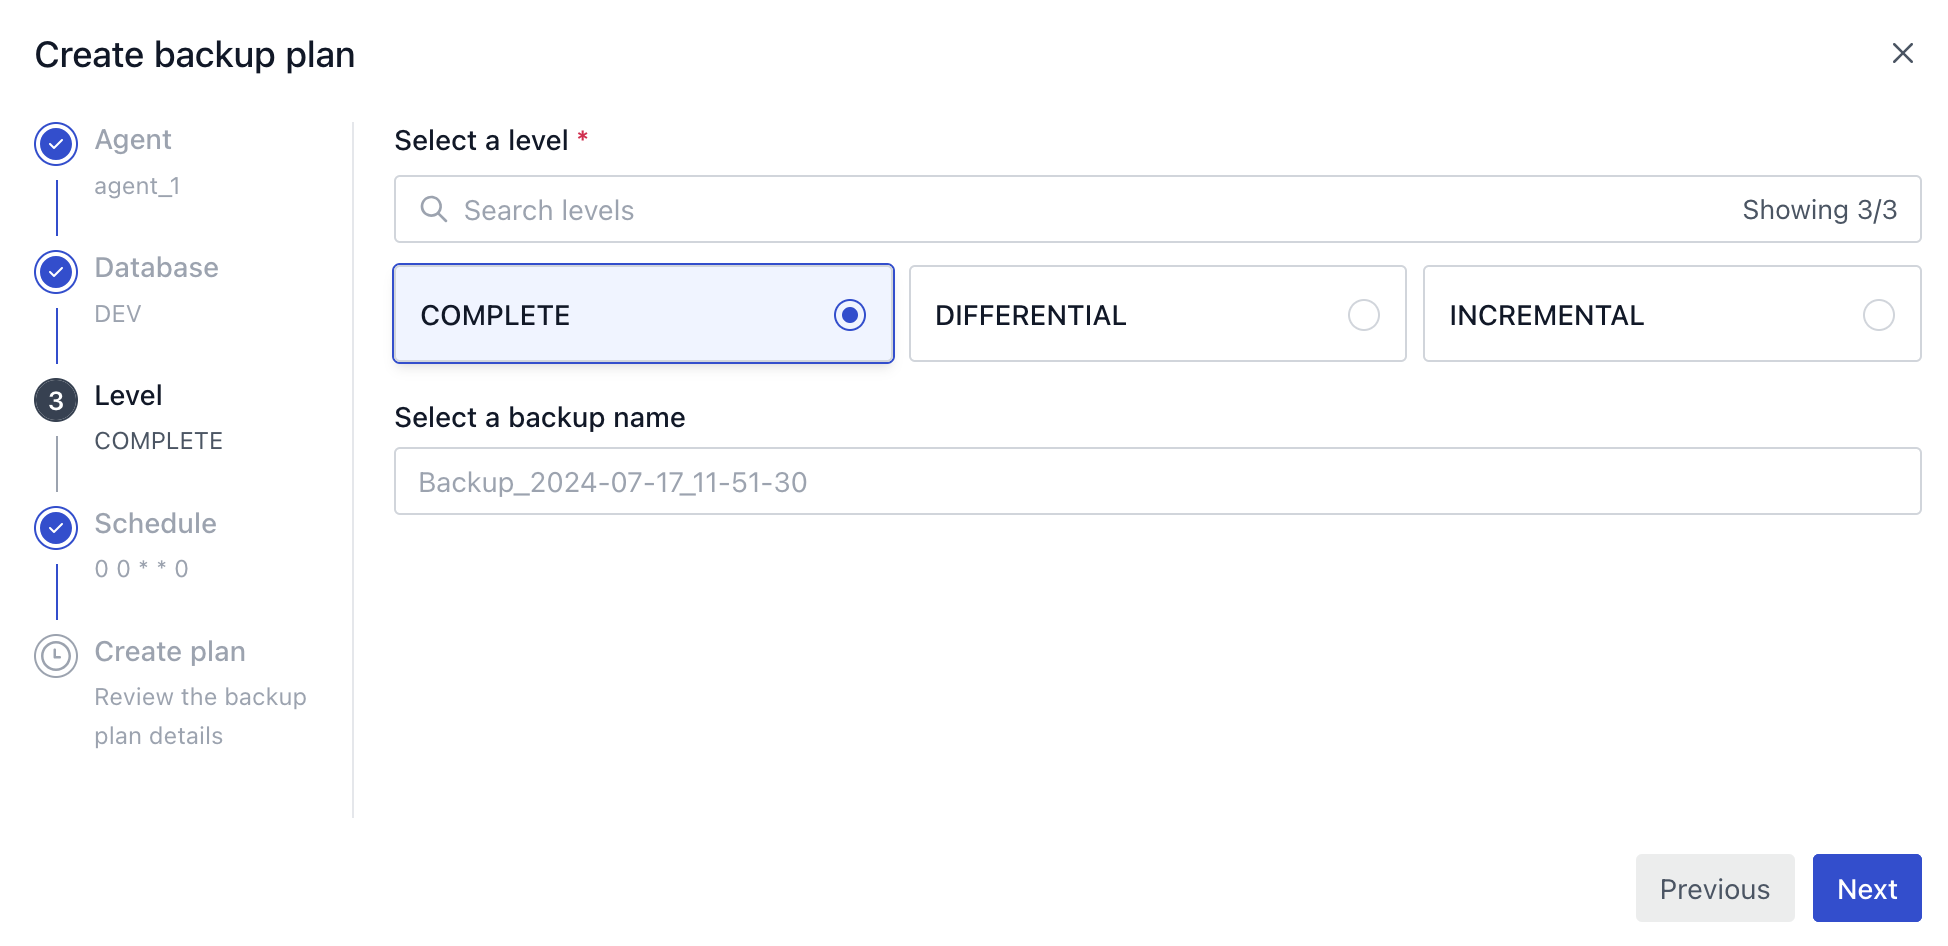
Select Backup Level and Backup Name for the plan:
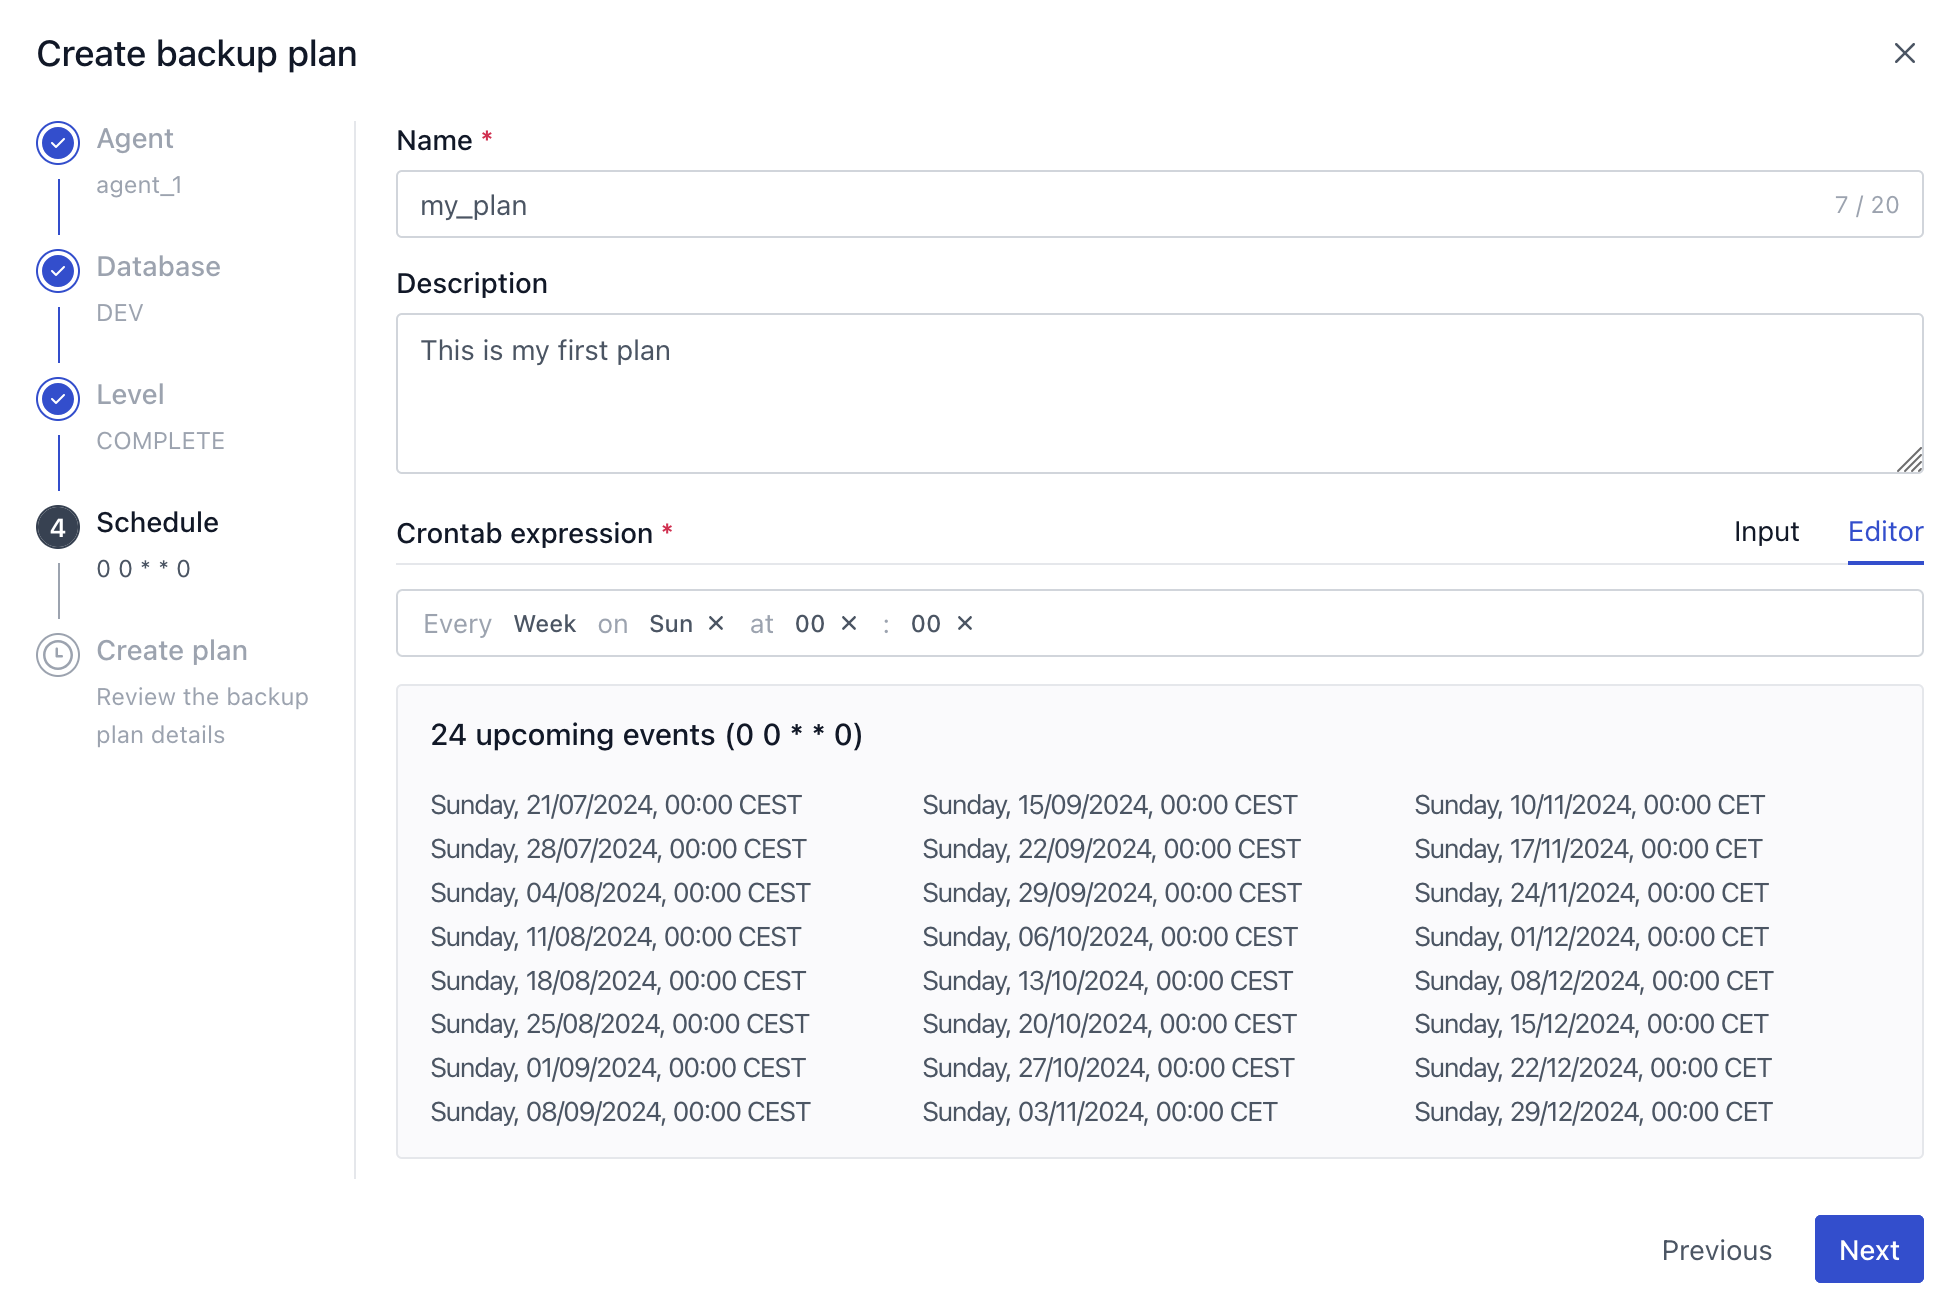
Select Plan name, a description and crontab expression (you don’t need to know about crontab expressions, there is an assistant for that):
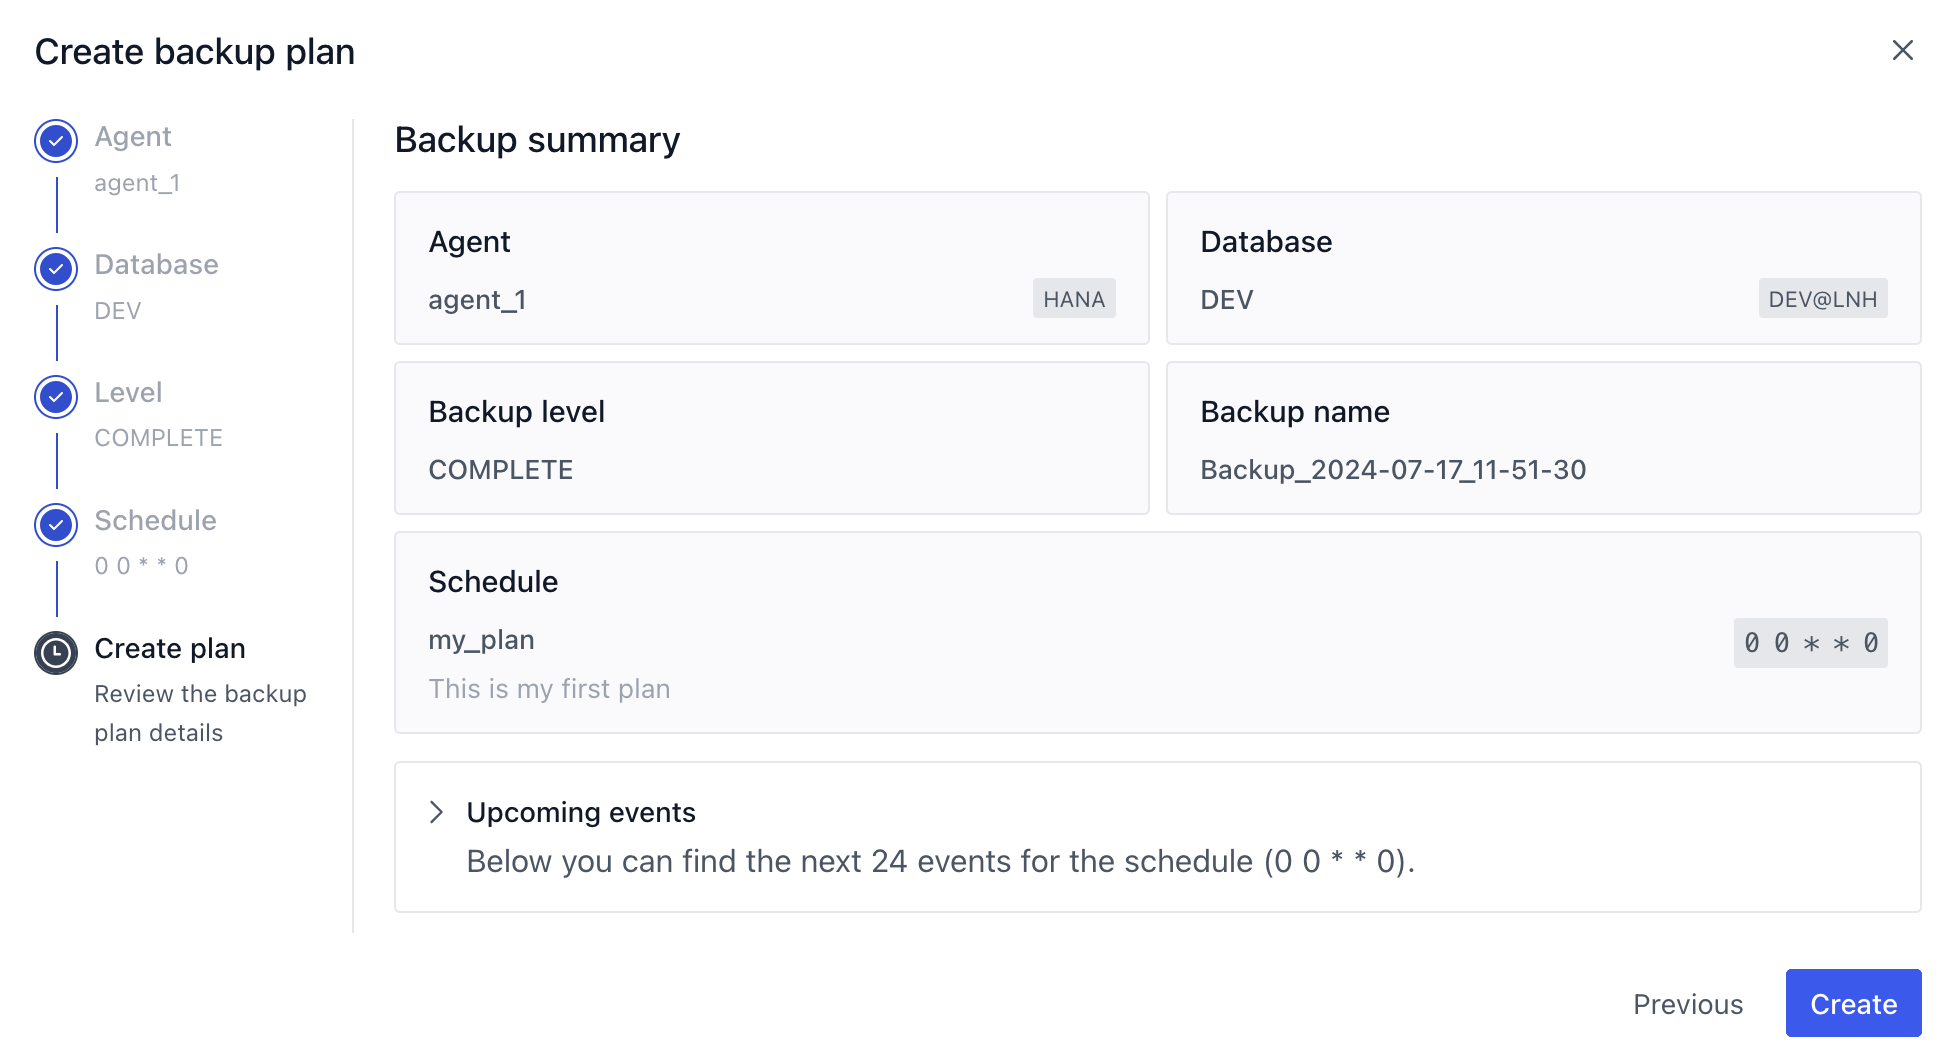
Last step is a summary of the Plan to be created:
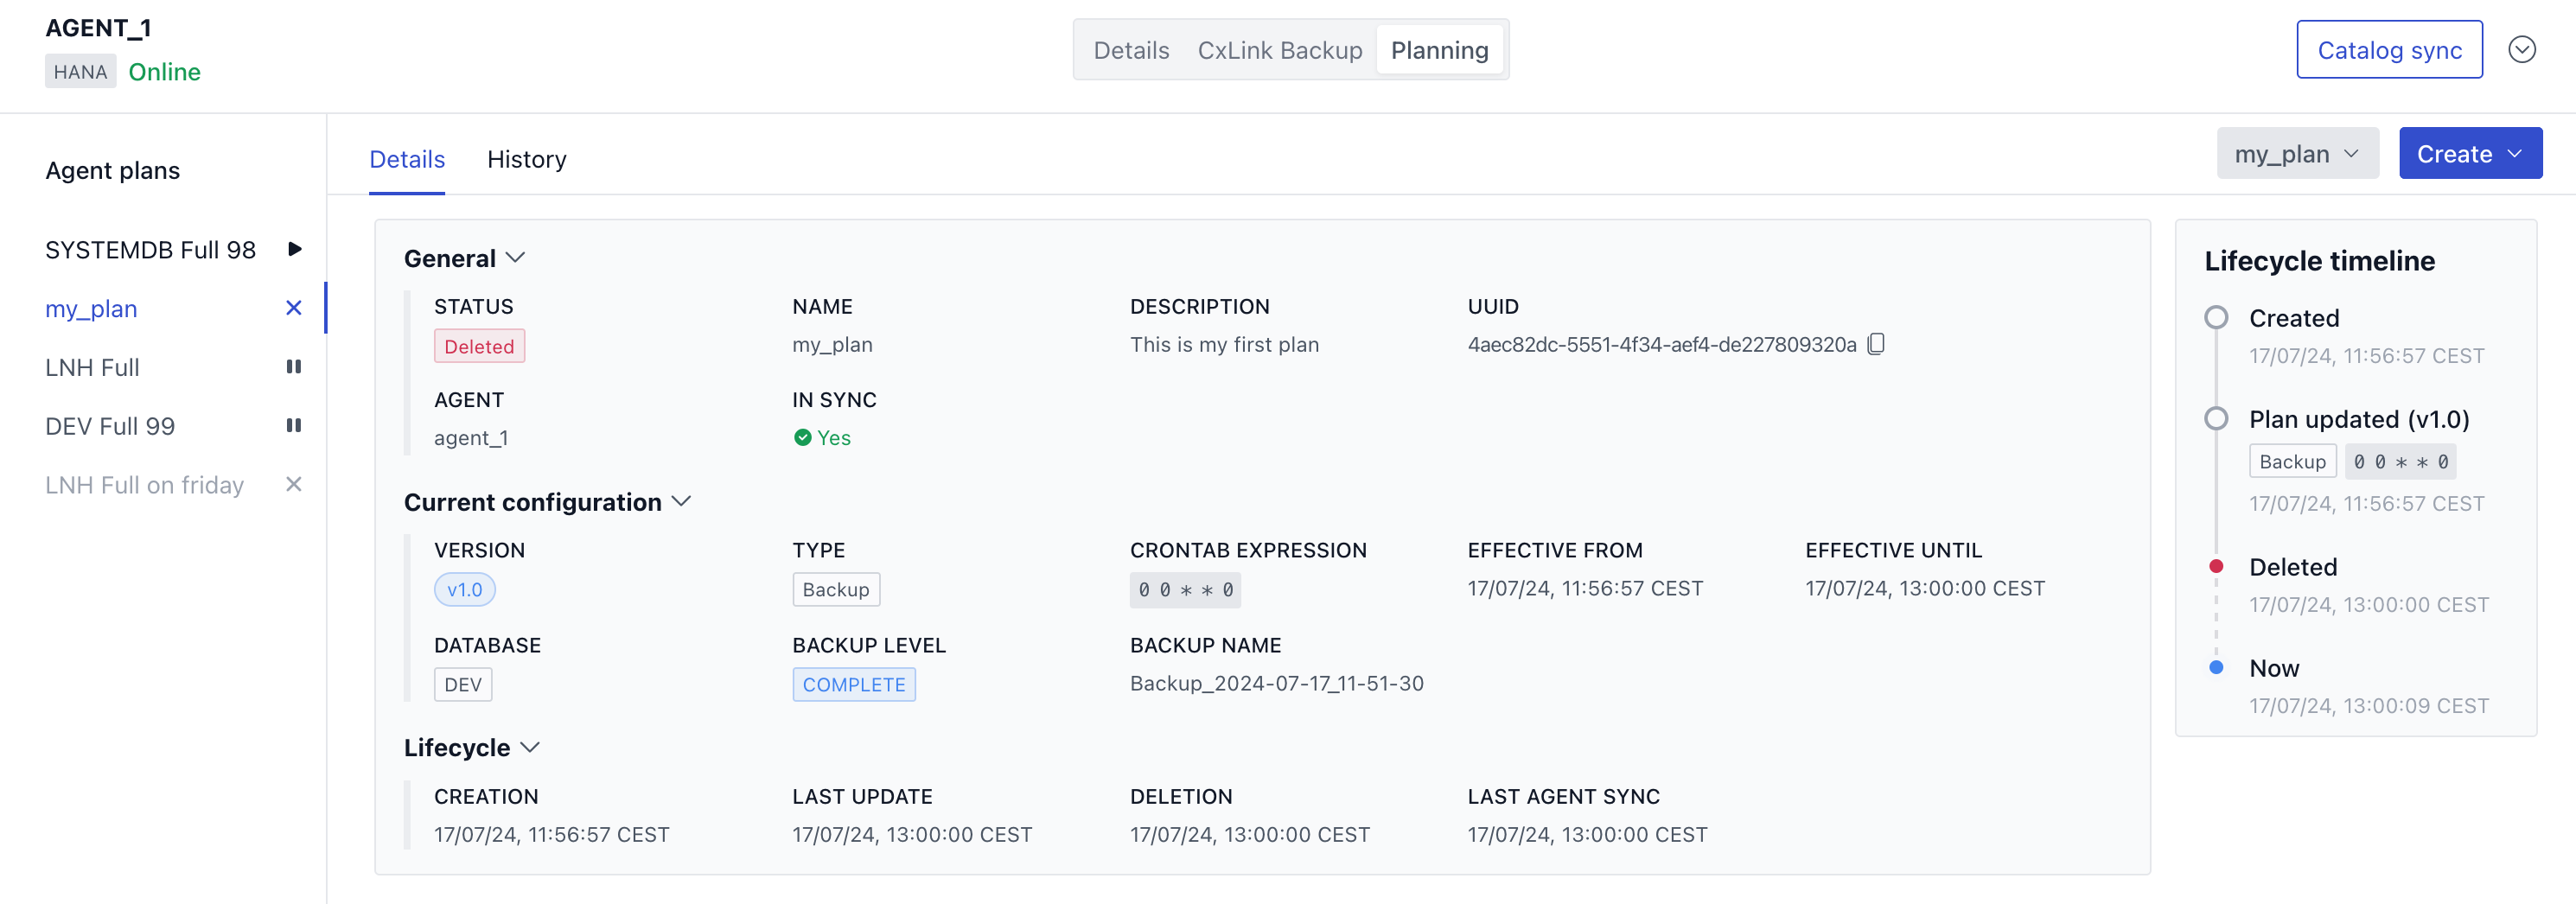
And this is the new created Plan:
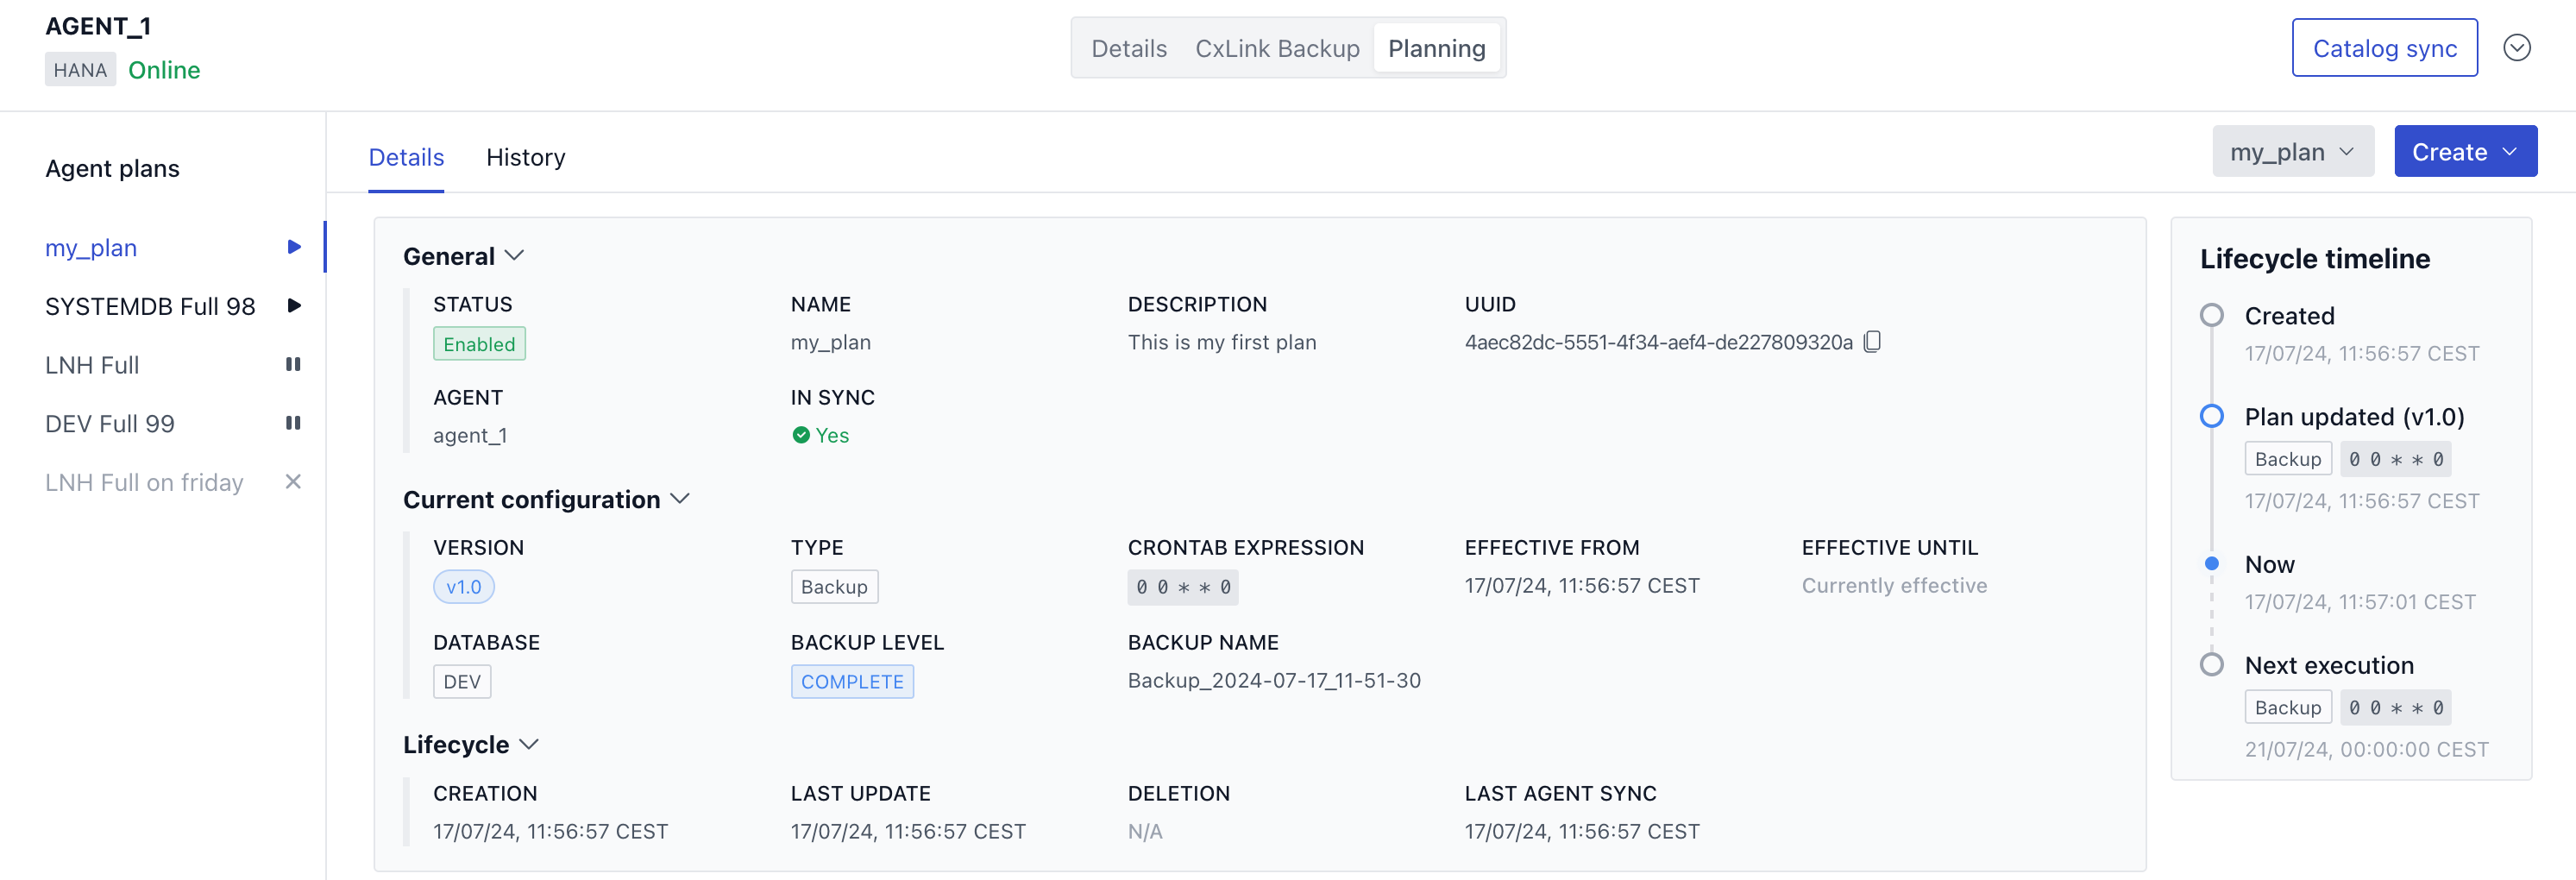
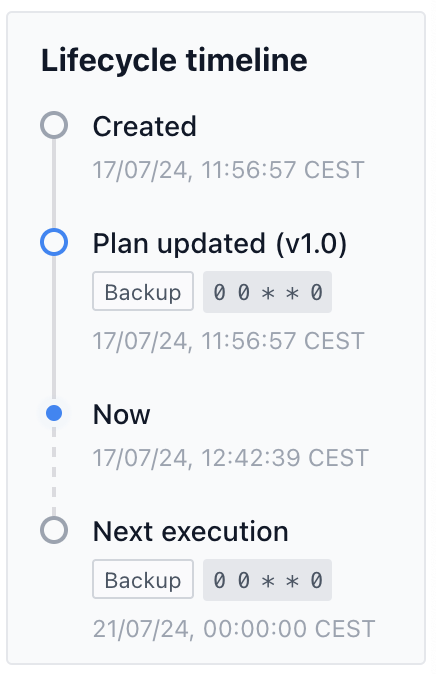
Note that to the right there is Lifecycle timeline associated to the selected plan displaying some data like when the plan was created, if it was updated, actual date an time and when it will be the next backup execution:
Plan Maintenance
Using the menu with the selected Plan name at the top of the Agent details you can update, delete and pause a plan:

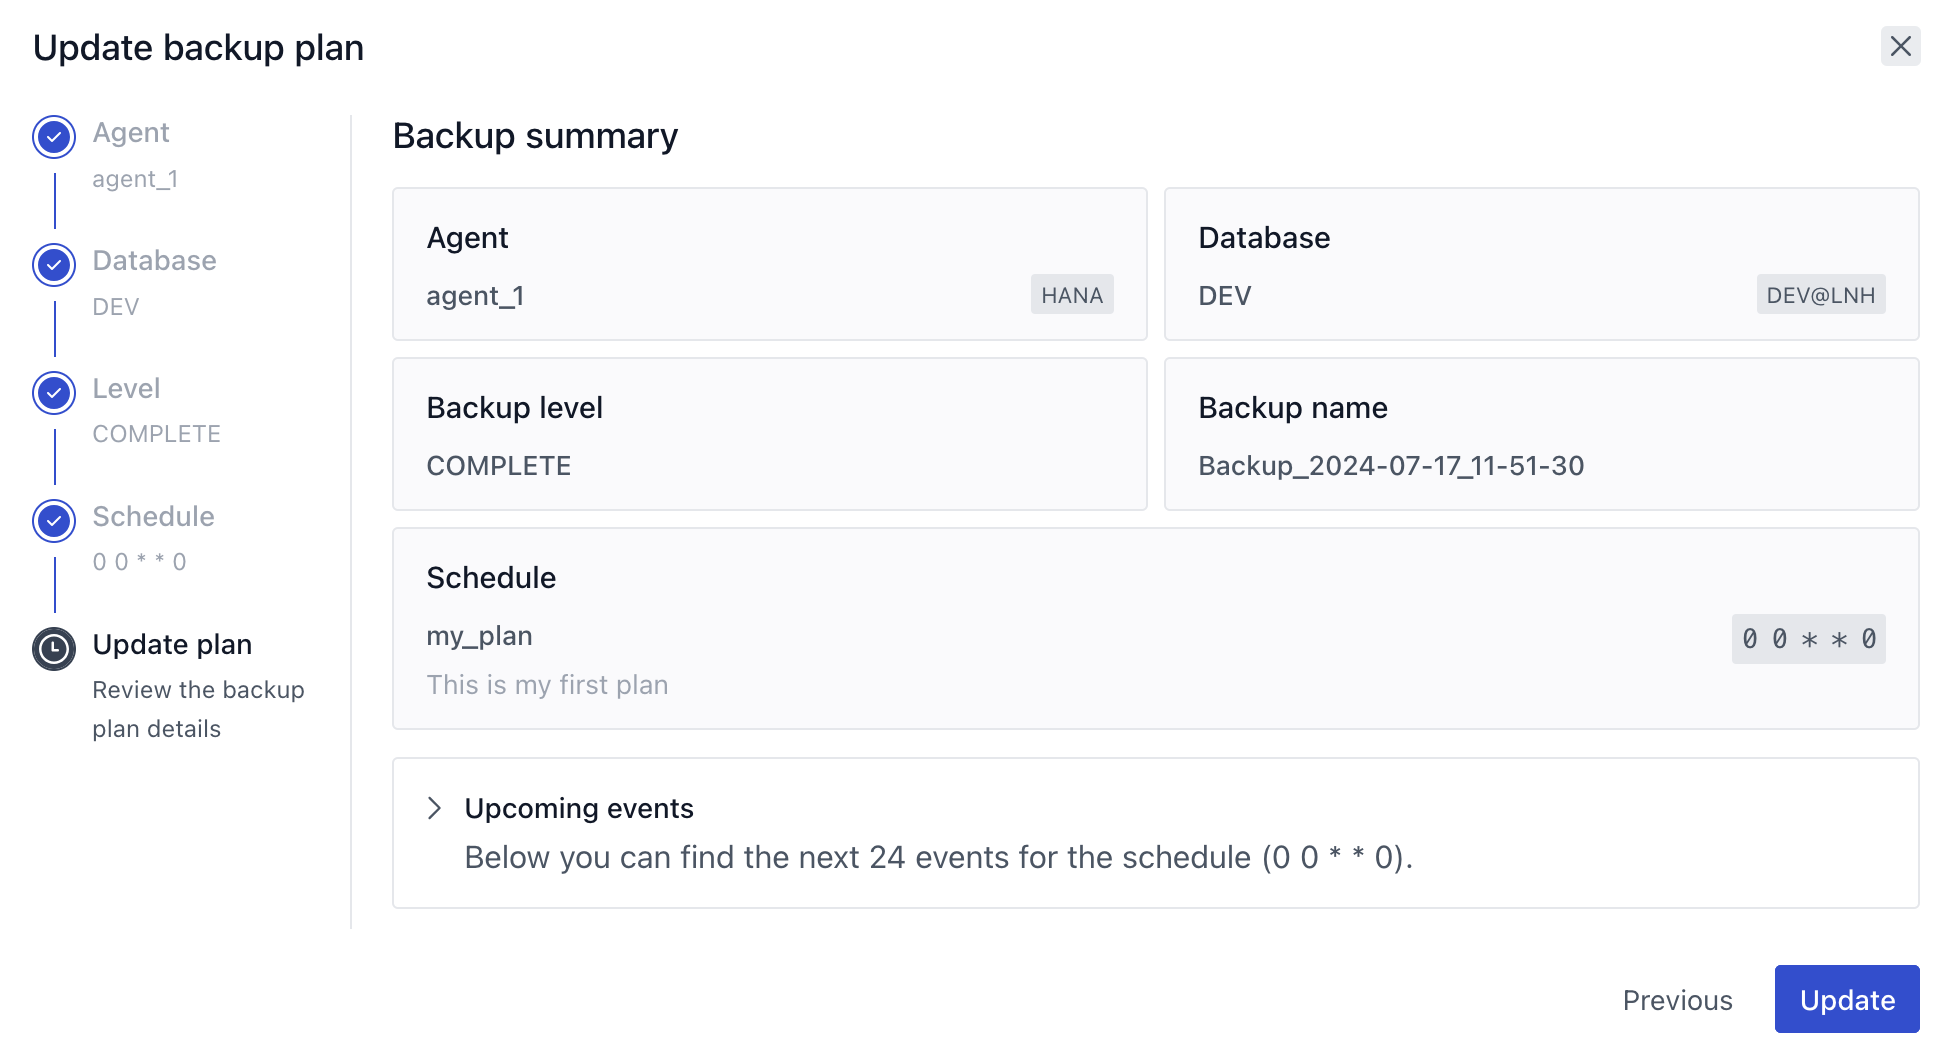
Update Plan
If you click on Update, update wizard is displayed and each one of the fields is updatable by clicking on the pencil icon when you move the mouse cursor over the attribute:
Pause Plan
If you click on Pause you will be asked for a confirmation:

By clicking on Pause plan, the Plan will be paused:

And the Plan status will change to Disabled:
Delete Plan
If you click on Delete you will be asked for a confirmation before delete the plan definetely:

Once you delete the plan it is no available anymore but you can still see the plan details:
Backup Planning Status
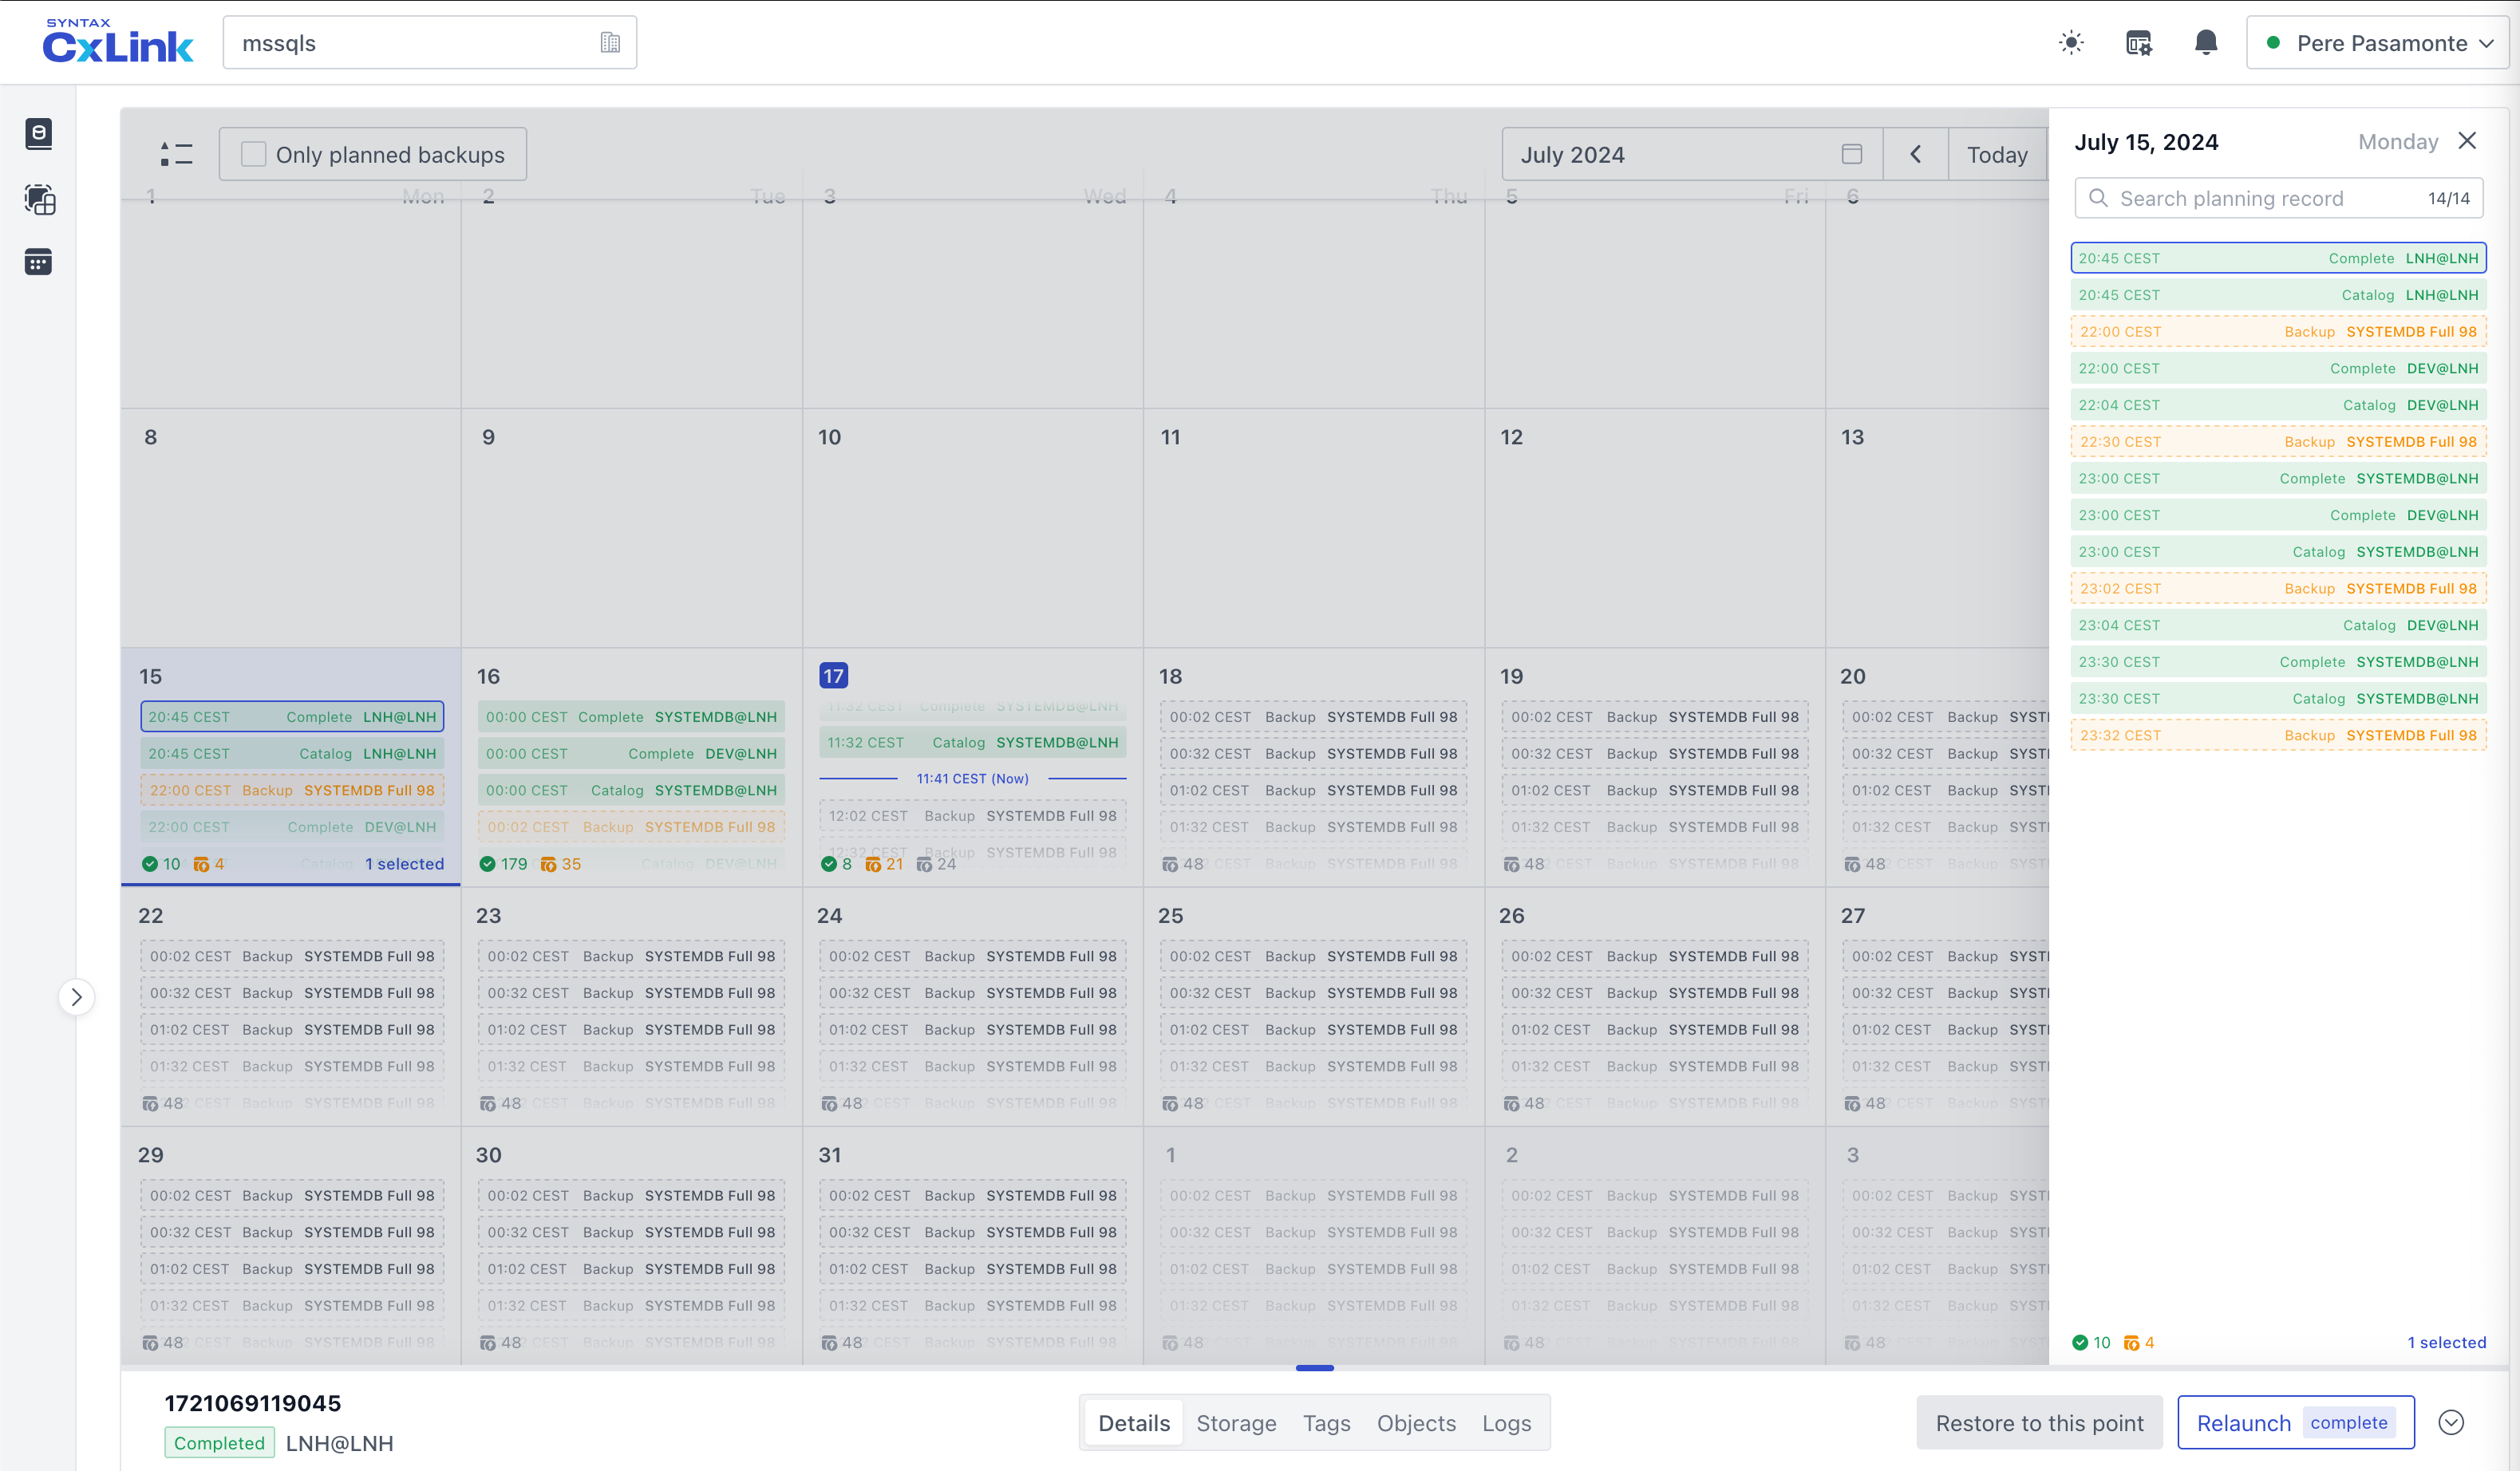
In the Planning section you can display all backup plans, executions and status.
This is the default view:
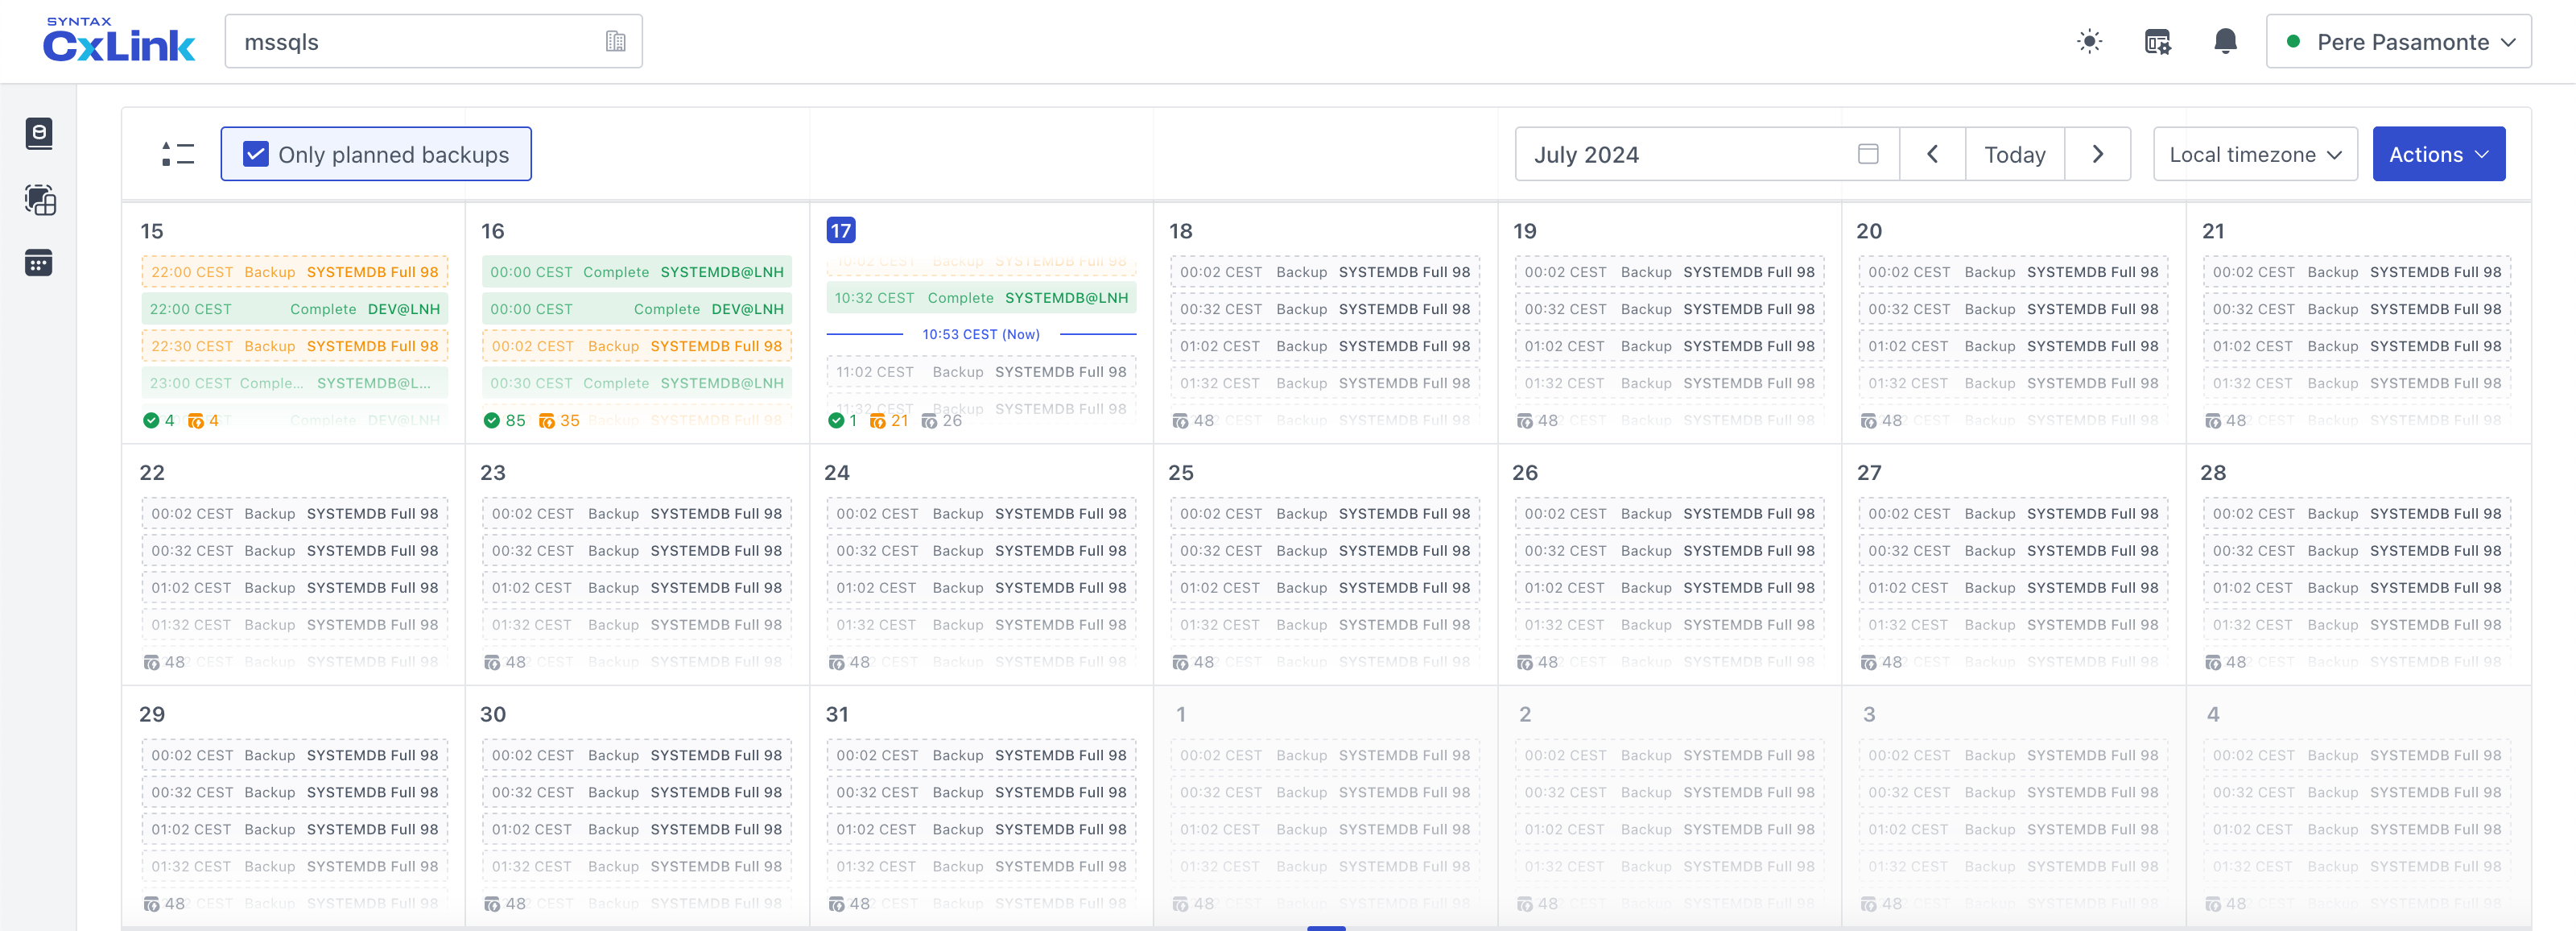
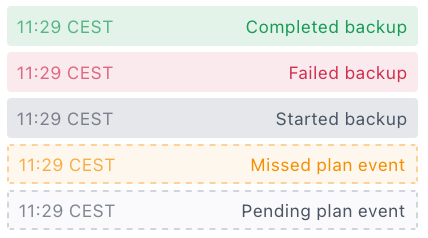
You can see the color legend by cliking on legend button, at the left of Only planned backups check button:
For each day there is a summary of backup executions at the bottom:

The color code is what we explained above. In the example there are 2 successfully executed backups, 21 past planned and not executed backups and 25 planned backups remaining for the day.
Displaying day details
If you click on a specific day you can see all executions and plans for the day:
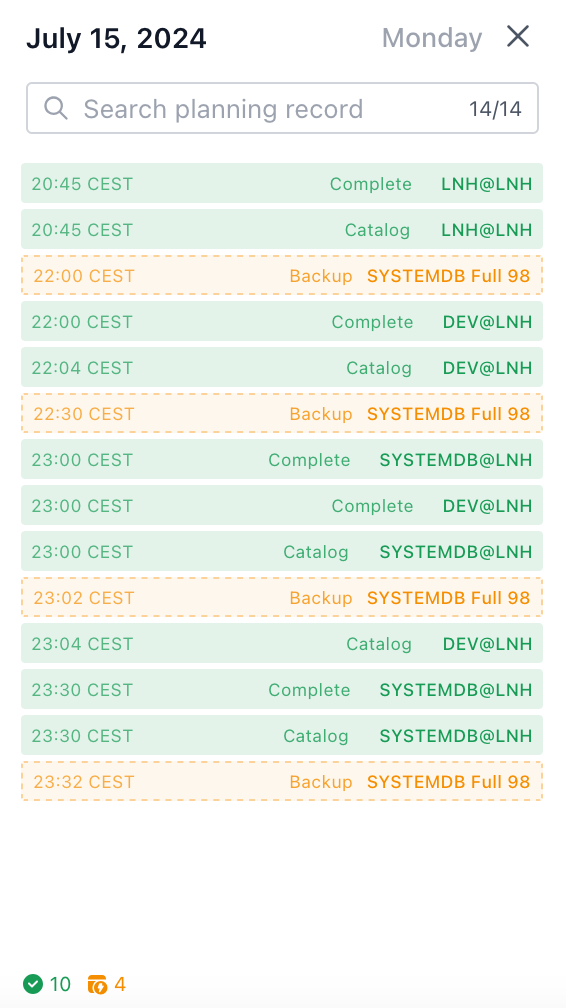
And there you can select one backup to display more detailed information:

The information is at the bottom:

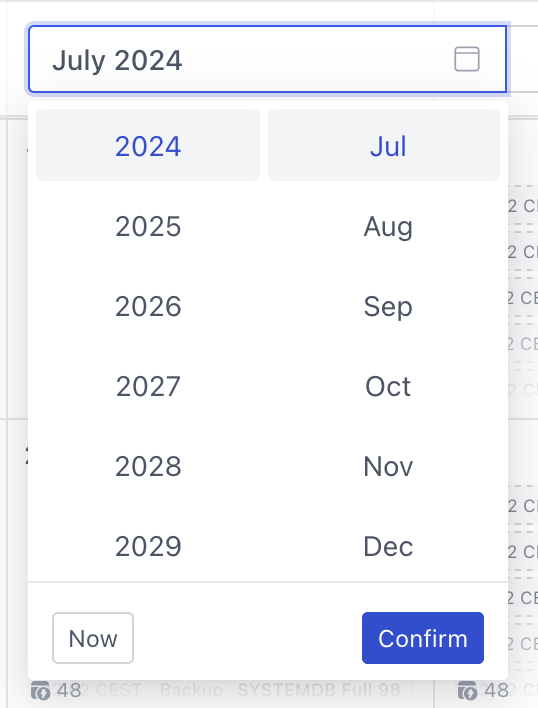
Selecting months
By default, current month is displayed but yoy can always display a different month by using the top menu:
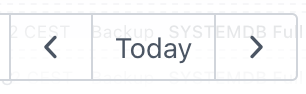
You can move from one month to another also using arrow controls to the right of the month control:
By default only backups executed using a plan are displayed but you can always display manually executed backups by unselecting Only planned backups option from the top menu:
