Microsoft Azure
To start working with Cxlink Suite for Documents and Archive you just need to provision a storage location for your documents and the proper permissions for both the location and the encryption key if you decide to encrypt your documents with a custom key.
Topics
Prerequisites
If you don't have an Azure subscription, create a free account before you begin.
Create an Storage Account
A storage account is an Azure Resource Manager resource. Resource Manager is the deployment and management service for Azure. For more information, see Azure Resource Manager overview.
Every Resource Manager resource, including an Azure storage account, must belong to an Azure resource group. A resource group is a logical container for grouping your Azure services. When you create a storage account, you have the option to either create a new resource group, or use an existing resource group. This how-to shows how to create a new resource group.
As a customer container has multiple combinations of parameters, is difficult to describe a common scenario for all of our customers. For this, please read and follow the steps described in https://learn.microsoft.com/en-us/azure/storage/common/storage-account-create?tabs=azure-portal to create your storage account.
Create a new container
To create a container in the Azure portal, follow these steps:
- Navigate to your new storage account in the Azure portal.
- In the left menu for the storage account, scroll to the Data storage section, then select Containers.
- Select the + Container button.
- Type a name for your new container. The container name must be lowercase, must start with a letter or number, and can include only letters, numbers, and the dash (-) character. For more information about container and blob names, see Naming and referencing containers, blobs, and metadata.
- Set the level of anonymous access to the container. The default level is Private (no anonymous access).
- Select Create to create the container.
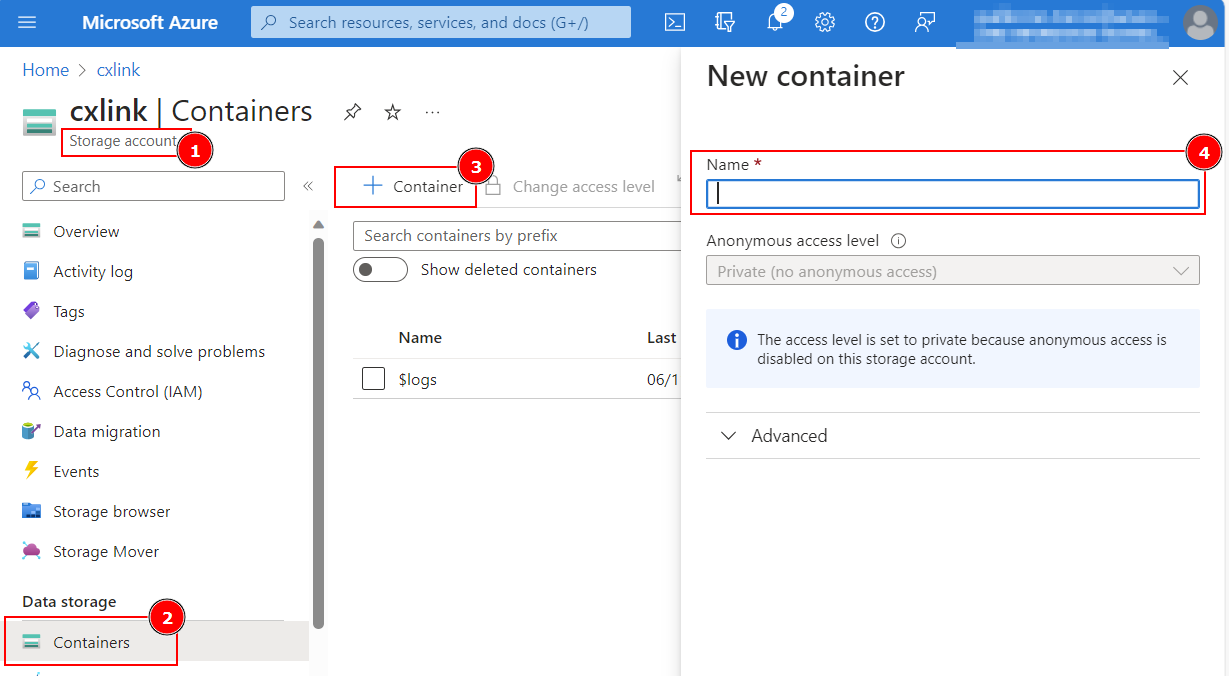
- Note down the container name for further configuration.
Credentials - Using Application registration (Azure Active Directory (ADD))
App registration in Microsoft Entra ID is typically done by ISVs who want to develop external client applications to read and write data in Dataverse. Registering an app in Microsoft Entra ID provides you with Application ID and Redirect URI values that ISVs can use in their client application's authentication code.
Create an application registration
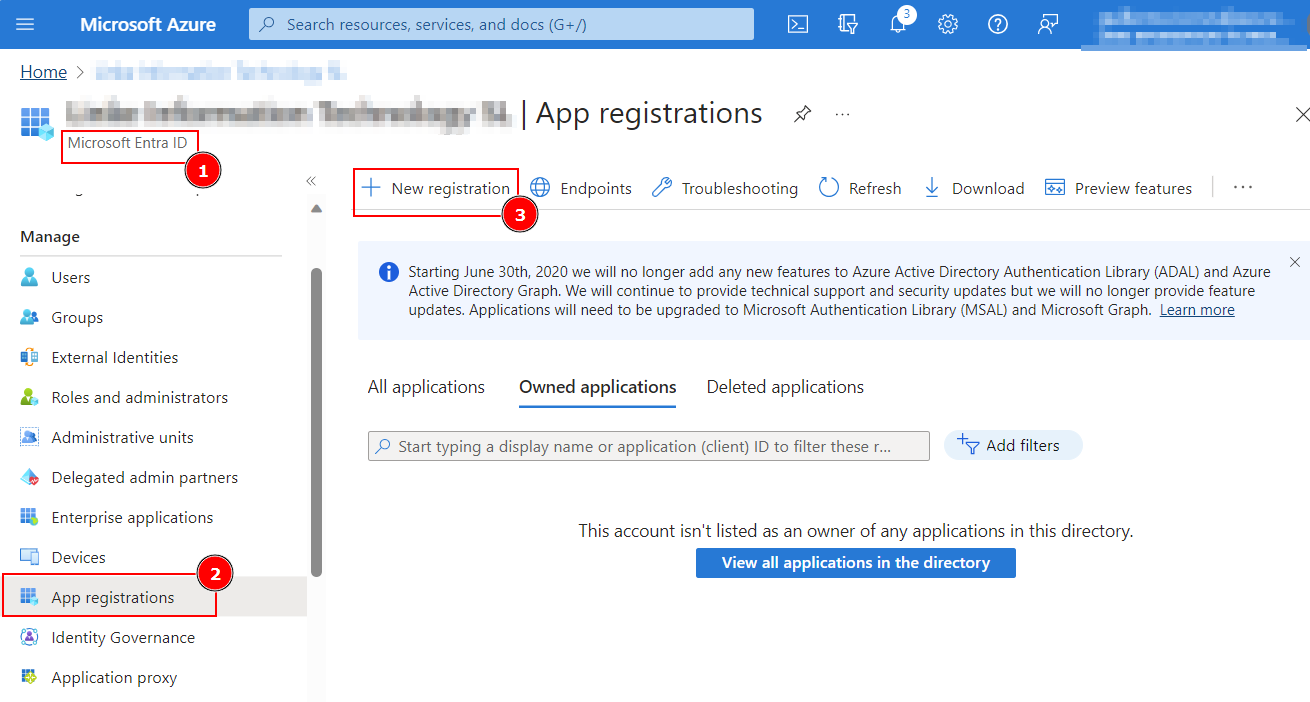
- Sign in to the Azure portal and select Microsoft Entra ID service.
- Select + New Registration to create a new application.
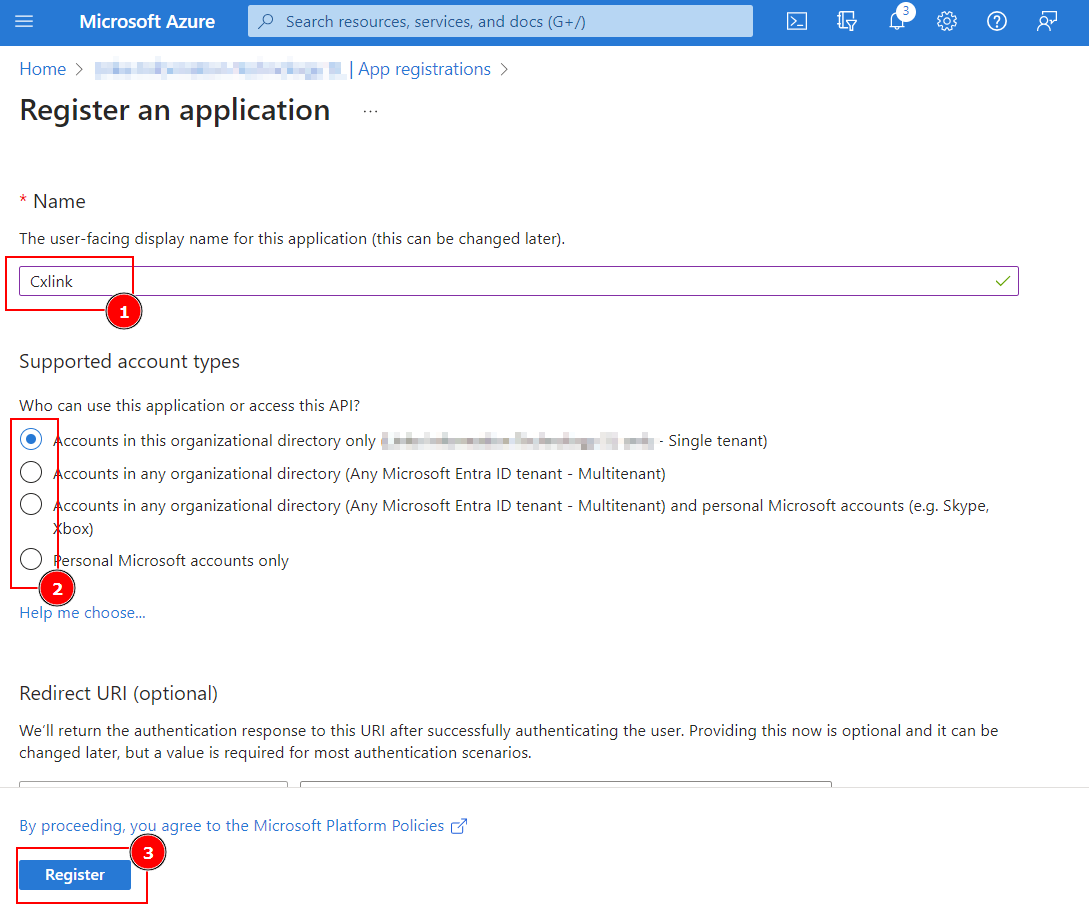
- In the Register an application screen, define:
- Name (1): A user-friendly name for the app. For instance, cxlink.
- Select Accounts in any organizational directory option from Supported account types (2) section or the option that best suites your requirements.
- Leave Redirect URI blank.
- Click on Register (3) to create the application.
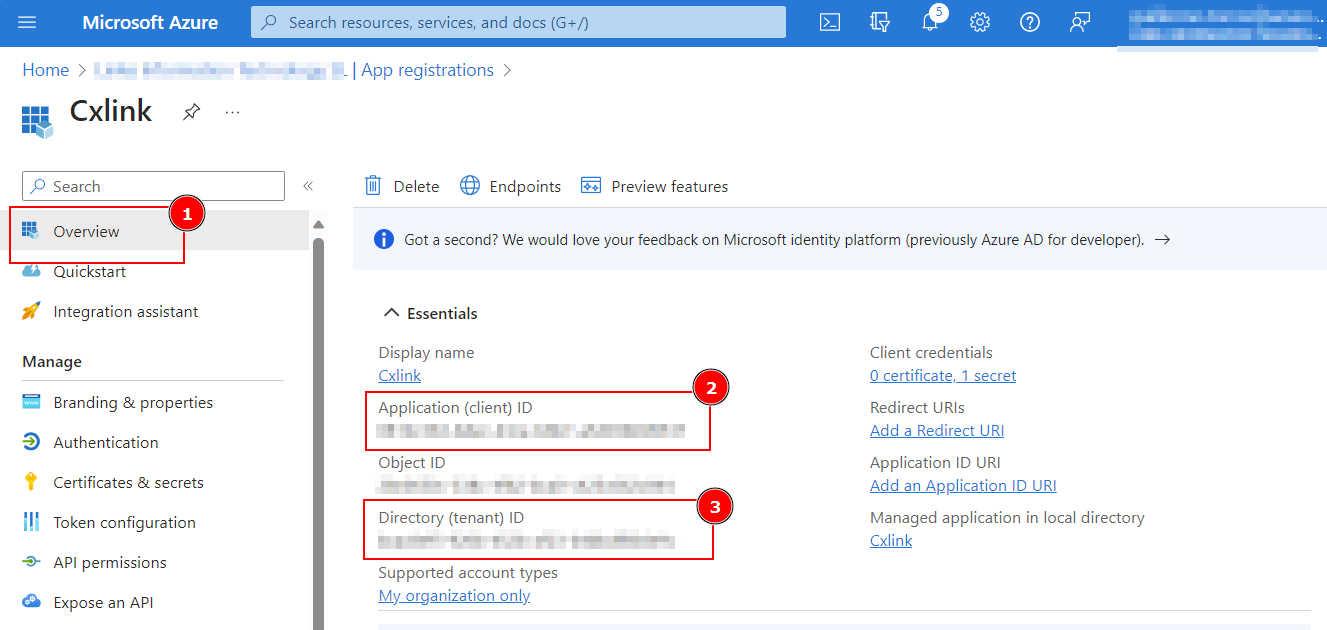
- Once created, go to the Overview section and note down both the Application (client) ID(2) and Directory (tenant) ID for later usage. Store them in a safe place in your computer or key vault.
- Finally, to obtain a cliente secret, access your application properties (1). In the Certificates & Secrets(2) tab of our selected application, click on the Client Secrets tab(3) and select + New client secret(4).
- Add a friendly Description, set the desired secret Expiration(5) and select Add(6) to create the secret.

- Note down the Value(1) for later usage. Store it in a safe place in your computer or key vault.

- Go to the Add permissions to the storage account section to finish the process.
Add permissions to the storage account for the app
To assign roles to an storage account:
-
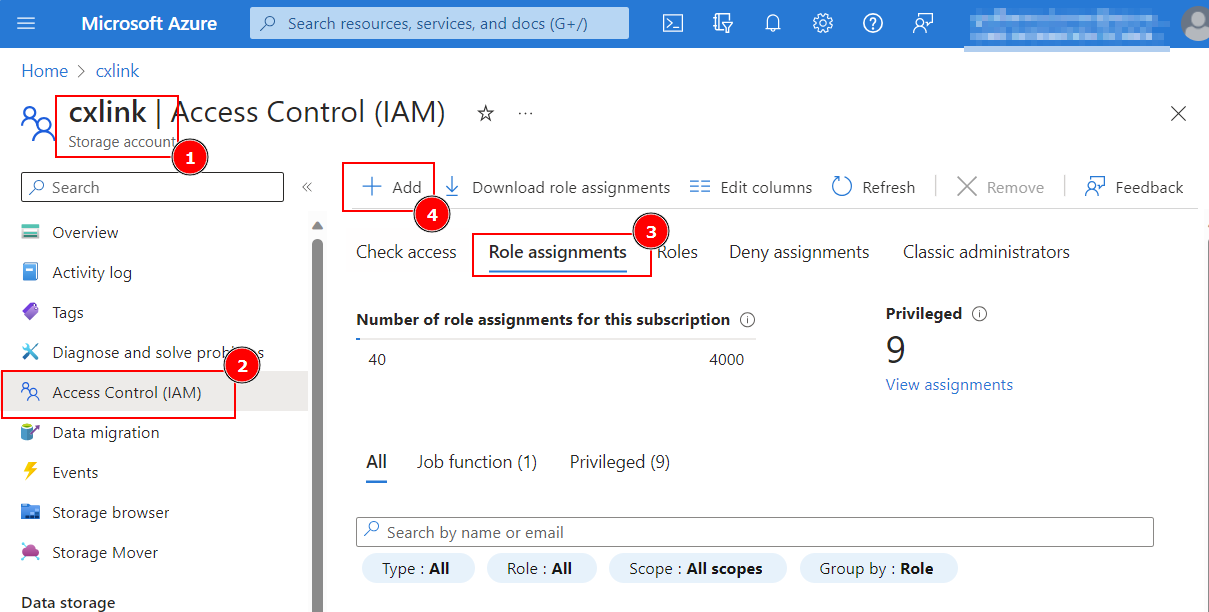
Add roles for the Application in Storage account(1), select your Storage Account(2) and go to Access Control (IAM)(3)→ Add(4) → Add role assignment.
-
On the Role(1) tab and find the role to assign. We recommend Storage Blob Data Owner and Storage Account Contributor, but this depends on your organisation's security policies and configuration preferences.

-
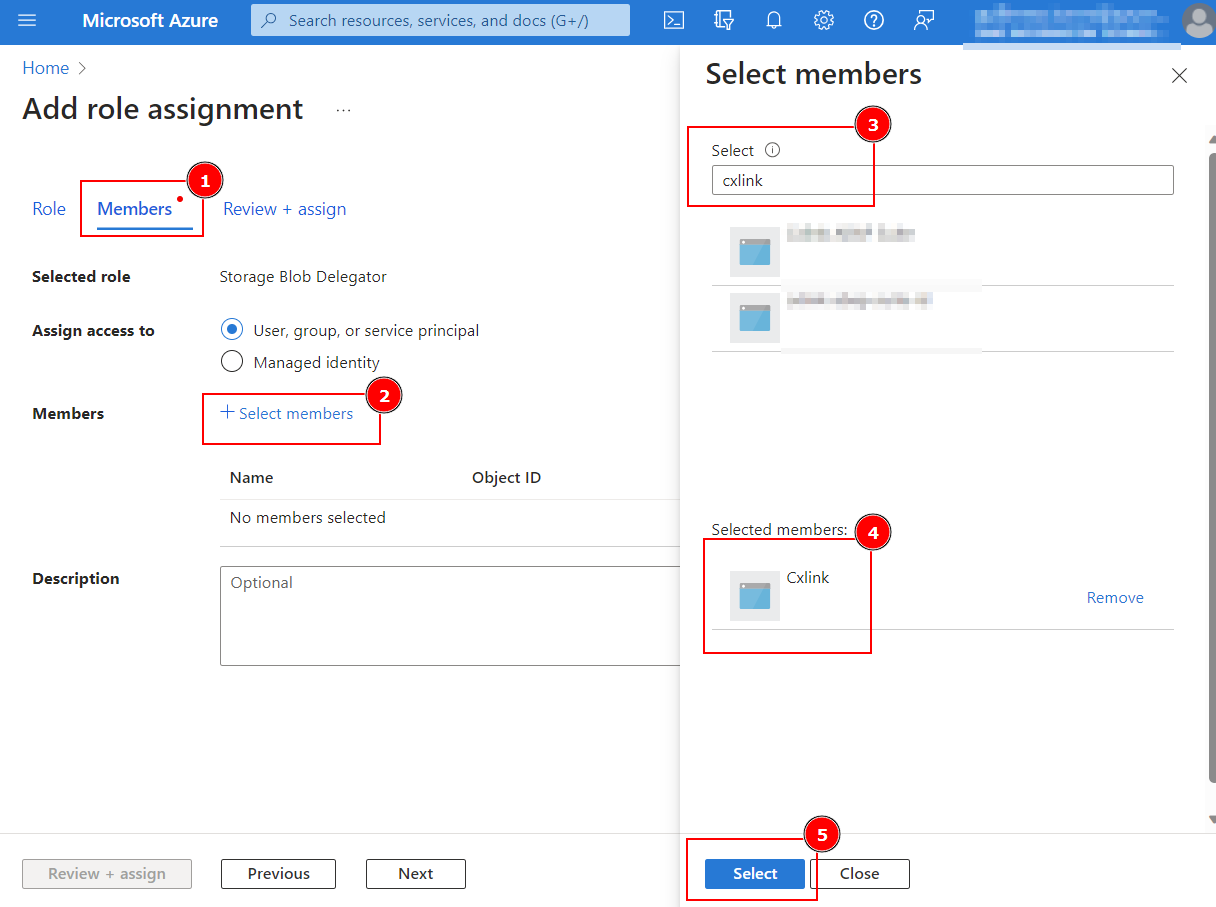
In the Members tab(1), select the + select members(2). In the new window search(3) the application name, click on the app and ensure that the app is listed in the Selected Members section(4) and click on Select (5).
-
Review the values and select Review + Assign.
-
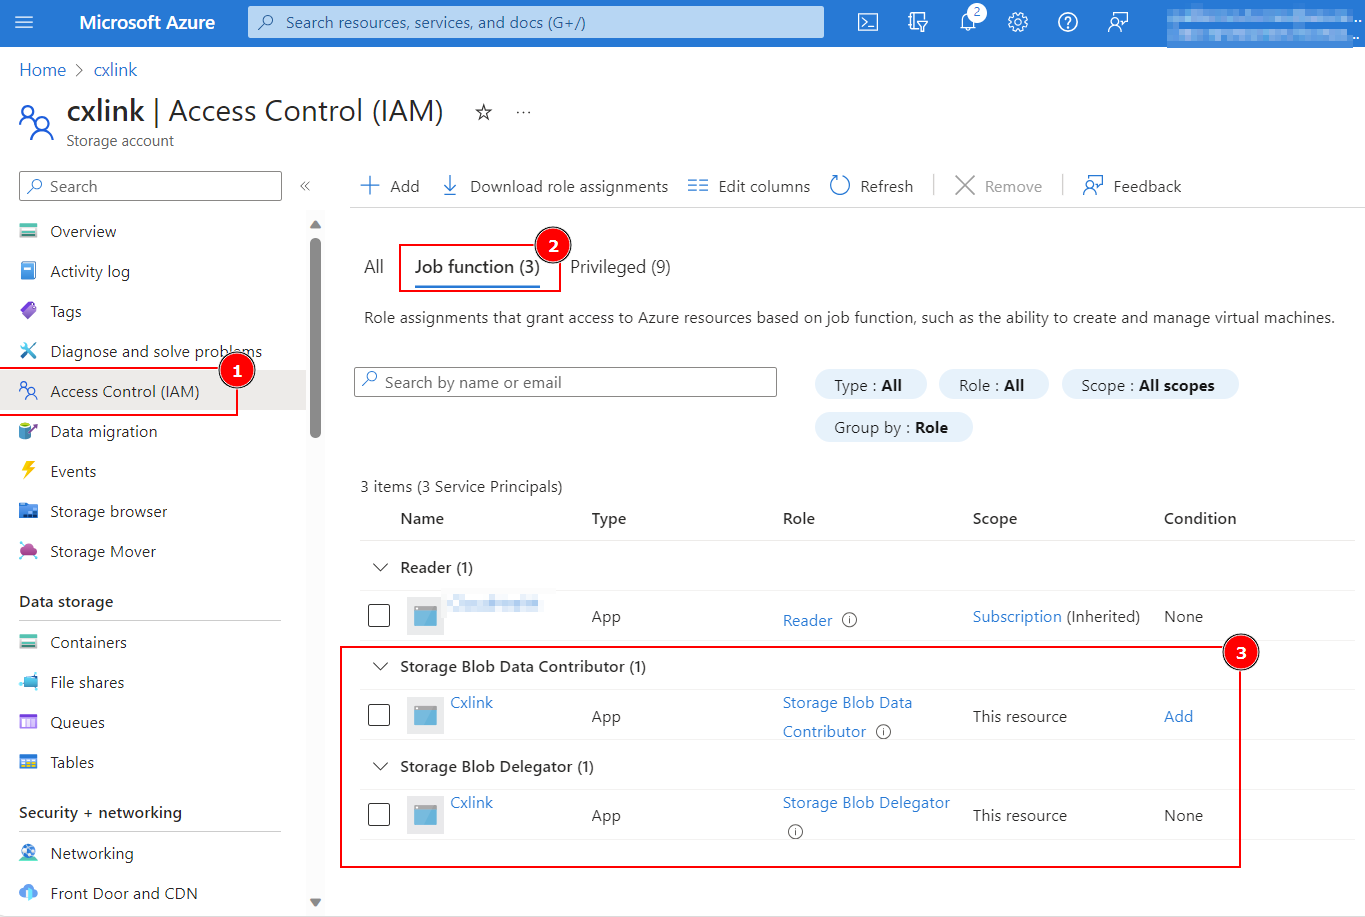
You can see the roles and assigned members(14) for these storage accounts in the Role Assignments(13) tab:
Credentials - Authorize with Storage Account Shared Key (Azure Shared Key (ASK))
Every request made against a storage service must be authorized, unless the request is for a blob or container resource that has been made available for public or signed access. One option for authorizing a request is by using Shared Key.
To get the Storage Account credentials:
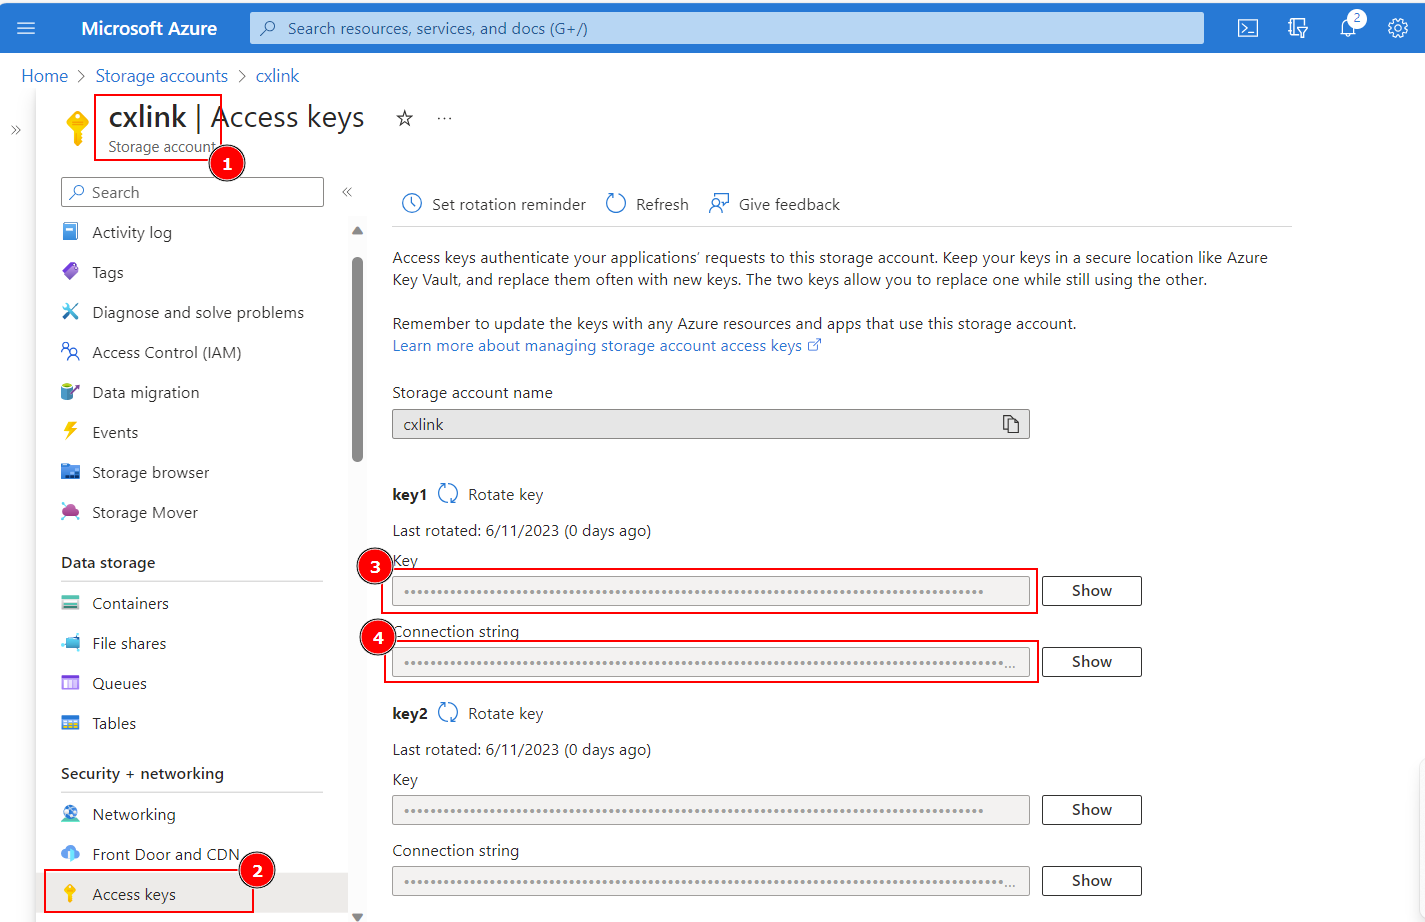
- Sign in to the Azure portal and select Storage accounts(1) service.
- Select the previously created storage account, go to Security + networking -> Access Keys(2).
- Note down both the
key1orkey2values for Key(3) and Connection string(4) for further configuration. Store it in a safe place in your computer or key vault.