Installation and Maintenance
This sections guides you through the process of dowloading the software and installing it in your SAP Server.
Topics
Download
To be able to download the installation/upgrade add-on or any support package you will need to have an active contract.
Follow these steps to download the required software:
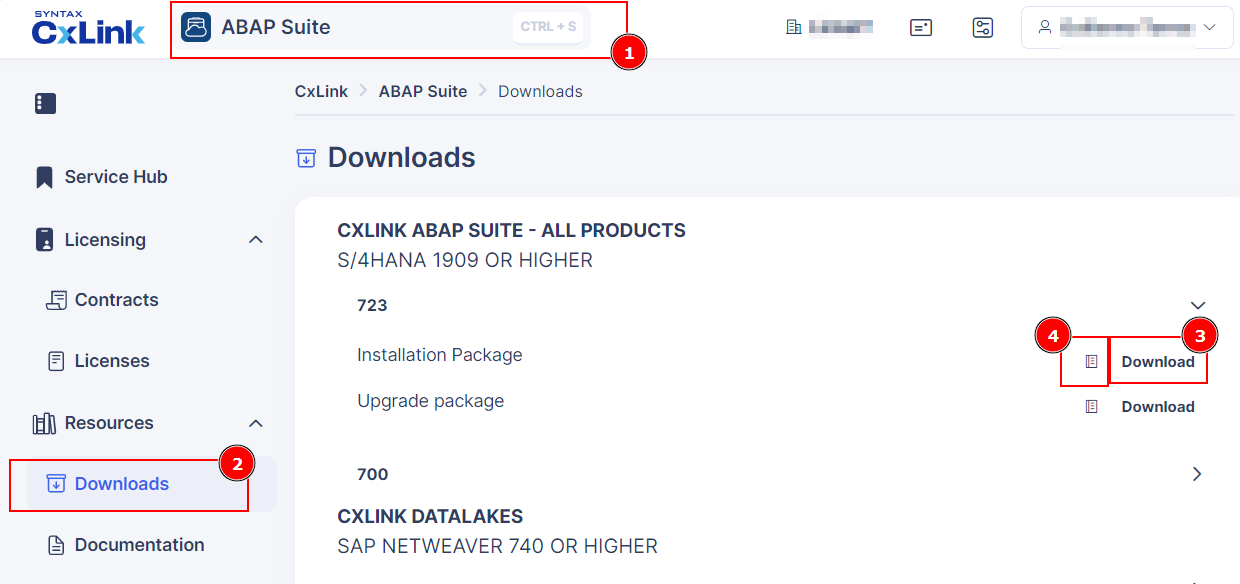
- Login to Cxlink Portal: https://cxlink.syntax.global.
- Select
Suitefrom the Services drop-down list. - In the navigation panel select
Resources->Downloads. - Drop-down the resources list for your Plaform and click on Download (3) the Installation package.
- You will need to download also the Add-on Password requested during installation. You will find besides the download link (4).
- If you are not sure what version to download, use these filters:
- Download the CXLINK Suite - ALL PRODUCTS version, if you are running an S/4HANA version 1909 or higher,
- Download the CXLINK DOCUMENTS & ARCHIVE version (No Datalakes support), if you are running an S/4HANA version 1809 or lower or ERP 6.0 Based system without DMIS installed, due to SLT limitations.
- Download the CXLINK DATALAKES version, if you are running an SAP Netweaver Standalone with DMIS installed and you want to use Cxlink Datalakes.
- Download all support packages available for this version, if any.
Install
Cxlink Suite is a certified add-on installed and updated using standard transaction tools.
You can find additional information in SAP Add-On Installation Tool.
Follow the next guidelines to install the add-on in your server:
- Login to client 000 in your SAP Server and go to transaction SAINT.
- Load the Installation and Support Packages into your system. You can find additional information in the SAP Help Portal
- Define the installation queue. Select the LNKAWS add-on package to be installed.
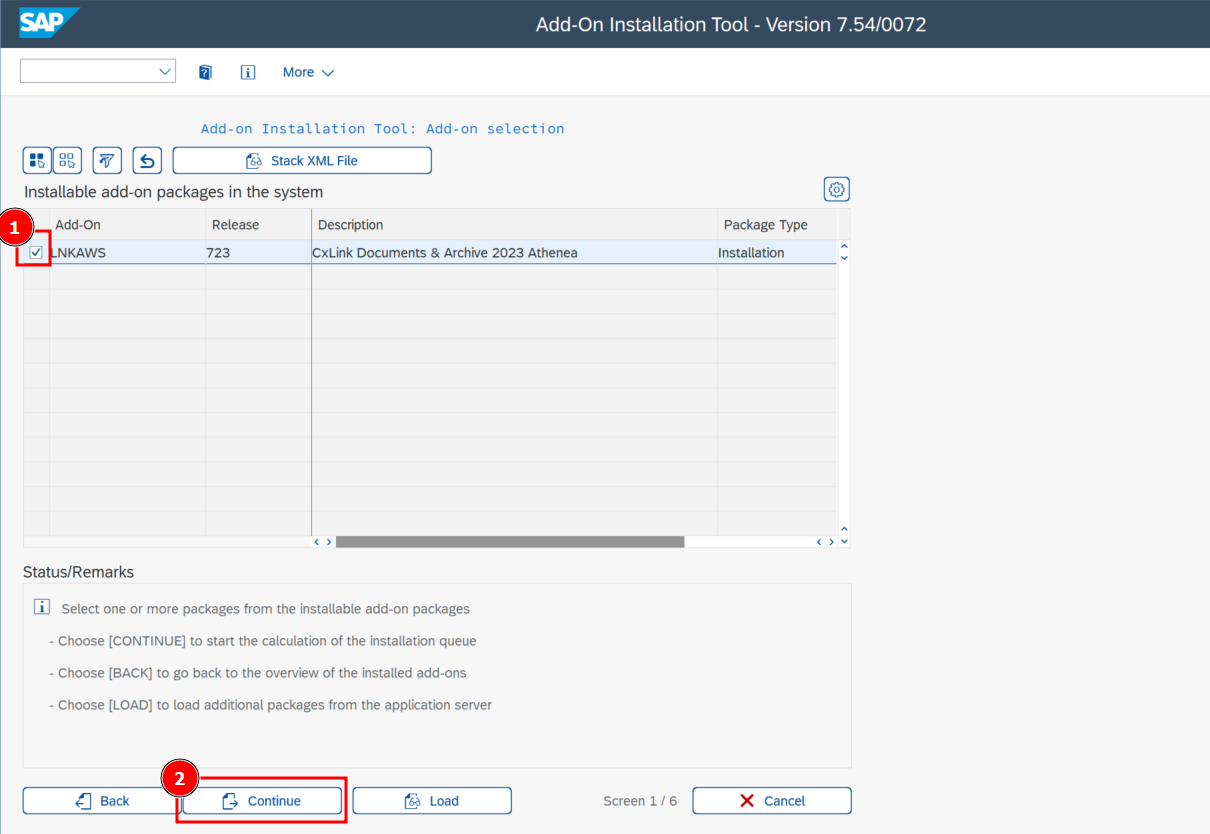
- Leave start options as default or check those needed for your SAP server.
- Install the queue. Installation starts straight after you have confirmed the start options.
- Enter the password obtained from the release note file previously downloaded.
- Check for the logs to confirm that the add-on has been successfully installed.
Update
You can update the Cxlink Add-on as any other SAP Add-on using the SPAM transaction.
Before starting the update process, take this considerations in mind if you are running Cxlink Datalakes:
- Deactivate all configurations prior to the upgrade.
- Update the package version.
- Once updated, activate configurations again to resume load/replication operations.
To update, follow these steps:
- Login to Cxlink Portal: https://cxlink.syntax.global.
- Select
Suitefrom the Services drop-down list. - In the navigation panel select
Resources->Downloads. - Drop-down the resources list for your Plaform and download all available support packages newer than your current version.
- In your SAP server, go to transaction
SPAM. - Upload the SPs from Application Server or SAP GUI.
- On the initial screen in Support Package Manager, choose Display/Define.
- Select LNKAWS from the installed software components list.
- Once you select the component, the current queue appears. This queue contains the Support Packages available for the selected component in your system. If the displayed queue meets your requirements, you can confirm it by choosing Confirm Queue.
- Choose Support Package –> Import Queue. Accept the default values or adapt them to your requirements.
- Confirm that the queue has been imported successfully into your system.
Uninstall
As any other SAP third-party certified add-on, Cxlink Suite can be uninstalled from your SAP Server by using standard procedure:
IF you want to delete Cxlink Suite from your server:
- Login to client 000 of your SAP Server with a user with enough permissions and calling transaction SAINT.
- Select tab Uninstallable components.
- Select the line for LNKAWS component and Start Uninstallation.
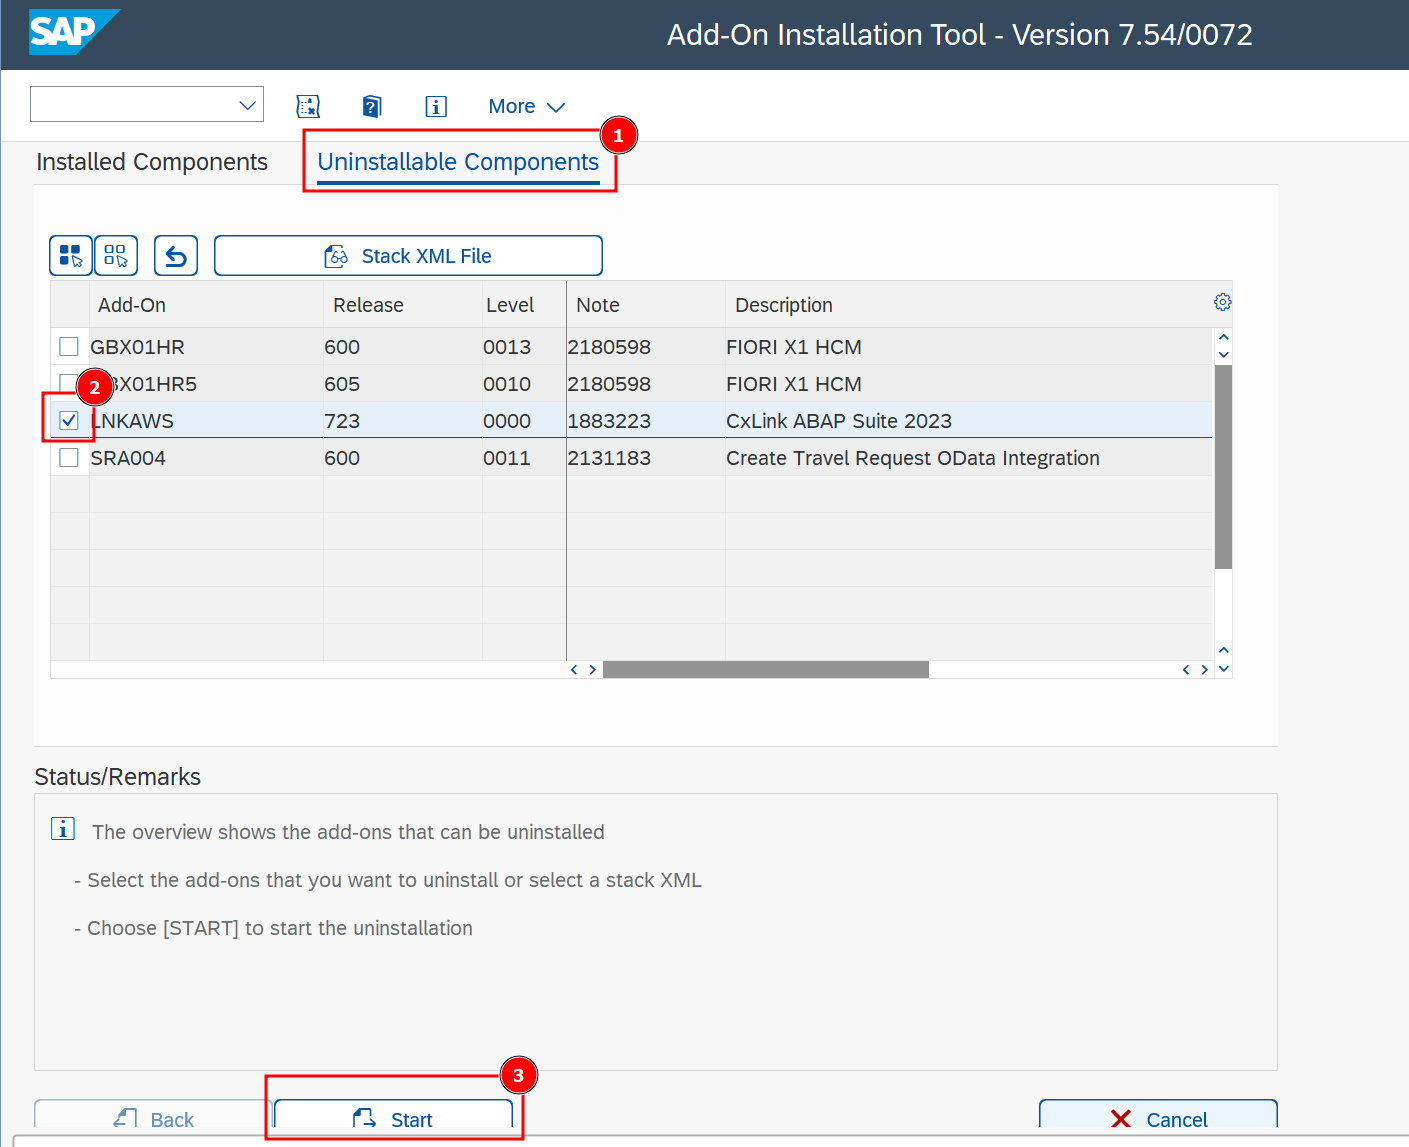
- Leave start options as default or check those needed for your SAP server.
- On the Uninstallation queue screen, select Continue to finish the process.
- Check for the logs to confirm that the add-on has been successfully uninstalled.