Configuration
The following steps need to be performed to implement your custom logic when writing to a target system.
Topics
When updating certificates, it is necessary to deactivate the mass transfer IDs that are active in the LTRC transaction. If these are not deactivated during the update, the ICM is restarted and the replications are affected.
The process of restarting the ICM is a standard procedure associated with a change in network parameters/configuration. It could also happen with the renewal of the SSL certificates, necessary to establish a secure connection to cloud services (AWS S3).
It is important to note that an ICM restart could potentially result in a SAP SLT job becoming unresponsive if replication is occurring concurrently.
Define an application for the BAdI implementation
You specify the application when you create the configuration; the application links the configuration to a specific BAdI implementation. To do so:
- In the SAP LT Replication Server system, in transaction SM30, enter the table IUUC_REPL_APPL, and choose the button Maintain.
- On the next screen choose
New Entriesand enter:- Name: ZLNKAWS_DATALAKES
- Description: Cxlink Datalakes BAdI or a description of your choice.
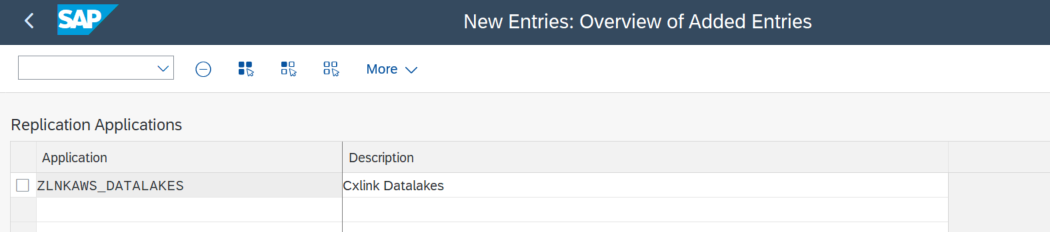
Savethe changes in a new transport request for later transportation.
Create a new configuration
The application values that you specify here will be later assigned to a configuration that wants to use the custom logic implemented here
To configure your :
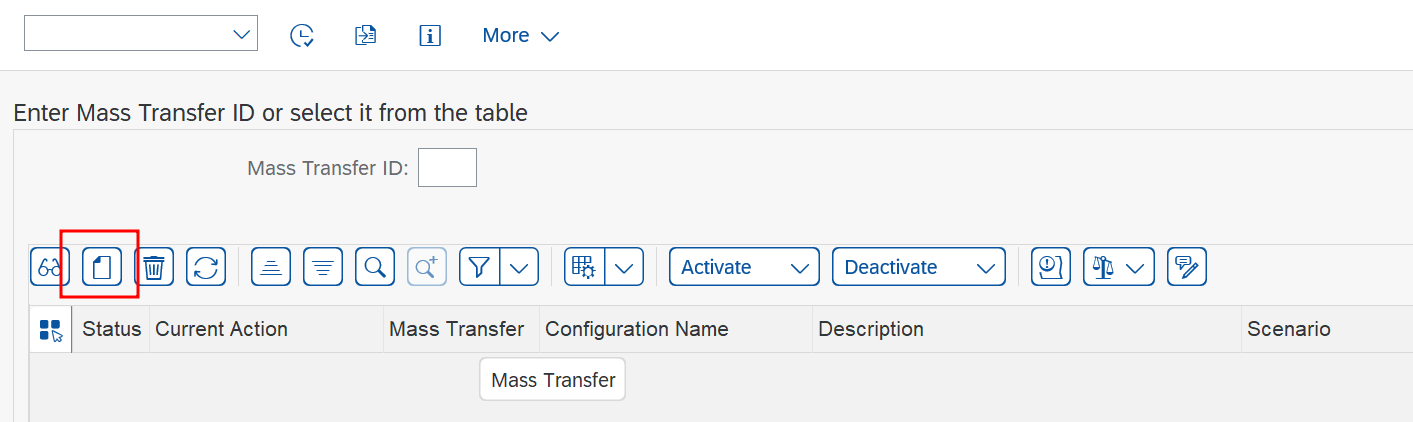
- Go to transaction LTRC
- Select Create Configuration to start a configuration wizard.
- In Specify General Data section add:
- Configuration Name: Select a descriptive name that helps you easily identify the configuration purpose.
- Description: Specify a more descriptive message for the configuration.
- Authorization Group: Leave empty.
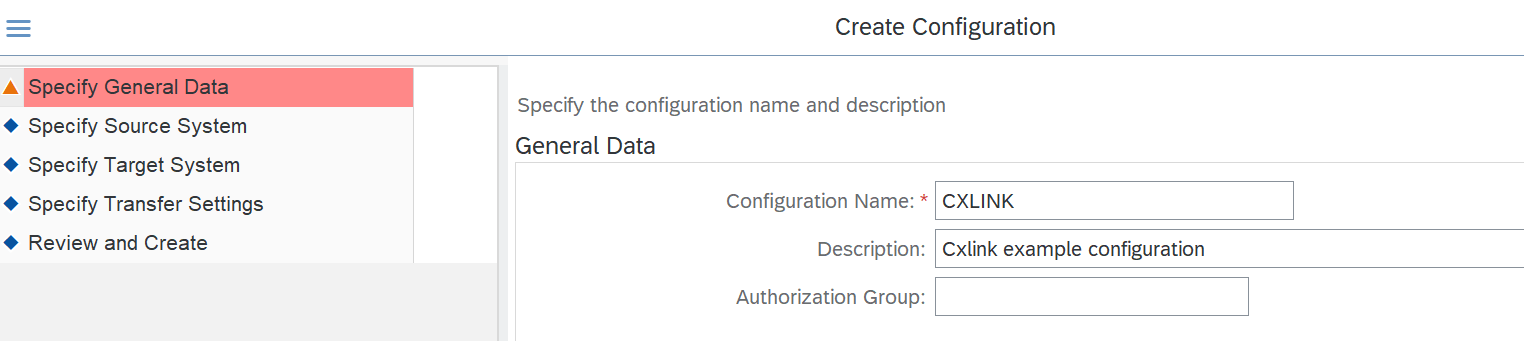
- Select
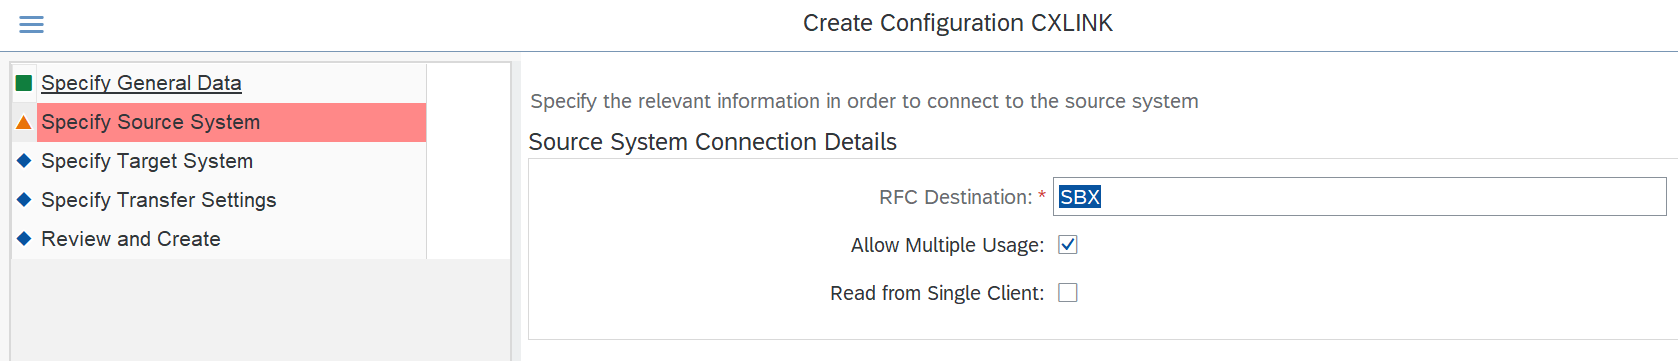
Next. - In the Specify Source System section define:
- RFC Destination: Select the RFC that connects to the SM59.
- Allow Multiple Usage: Keep checked to allow the configuration to be used in multiple environments.
- Read from Single Client: Check if you want to restrict the usage of this configuration to the current client. Leave unchecked if no restrictions apply.
- Select
Next. - In the Specify Target System section define:
- Select Other from the option list.
- Select SLT SDK in the Scenario for RFC Communication dropdown.

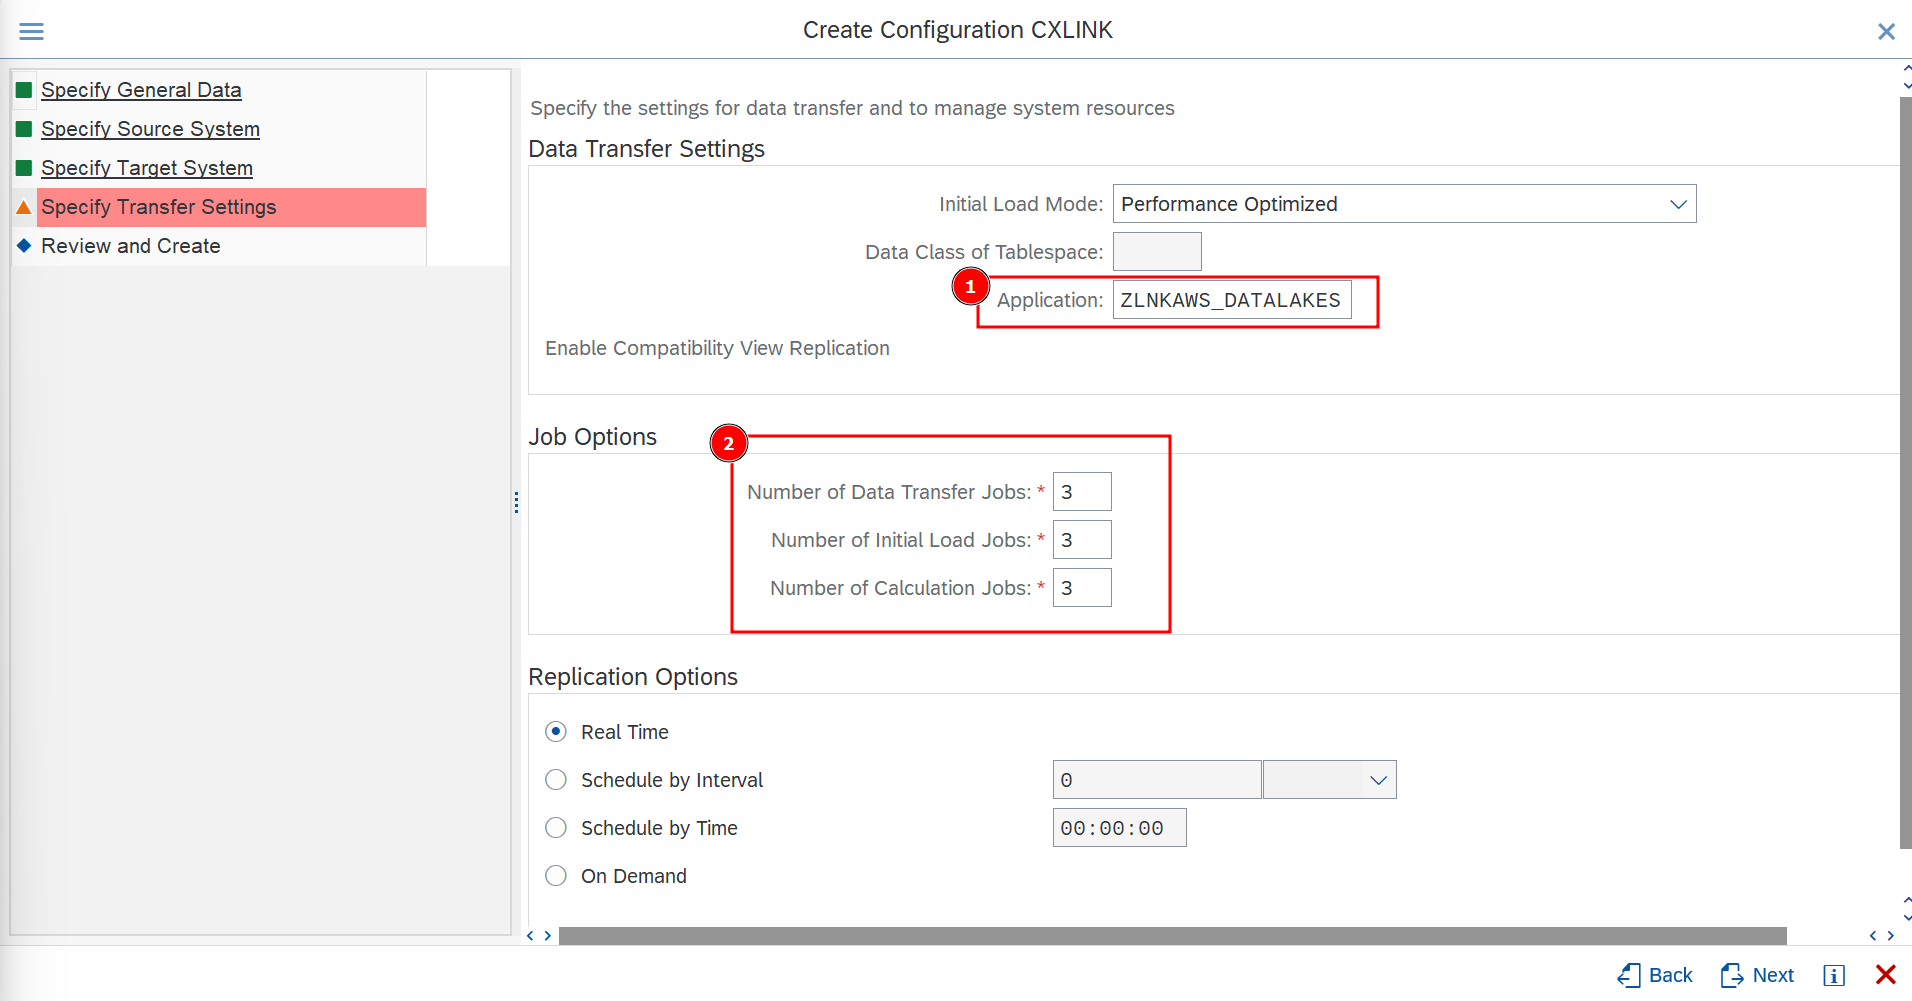
- In the Specify Transfer Settings section define:
- In Application select the previously created application for BAdI implementation.
- In Job Options, set 3 for all values for testing purposes or adapt them to your needs.
- Leave the rest of options by default or adapt them to your needs.
- Select
Next. - In the Review screen, check the values and select
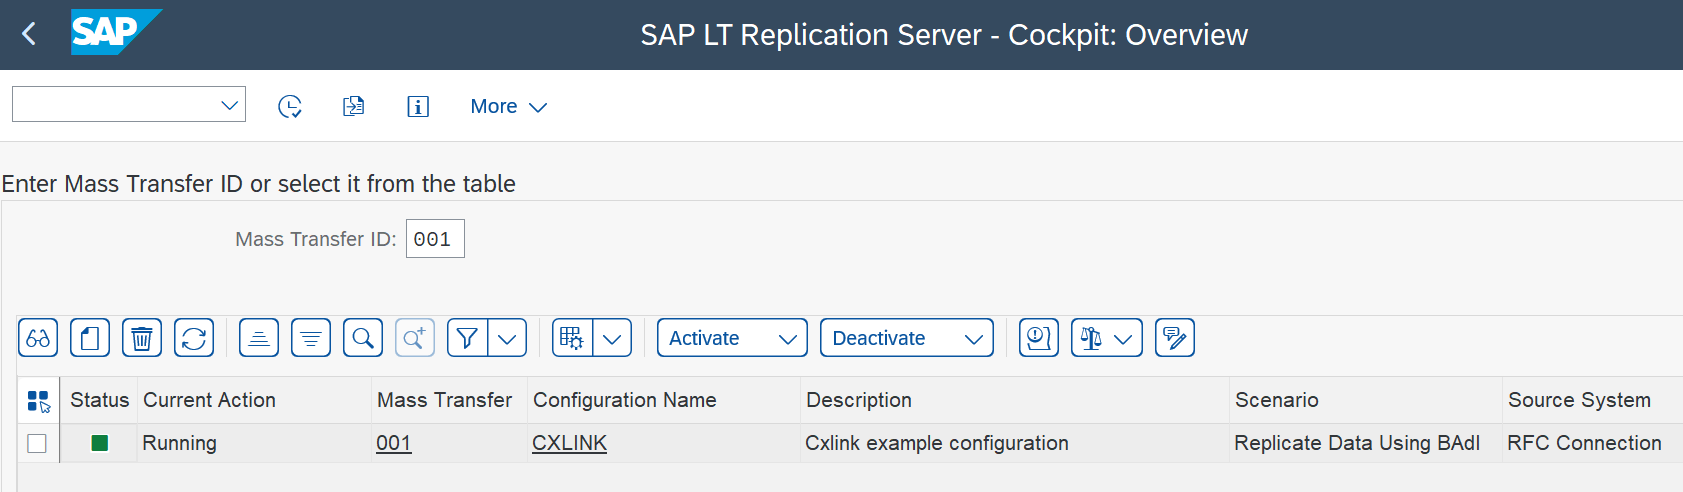
Createto finish the process. - Back in the SAP LT Replication Server - Cockpit: Overview screen, you should be able to see the new Mass Transfer.
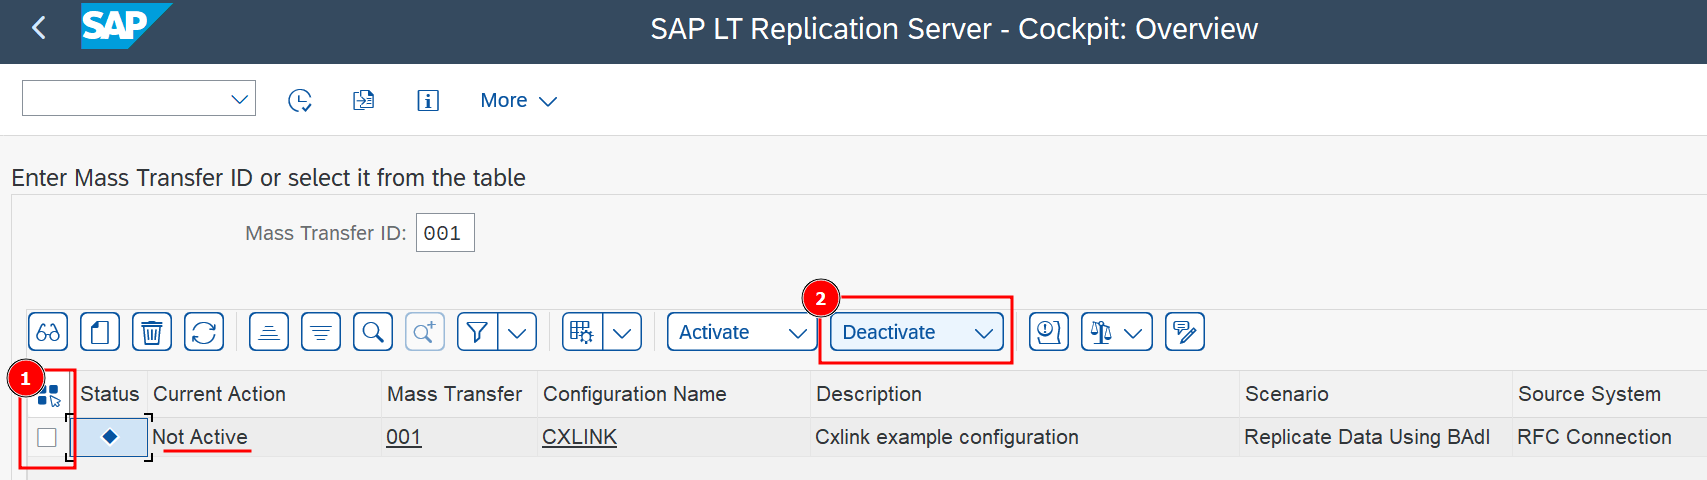
- Ensure that the configuration is deactivated before continuing.
Associate Cxlink Datalakes to the configuration
Now that you have created the SLT standard configuration, you will need to create the relationship with the storage target for the data. To do so:
-
Go to transaction /n/LNKAWS/SLT_LTR.
-
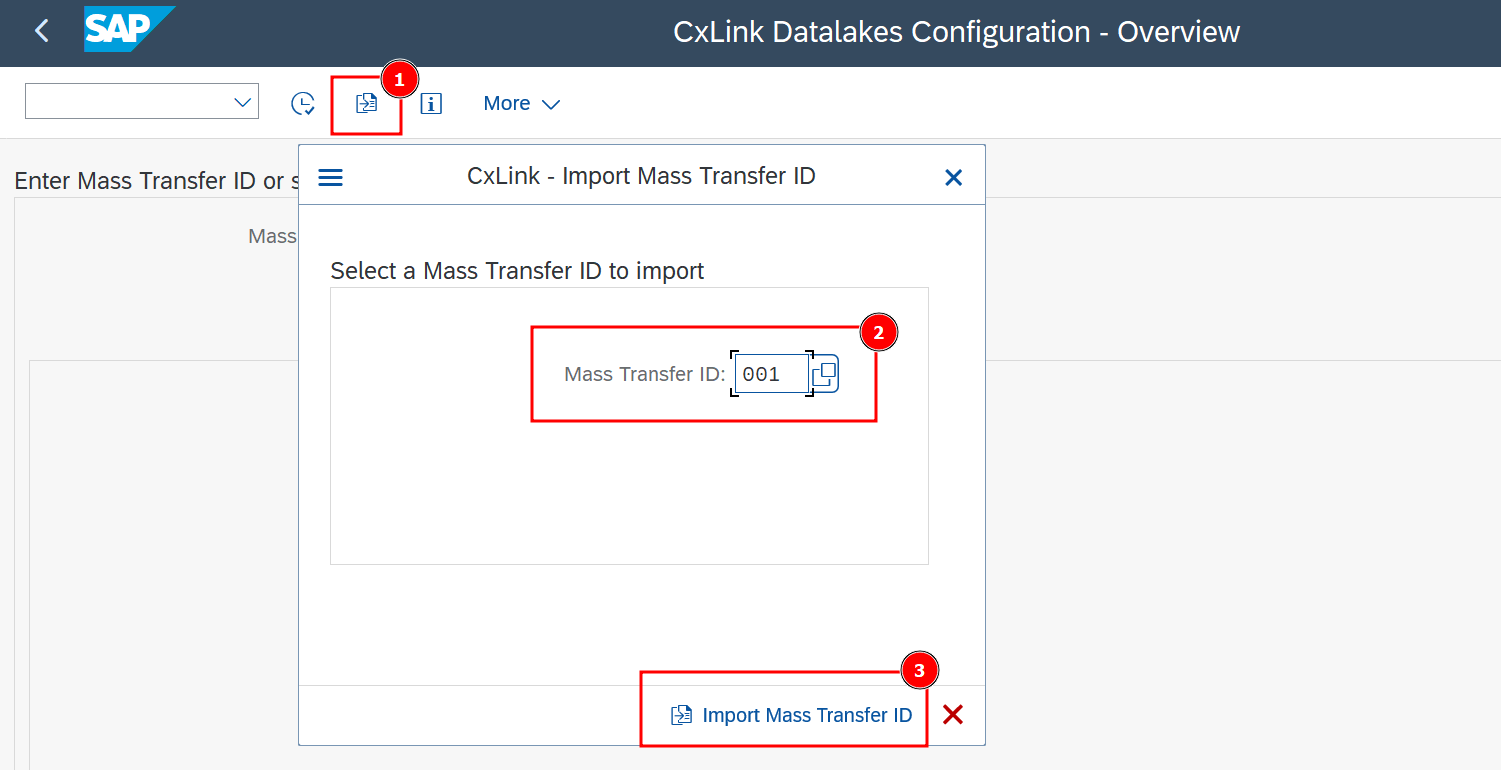
In the CxLink Data Lakes Configuration - Overview screen, select Import Mass Transfer ID or (F9).
-
Select the previously generated Mass Transfer ID* and select Import Mass Transfer ID.
-
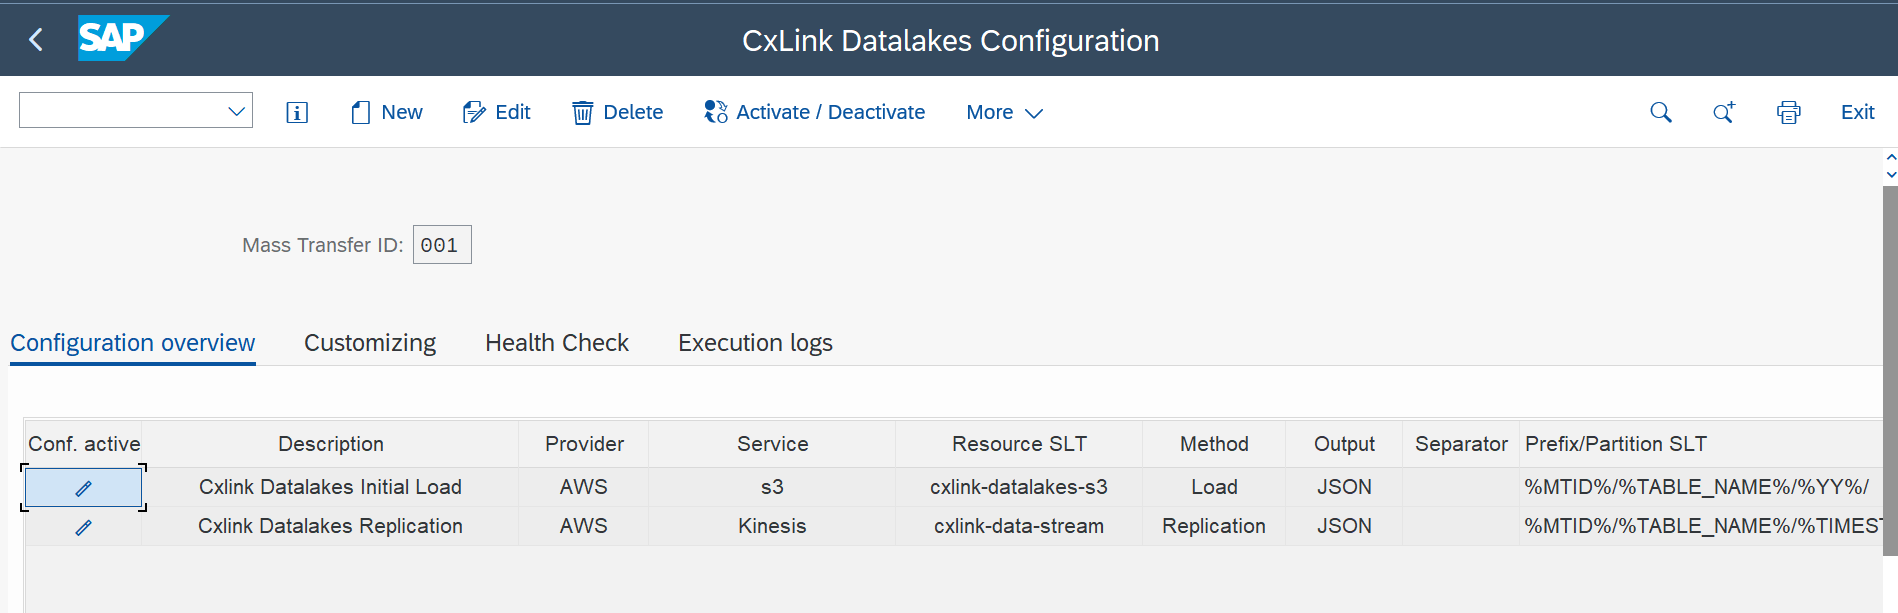
Back in the Cxlink Datalakes Configuration - Overview screen, find the imported MTID and open it.
-
Select
Newto create a new configuration. -
In General data section define:
- Amazon Web Services (AWS)
- Microsoft Azure
To add a new Amazon Web Services to the configuration:
- Description: A descriptive text for this configuration.
- Cloud Service Provider: Select Amazon Web Services.
- Service: Indicate your preferred service option: S3 or Kinesis.

- Select
Next.
To add a new Microsoft Azure to the configuration:
- Description: A descriptive text for this configuration.
- Cloud Service Provider: Select Microsoft Azure.
- Azure Tennat: Please select the Azure tenant to be used for this process.
- Service: Indicate your preferred service option: Blob or EventHubs.
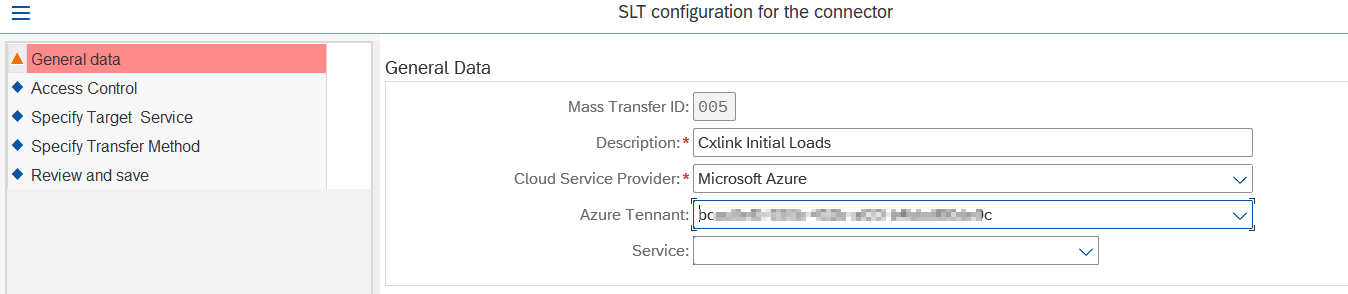
- Select
Next.
-
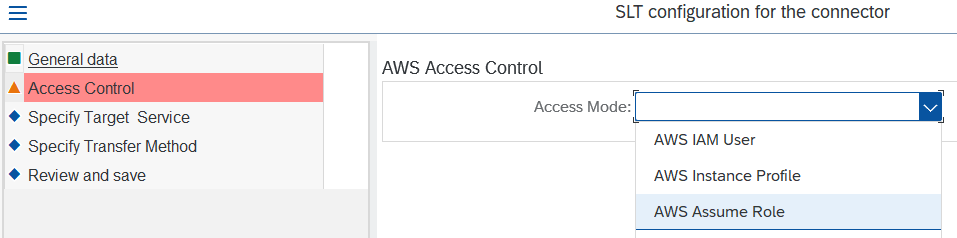
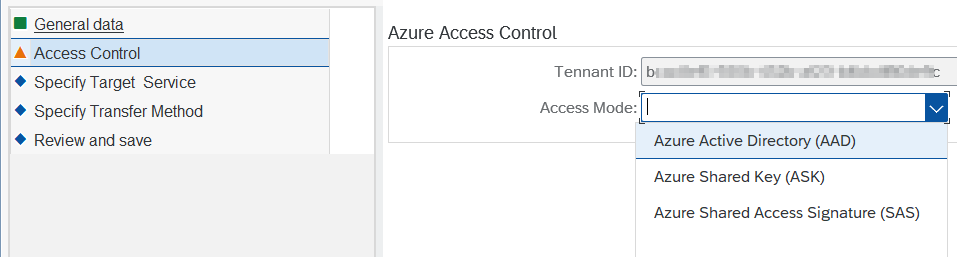
In Access Control section define the Credential to be used:
- Amazon Web Services (AWS)
- Microsoft Azure
Access Mode: Choose between IAM User, Instance Profile or Assume Role:
-
IAM User: In the case of an IAM user, select the user:

-
Instance Profile: No further data required:

-
Assume Role: Select the User/Instance Profile and Assume Role:

Select
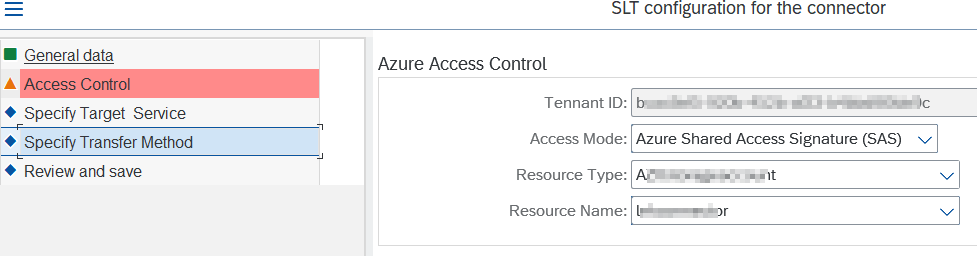
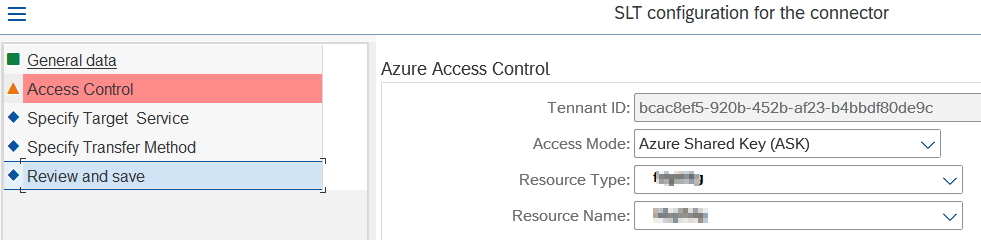
Next.Access Mode: Choose between Azure Active Directory (AAD), Shared Access Signature (SAS) and Azure Shared Key (ASK)*:
-
Azure Active Directory (AAD): Select Resource Name:

-
Azure Shared Access Signature (SAS): Select Resource Type and Resource Name:
-
Azure Shared Key (ASK): *For a Blob Service only. Select Resource Type and Resource Name:
Select
Next. -
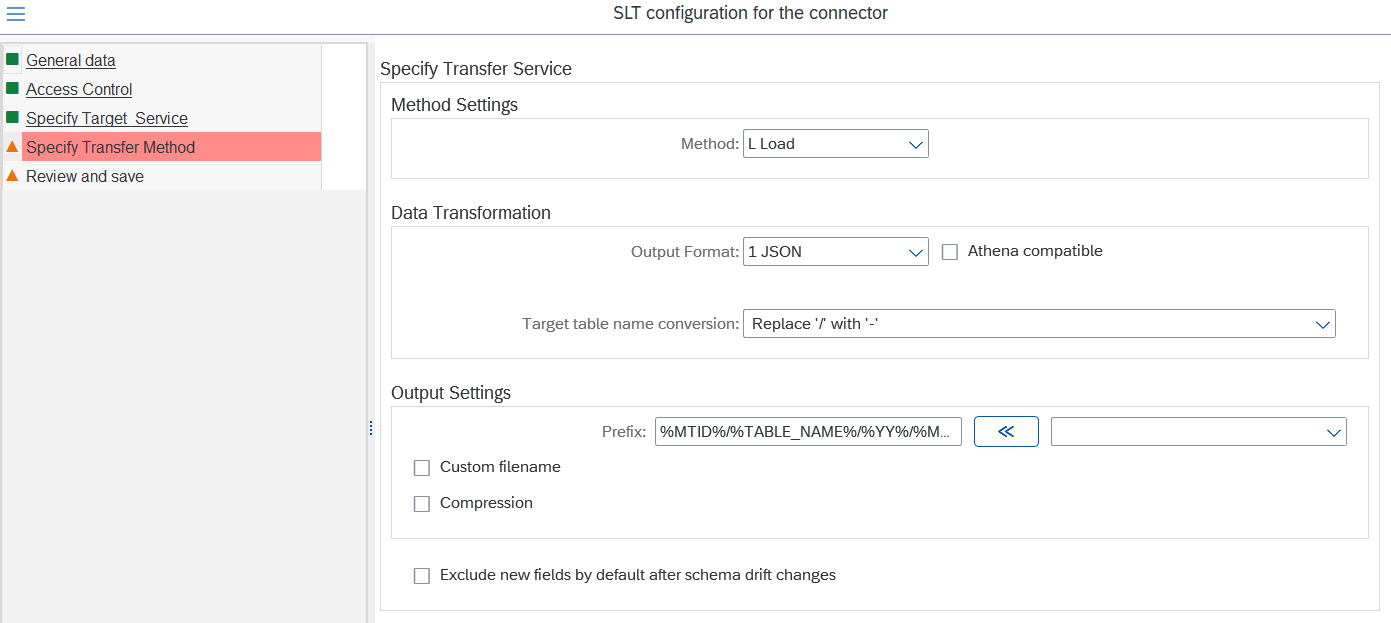
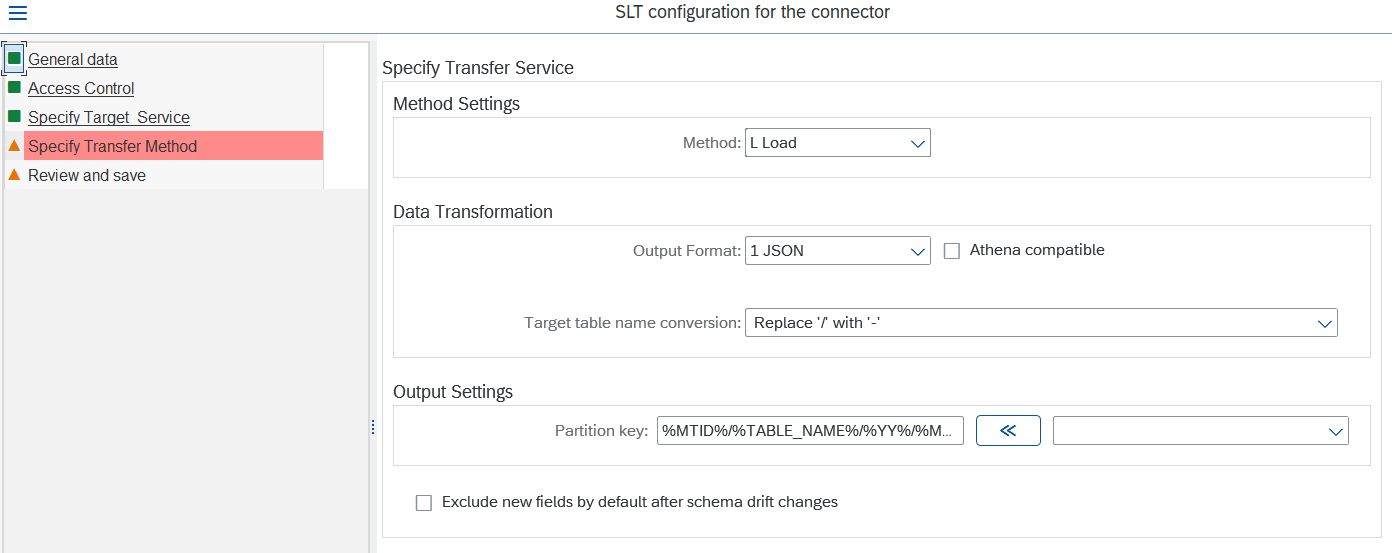
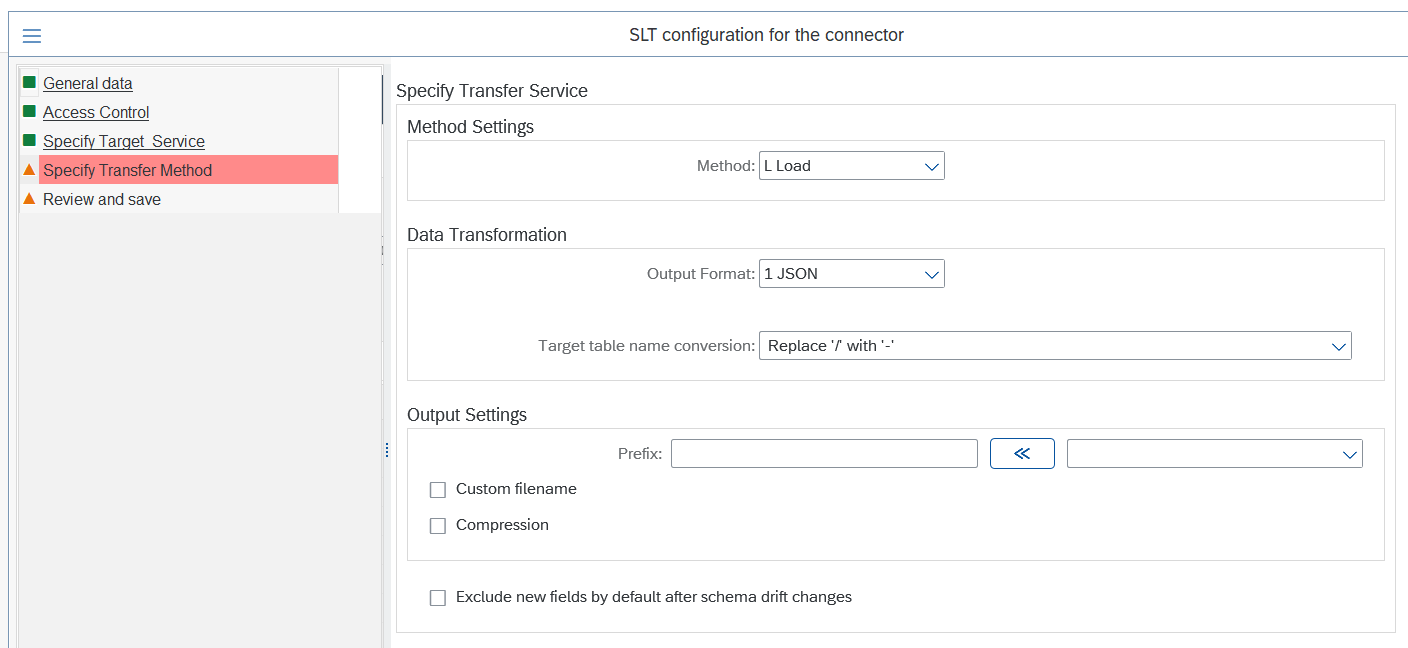
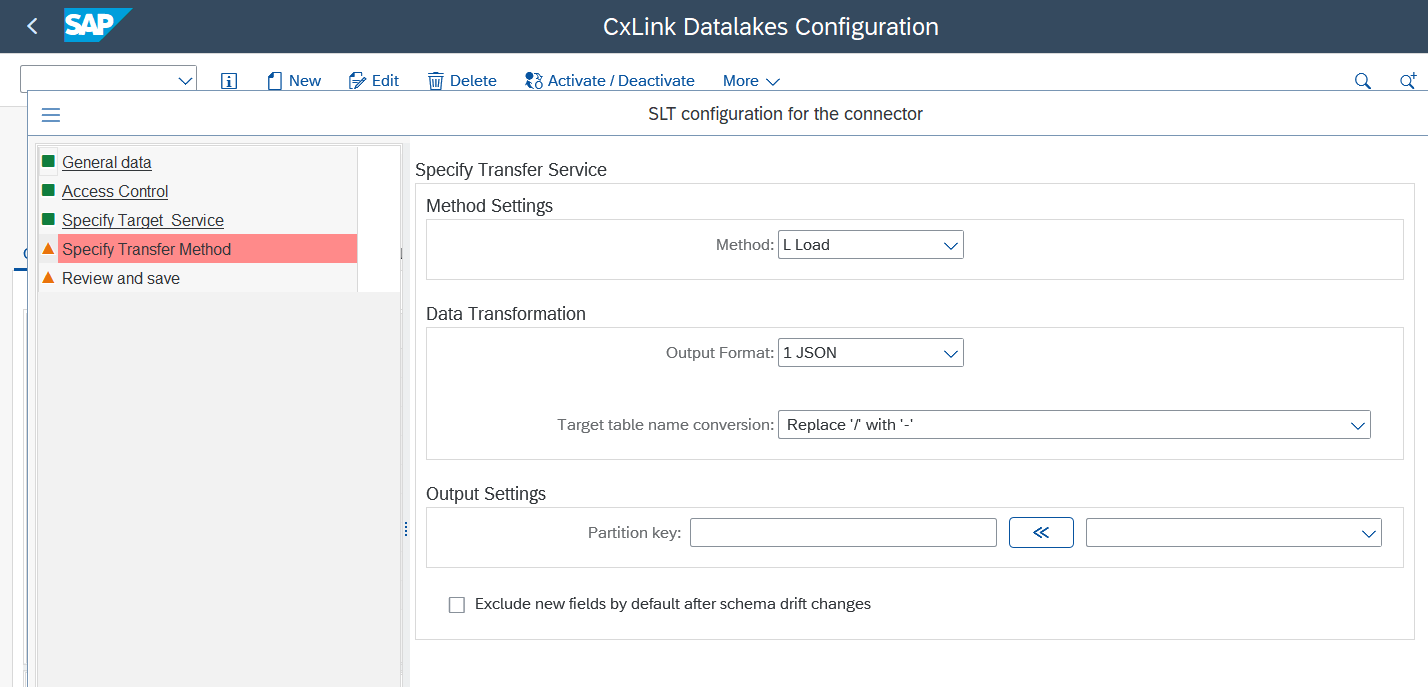
In Specify Transfer Method define:
-
Method: You can define a target for specific operations or the whole process:
- Load: Only Initial Load will be sent to the specified target.
- Replication: Only Replication data will be sent to the specific target.
- Both: Initial Load and Replication data will be sent to the specific target.
-
Output Format: Choose between JSON or CSV as output format.
- JSON: Check Athena compatible if you want to export the data in JSONL format (JSON Lines).
- CSV: Specify the ASCII representation of the separator you want to use in the data. (https://www.asciitable.com/)
-
Target table name conversion. Tables with "/" in their names can provoke path alterations when stored in Amazon S3 or Azure Blob, as they can be assumed as folder separation instead of a single table name. To avoid this behaviour, you can select to replace the '/' symbol for "-" or "__" depending on your needs.
-
In the Output Settings section:
- Amazon Web Services (AWS)
- Microsoft Azure
Amazon S3 as target
- Prefix: You can use the listed dynamic env vars, to generate a custom path based on the values of the exported data.
- Custom filename: In the same way, you can use the listed dynamic env vars to build the file names generated to meet your requirements.
- Compression: You can enable the compression option to save some space while at rest. You should be able to uncompress the data from your consumers.
Amazon Kinesis as target
- Partition Key: You can use the listed dynamic env vars, to generate a custom partition key for kinesis data stream.
- Inform of structure changes: If checked, Cxlink Datalakes will inform of any
Blobs as target
- Compression: You can enable the compression option to save some space while at rest. You should be able to uncompress the data from your consumers.
- Inform of structure changes: If checked, Cxlink Datalakes will inform of any
EventHub as target
- Compression: You can enable the compression option to save some space while at rest. You should be able to uncompress the data from your consumers.
- Inform of structure changes: If checked, Cxlink Datalakes will inform of any
-
Select
Next. -
Back to the CxLink Data Lakes Configuration - Overview screen, you should see all the configuration values listed.
-
-
In the Review section, check the values and select
Createto finish the process. -
Repeat the same steps to create as many configurations as needed.
Advanced Configuration
In this section you will find all advance configuration needed for Datalakes to work properly.
Inform of structure changes
Cxlink Datalake offers the capability to notify users when modifications are made to the structure of the source system table. This option can be accessed via the transaction /LNKAWS/SLT_LTR in the configuration wizard, under the 'Inform of structure changes' step.
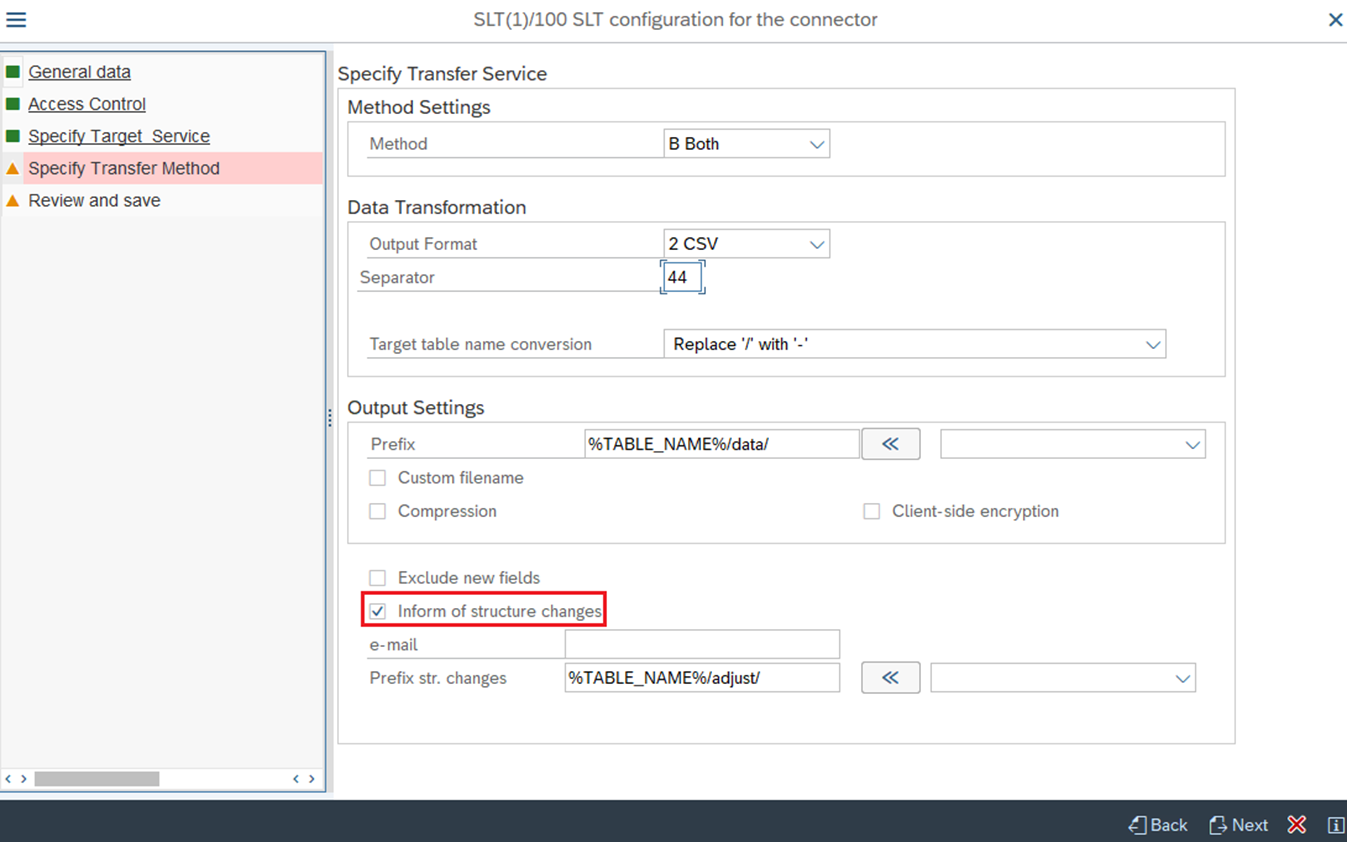
Upon activation of this option and the addition of a new field to a database table affected by this configuration, two distinct files are generated. One file contains the information pertaining solely to the newly added field.
Example| US_OPERATION | US_MTID | US_SID | US_TABNAME | TABNAME | FIELDNAME |
|---|---|---|---|---|---|
The second file contains the final structure of the table, including all the fields.
Example| US_OPERATION | US_MTID | US_SID | US_TABNAME | TABNAME | FIELDNAME |
|---|---|---|---|---|---|
Both files have the same structure:
- US_OPERATION: As a usual replication, it’s the first field included in the file.
- Value ‘L’ → For the file with the final structure.
- Value ‘I’ → For the file with only the new field.
- US_MTID: Mass Transfer ID identificator from SAP LT Replication Server.
- US_SID: SAP System ID
- US_TABNAME: Name of the table with the change.
- Structure DD03P: SAP Standard structure that contains all the technical information about the file.

Further information about the DD03P structure can be obtained by executing the SE11 transaction and specifying the DD_GET_DD03P function module and parameter DD03P_TAB for a specific table.

Ones of the most important fields are:
| Fieldname | Type | Description |
|---|---|---|
| TABNAME | TABNAME | In this case, empty |
| FIELDNAME | FIELDNAME | Name of the new field |
| DDLANGUAGE | DDLANGUAGE | Language key |
| POSITION | TABFDPOS | Position of the field |
| KEYFLAG | KEYFLAG | Identify key fields of the table with ‘X’ |
| MANDATORY | MANDATORY | Identify if the field is required |
| DATATYPE | DATATYPE_D | Datatype in Dictionary |
| LENG | DDLENG | Length ( Nº of characters ) |
| DECIMALS | DECIMALS | Number of decimals |
| DOMNAME3L | DOMNAME | Domain name |
Kinesis Data Limitation
If you are using Kinesis as a target for data replication, you will need to add a custom configuration to limit the number of records per data chunk to avoid Kinesis limits.
To do so:
- Go to transaction LTRS
- Select the desired Mass Transfer ID and double-click to open its properties.
- Right-click on Performance Options and Add table.
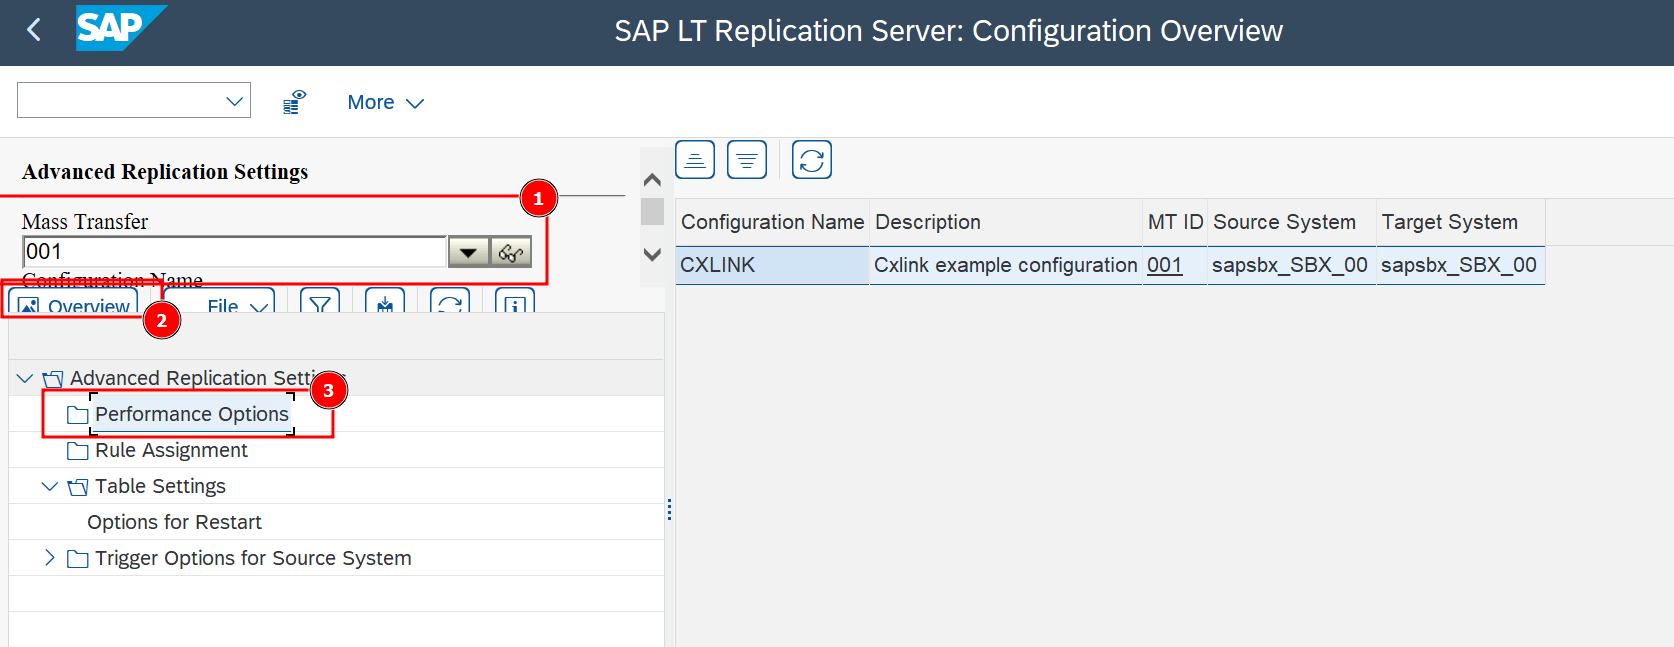
- Go to Replication Options tab and set the Portion Size (Records) to 500.
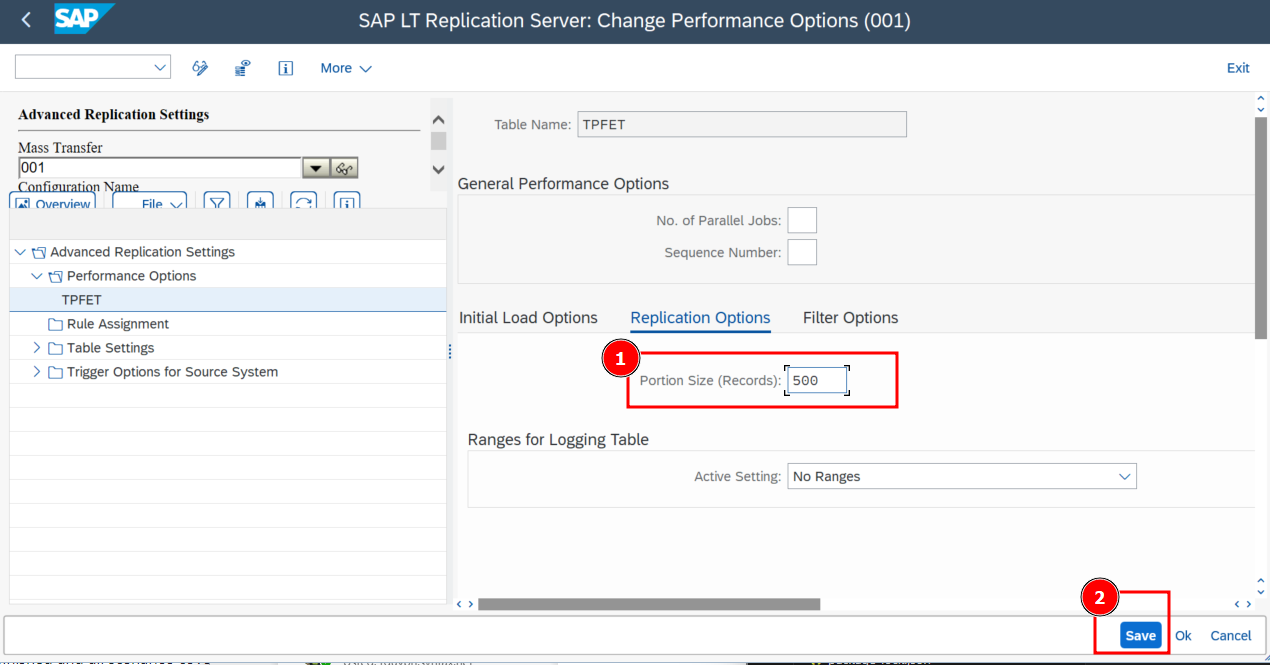
Saveto finish the configuration.
Health Checks
You can perform some health checks over the configuration created to ensure that everything is correctly configured before start replication tables.
To perform the checks:
-
Go to transaction /n/LNKAWS/SLT_LTR.
-
In the CxLink Data Lakes Configuration - Overview screen, go to the
Health checktab, selectConfiguration Health CheckandExecute.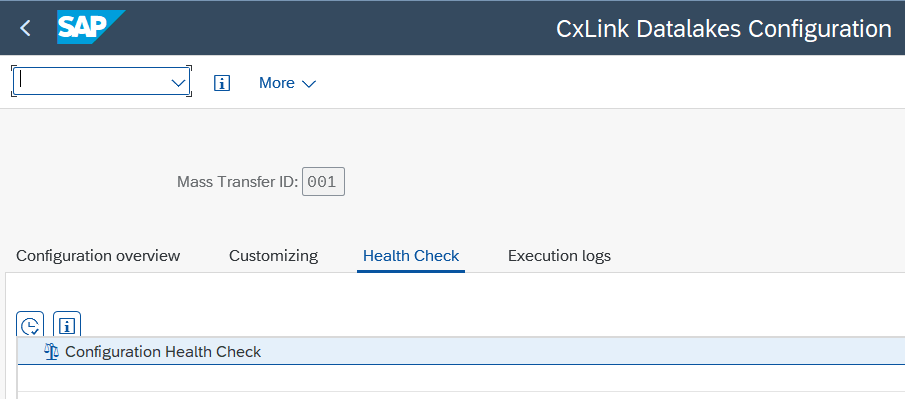
- Amazon Web Services (AWS)
- Microsoft Azure
-
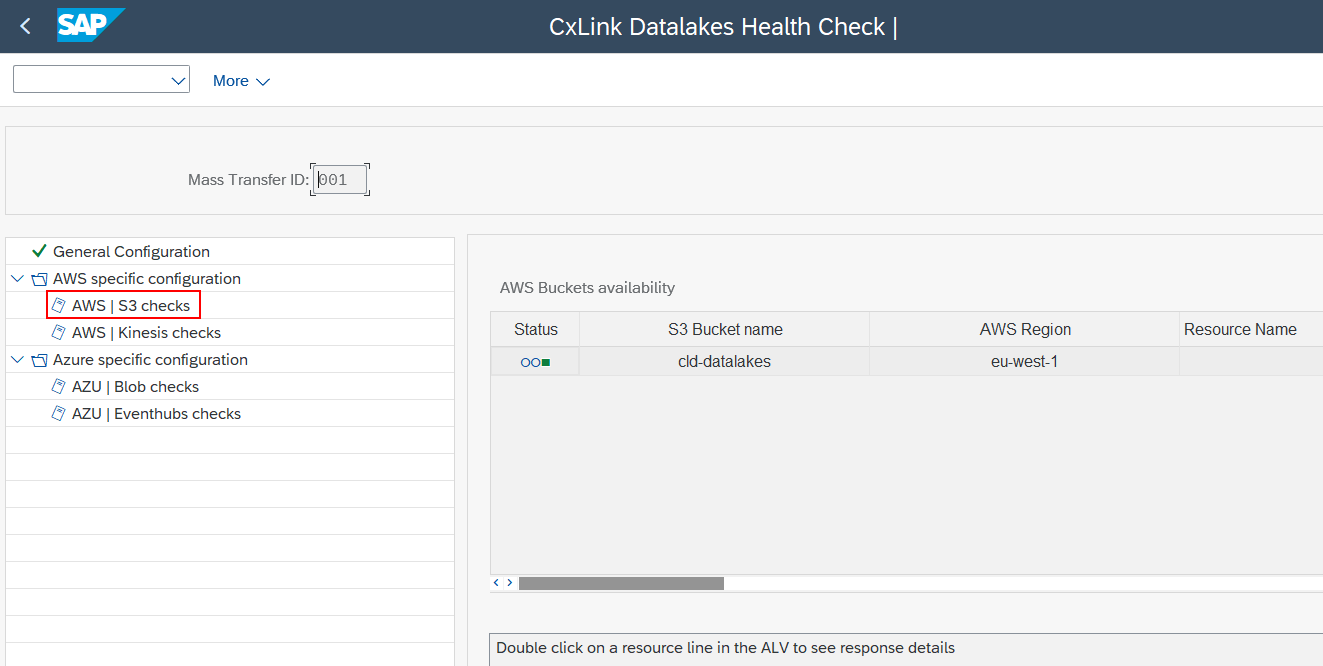
Double click on the nodes under AWS specific configuration and check the logs.
-
For S3 Checks output should look similar to:
-
For Kinesis checks output should look similar to:
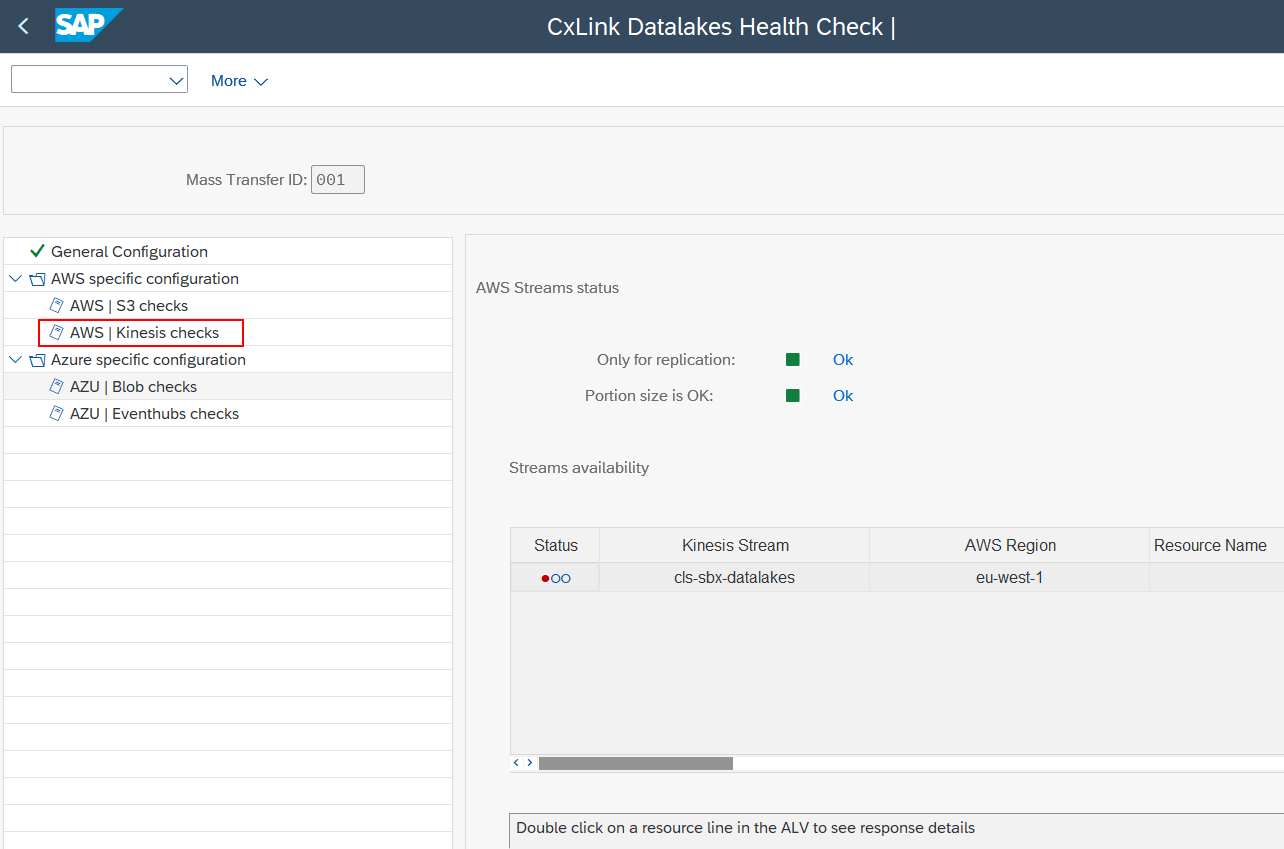
-
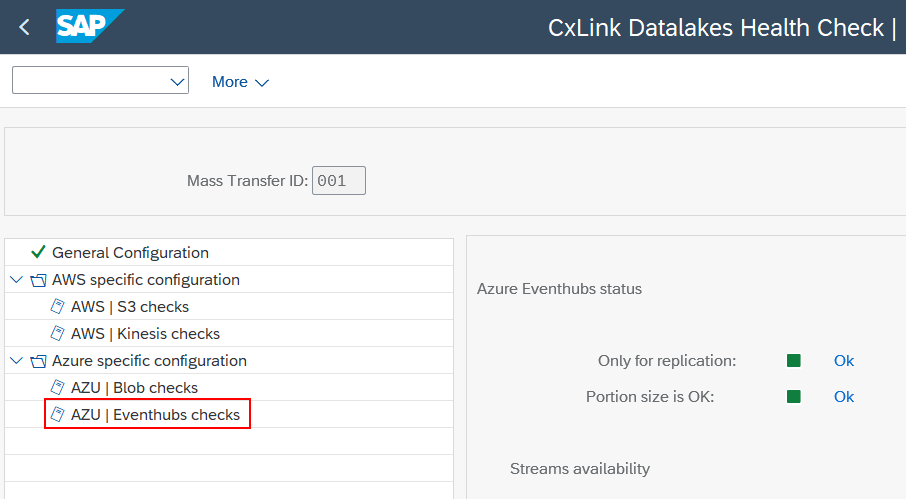
Double click on the nodes under Azure specific configuration and check the logs.
-
For Blob Checks output should look similar to:
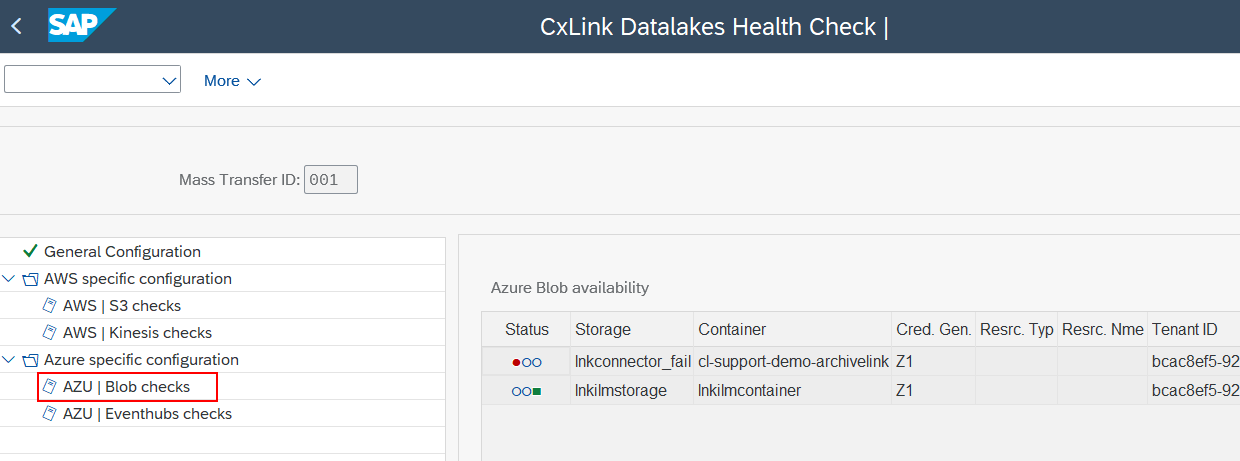
-
For EventHubs checks output should look similar to: