Working with attachments (GOS)
SAP application documents such as Invoice, Purchase Order, Sales Order and so on use common functions such as create attachments, list attachments, show links to an internet address and display associated workflows. The Generic Object Services toolbox provides these functions. Syntax CxLink Documents leverages a simple interface, providing more efficient, faster document storage, access and recovery of SAP data. It is not a separate product; it is integrated into your SAP environment for easy access.
With CxLink Documents, you can easily define retention policies for all of your SAP documents, linking the policies to the S3 storage classes to optimize cost savings.
Even more critical, CxLink Documents is an SAP native application, written in ABAP and leveraging the ABAP SDK for AWS. As such, it is an SAP-certified solution available in both the AWS Marketplace and the SAP App Center.
In addition, CxLink Documents is managed by Syntax and is regularly updated with the latest AWS and SAP features and functions, providing the most robust document management solution available.
Before you start
Configure
You will need to select where your attachments will be stored. For that you will need to select the target storage container (Amazon S3 Bucket or Azure Blob Storage). To do so:
- Go to
SPRO->Cxlink Suite by Syntax->Cxlink Documents & Archive->Working with Attachments (GOS)and select Execute. - On the GOS Attachments configuration screen, select the storage location for your attachments.
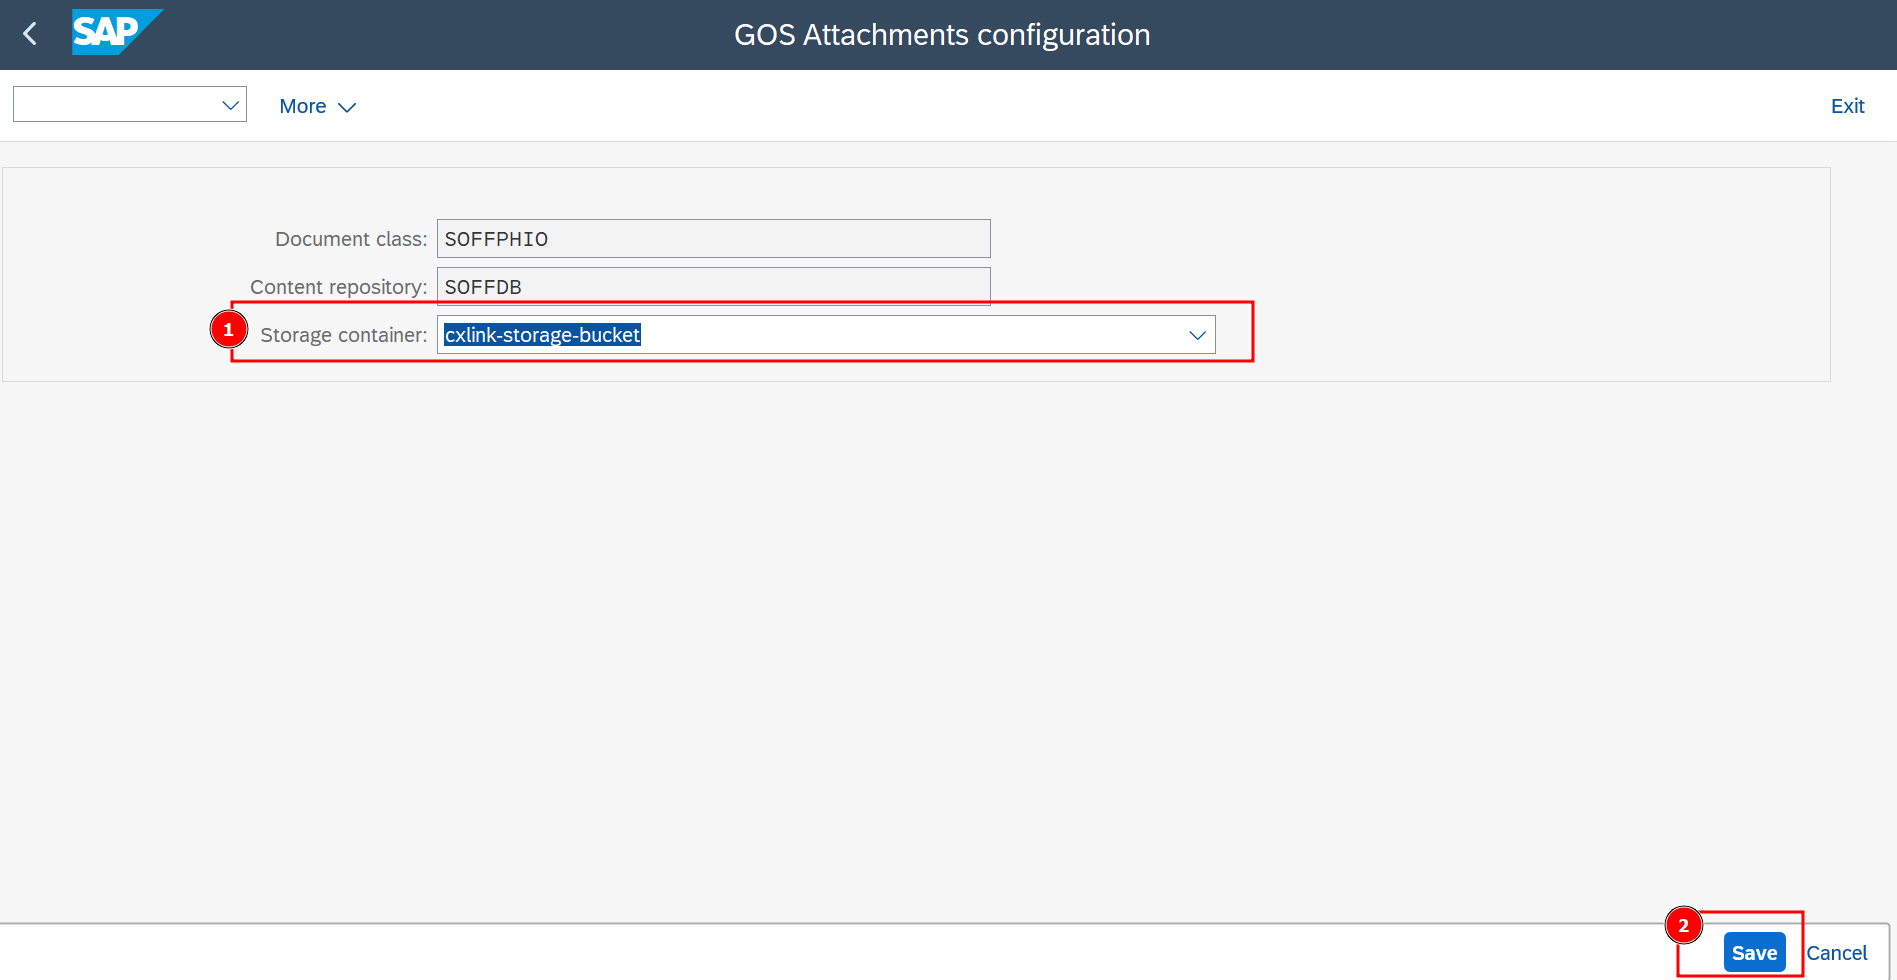
- Select Save.
IMPORTANT
Starting now, any newly added attachments will be automatically saved in the new location. If you currently have attachments stored in the SOFFCONT1 table or any other content repository, please refer to our migration guide for step-by-step instructions on transferring them to the new content repository (CR).
Migrate your existing content
You already have an existing Content Management server (SAP Content Server, Opentext, IBM FileNet...) and you want to migrate its contents to an Amazon S3 Bucket. Documents will be moved in a one-by-one strategy and an integrity check will be performed each time a document is stored in Amazon S3.
Follow these to migrate your contents to CxLink Documents:
- Call transaction SA38 or SE38.
- Specify report /LNKAWS/RSIRPIRL_MIGRATION and press F8 or Execute. Migration Report
- In the Convert Contents to Physical Documents report, set the following options:
- Document Area: Leave blank
- PHIO Class: SOFFPHIO
- Target Category: /LNKAWS/AT
- Source Category: SOFFDB
- DATUM: Initial and Final date for the documents to be migrated.
- Test Run:
- Check if you want to perform a dry-run before you start moving your documents to the new Content Repository.
- Uncheck for real migration.
- Delete Source Repository:
- Check if you want to delete the files in the source Content Repository after they have been successfully migrated.
- Uncheck if you want to keep the original documents in the source Content Repository (SAP Server will not be able to access them after the migration, but you will be able to access them from your original Content Repository management tools).
- Execute (F8) the report in dialog or background (Background processing is recommended if you select to migrate a large number of documents)
- Review the output to ensure that all documents have been successfully migrated. GOS Migration Output
- If the migration process finishes with no errors, your documents are now stored in the selected bucket in the cloud.
Rollback to your previous Content Repository
If for any reason you need to migrate back to a previous content repository, follow these steps:
- Execute the migration process, from the CR managed by Cxlink to the desired one.
- Once finished, go to
SPRO->Cxlink Suite by Syntax->Cxlink Documents & Archive->Working with Attachments (GOS)and select Execute. - On the GOS Attachments configuration screen, set the Storage Container to blank.
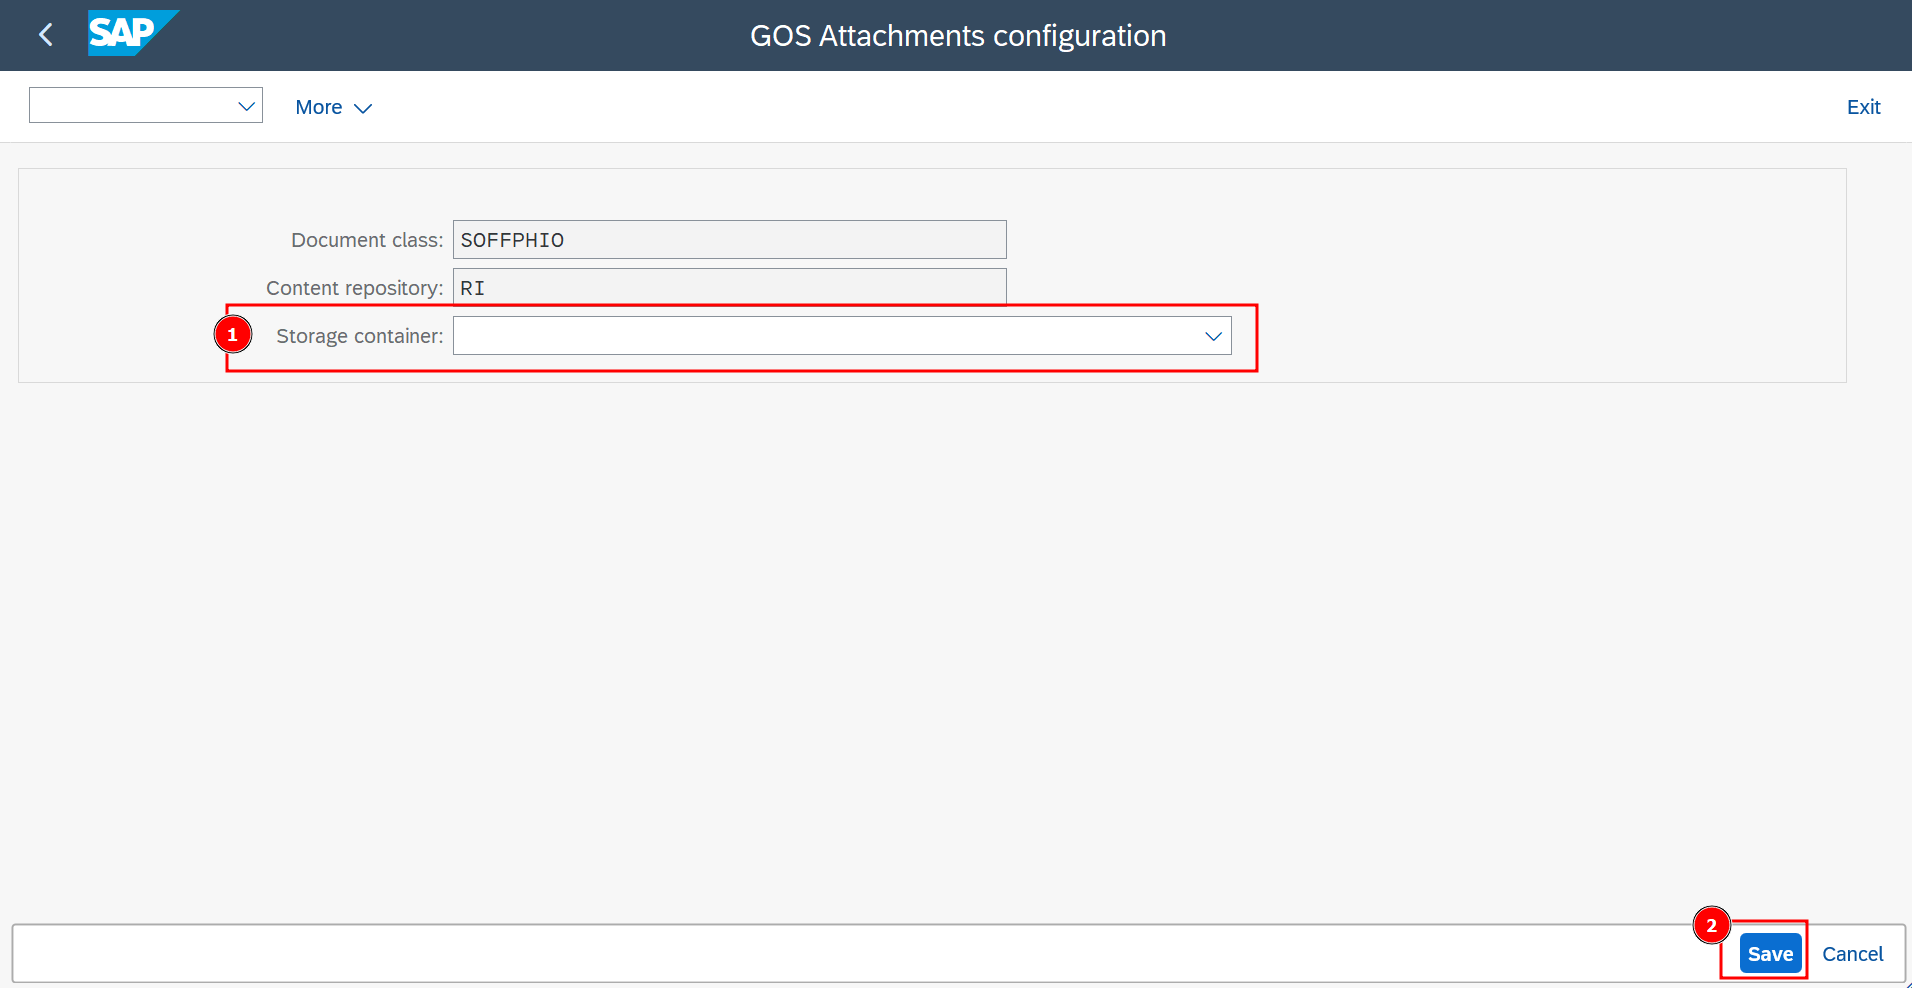
- Select Save.
IMPORTANT
Starting now, any newly added attachments will be automatically saved in the new location.