Working with Archive Sessions (SARA)
Overview
All data archiving activities commence with Archive administration (transaction SARA). SARA provides the overall administration of archiving schedules and manages the archiving sessions. The process includes customization of objects, their conversion to archived sequential archived files and most importantly, their overall management. In addition to these, the archive administration process also retrieves the archived files and converts the data through an automated process, if there is a change in software, hardware or the data structure. The data archiving process is streamlined and simplified through the Central command of archiving administration
Configure
You will need to select where your attachments will be stored. For that you will need to select the target storage container (Amazon S3 Bucket or Azure Blob Storage). To do so:
- Go to
SPRO→Cxlink Suite by Syntax→Cxlink Documents & Archive→Define Archive Objects (SARA) destinationand selectExecute. - Select
New. - In General Data section add:
- Provider: Select between the listed providers.
- Content Repository: Select a Content Repository custom name or leave blank to autogenerate one.
- On the GOS Attachments configuration screen, select the storage location for your attachments.
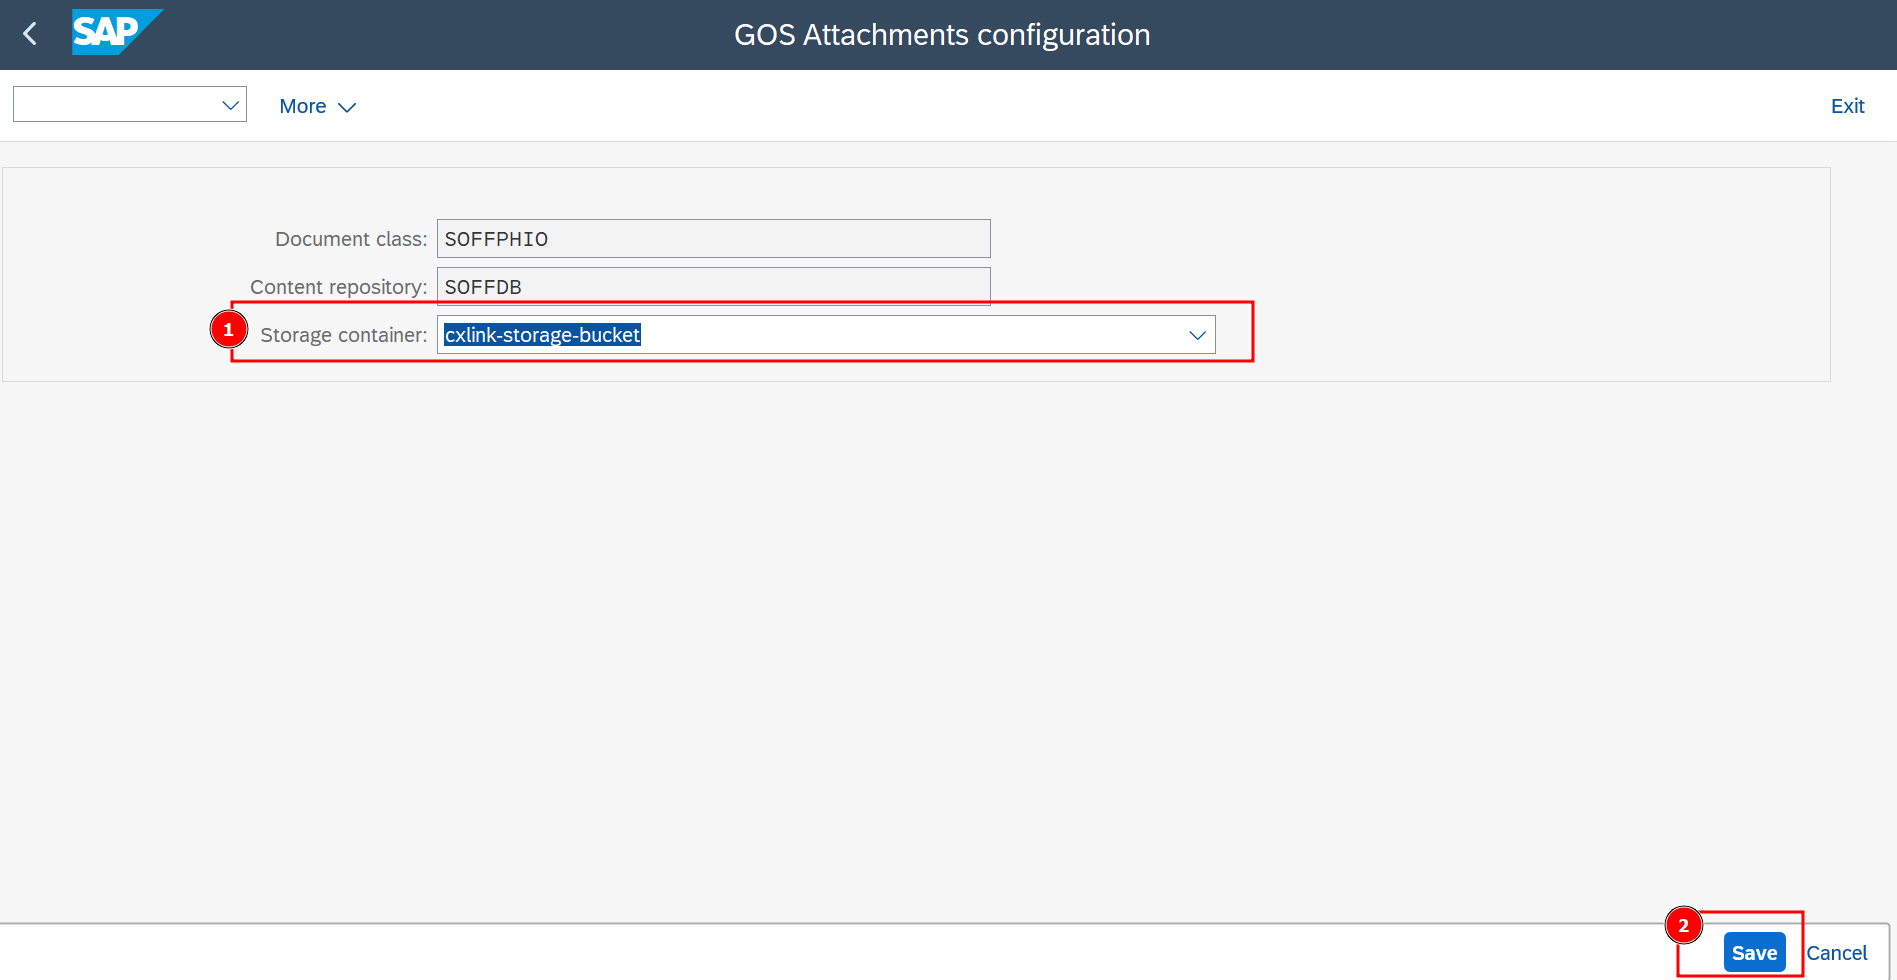
- Select
Save.IMPORTANTStarting now, any newly added attachments will be automatically saved in the new location. If you currently have attachments stored in the SOFFCONT1 table or any other content repository, please refer to our migration guide for step-by-step instructions on transferring them to the new content repository (CR).
Migrate your existing content
Migrating your attachments between content repositories will be executed
Rollback to original setup
If for any reason you need to migrate back to a previous content repository, follow these steps:
-
Execute the migration process, from the CR managed by Cxlink to the desired one.
-
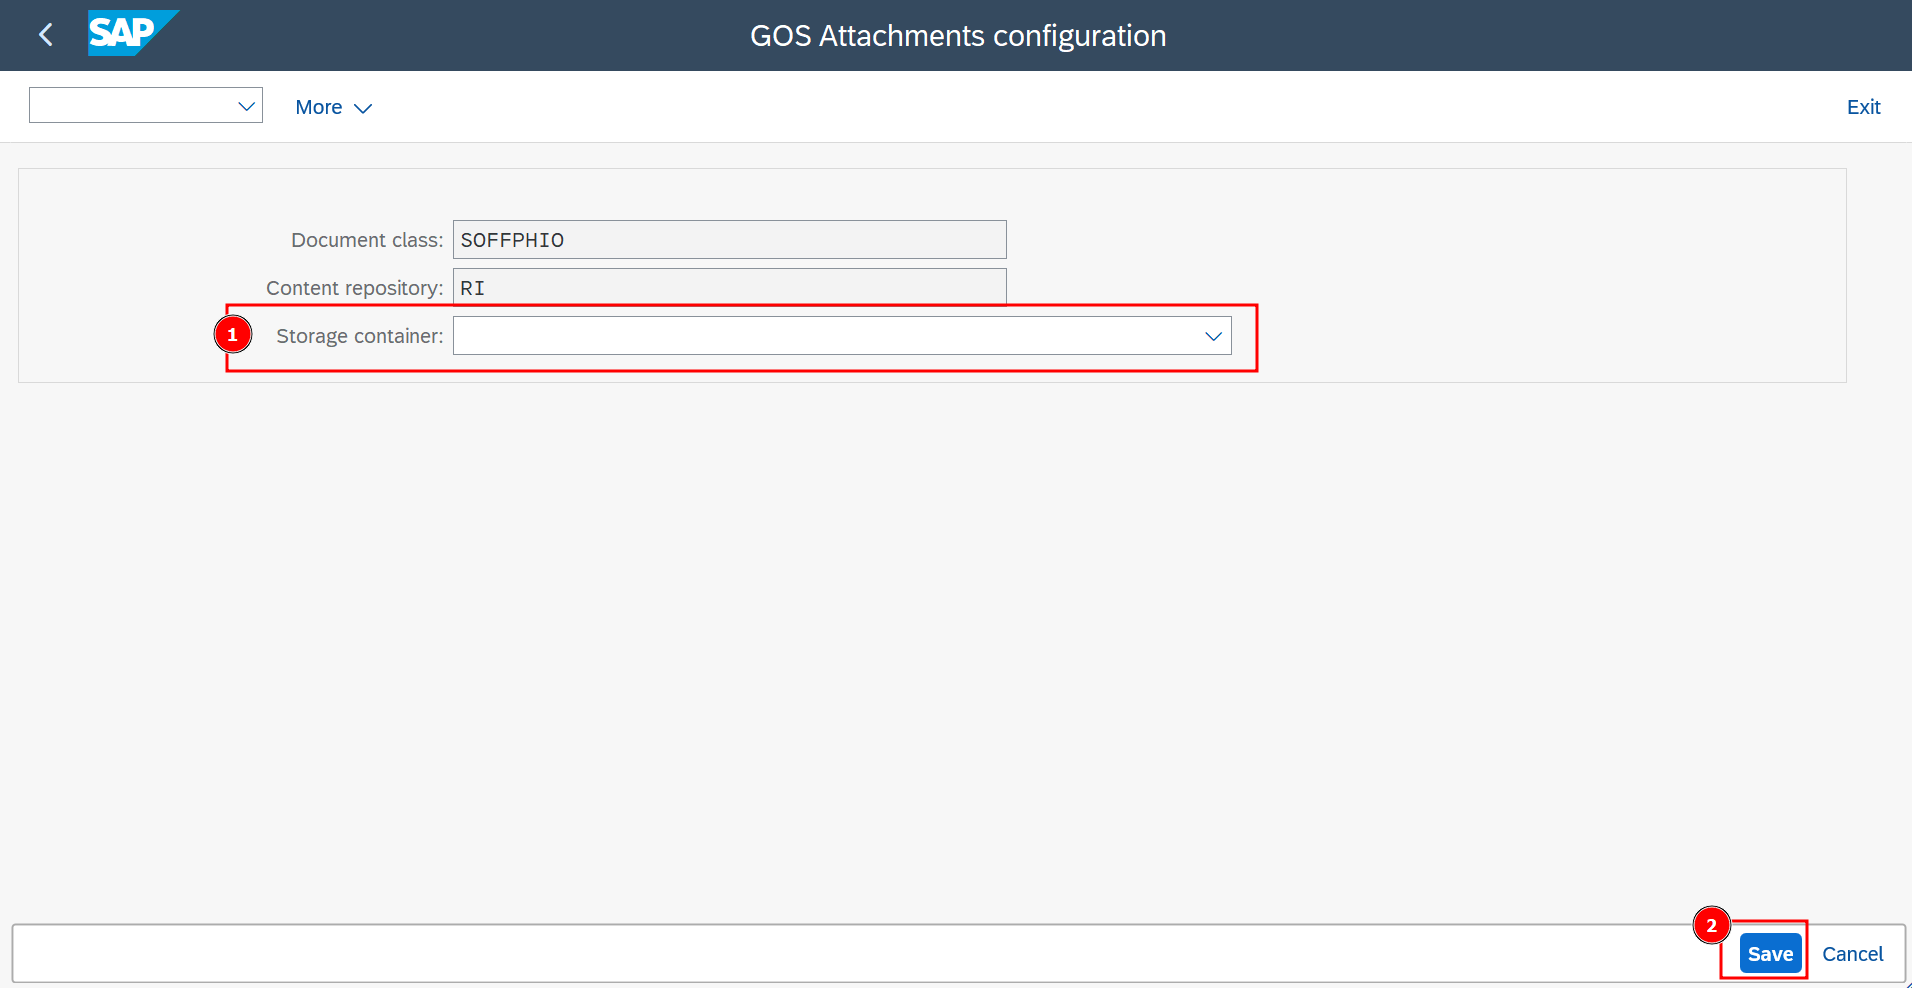
Once finished, go to
SPRO→Cxlink Suite by Syntax→Cxlink Documents & Archive→Working with Attachments (GOS)and selectExecute. -
On the GOS Attachments configuration screen, set the Storage Container to blank.
-
Select
Save.IMPORTANTStarting now, any newly added attachments will be automatically saved in the new location.