
Archiving Sessions (SARA)
All data archiving activities commence with Archive administration (transaction SARA). SARA provides the overall administration of archiving schedules and manages the archiving sessions. The process includes customization of objects, their conversion to archived sequential archived files and most importantly, their overall management. In addition to these, the archive administration process also retrieves the archived files and converts the data through an automated process, if there is a change in software, hardware or the data structure. The data archiving process is streamlined and simplified through the Central command of archiving administration
This section will guide you in how to configure CxLink Archive to be used as the storage provider for your archiving sessions:
Topics
How it works
Configuration
This section will guide through all the steps needed to start using a Amazon S3 bucket as the storage provider for attachments.
WARNING
Ensure that you have an existing bucket in the Buckets Management tab. If you don't, please follow the Buckets management section, to create or import and existing repository.
Follow these steps to configure Archive for Archiving Session:
Access SAP transaction
/n/LNKAWS/S4MANAGERto open CxLink ABAP ConsoleJump into the Archiving objects management tab
Press Add to create a new line
Open the selector for the
Arch. Objectcolumn and search for the desired Archiving Object. In this example, BC_SFLIGHT
Select the proper bucket where the archiving sessions will be stored from the
Bucketscolumn list.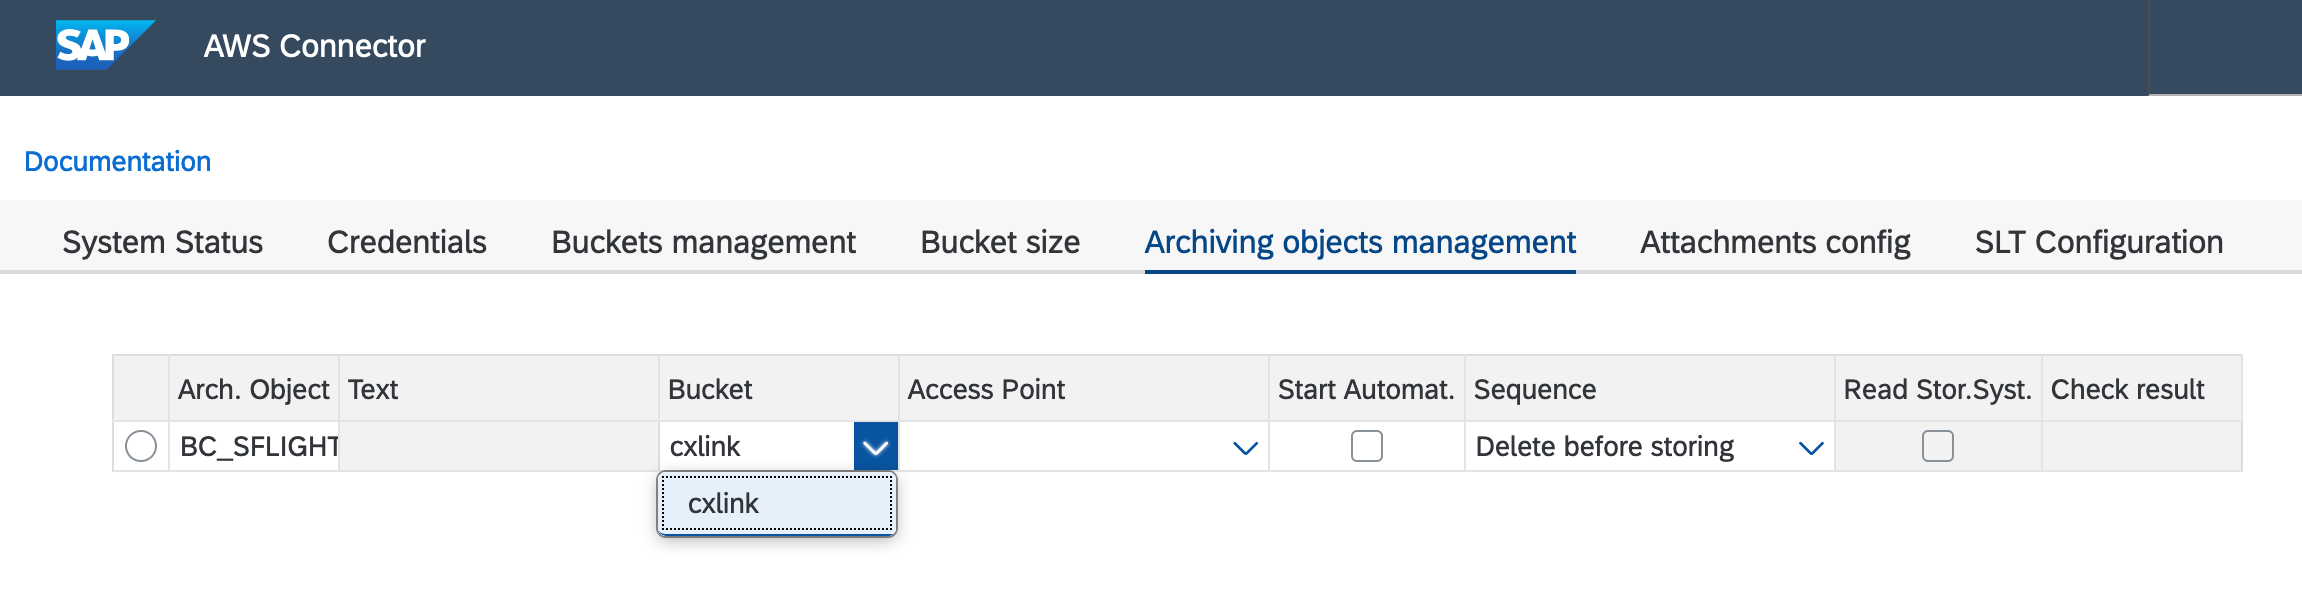
Select also the Access Point in case that you want to use these feature. (Omit if you are not using it).
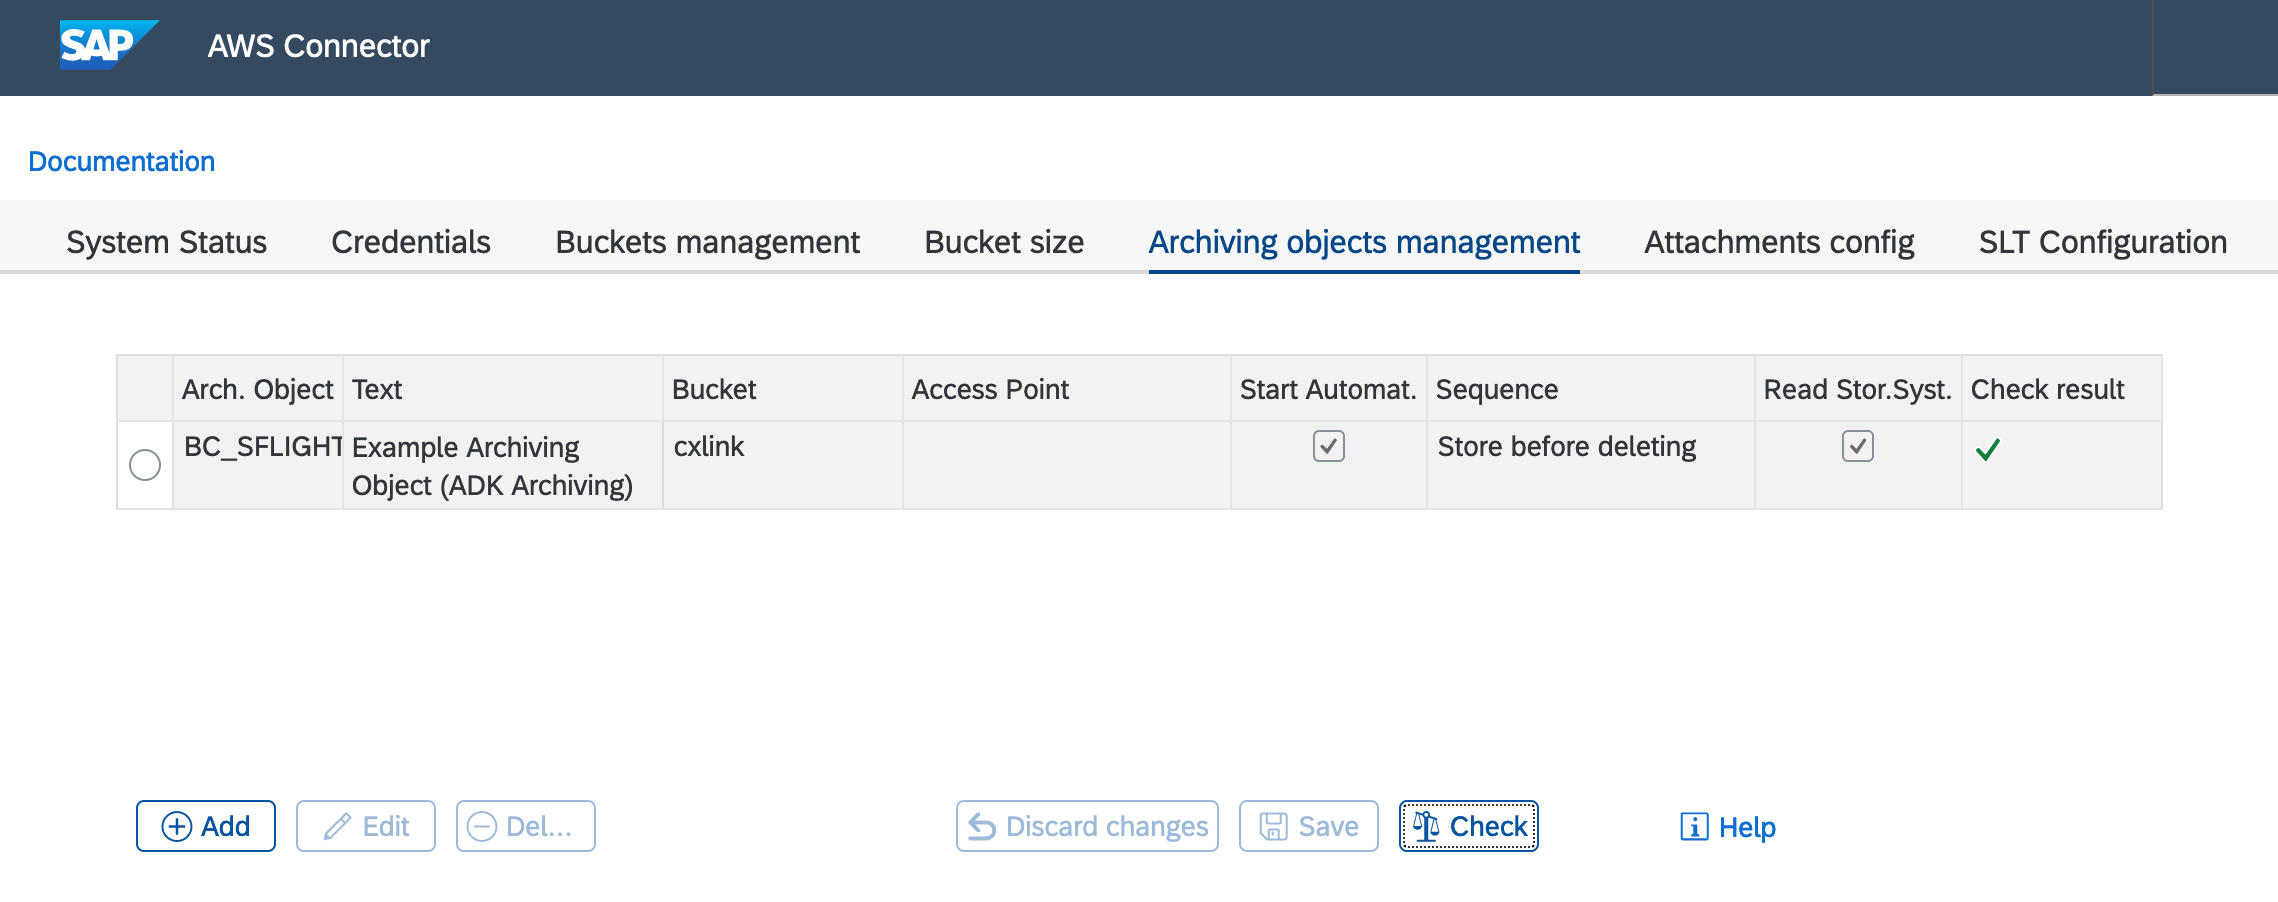
Check the Start Automatic option.
Under Sequence, you can specify when the storage is to take place:
- If you select Delete Before Storage, the archive file is not stored until it has been processed by the delete program. If the delete program is run in test mode, automatic storage is not carried out. This option improves performance. You can use this setting to perform storage manually if no delete program has been run for the archive file. In this case, the system informs you that this does not match the selected sequence. You must then ensure that the file is not stored at the same time as the delete program is active.
- If you select Store Before Delete, the archive file is stored as soon as the write program has created the archive file, but before the delete program has edited it. The delete program can therefore only remove the contents of an archive file from the database once the archive file has been stored. option offers enhanced backup, as the archived data is not deleted until it has been stored.
Press Save when your done.
Press Check to ensure that the configuration has been properly saved and the bucket is reachable.
If you selected
Storage Before Deleteduring configuration and you want to delete the files from filesystem, you should select the Read Storage System option in the bucket. This configuration should be done after a new Archiving Object association is created.Storage Before Delete
During storage before delete, you can choose Delete Program Reads from the Storage System to control the read behavior of the delete program during the delete process:
- Indicator selected: After storage, the stored archive file is deleted from the file system. Consequently, during the delete phase, the delete program reads the archive file from the storage system. ensures that the data is only deleted from the database if it was successfully stored in the storage system.
- Indicator not selected: After storage, the archive file is not deleted from the file system. The delete program reads the archive file from the file system. This setting results in improved performance of the delete program without neglecting backup considerations.
- If in the settings for the delete program, the radio button Start Automatically is also selected, the delete program is started automatically following storage. It therefore makes no difference whether the delete program is run in test or production mode.
Follow next steps to configure the proper option:
- Select the Archiving Object from the list.
- Edit.
- Change the value by selecting/deselecting the option.
- Save.
Repeat all these steps for every Archiving Object that you want to be managed by CxLink Archive.
From now on, all new archiving sessions for the Archiving Objects configured in CxLink ABAP Console will be stored in the proper bucket in the cloud.
Migrating your Sessions
You can use this procedure to move your Archiving Sessions from an existing Content Repository to an Amazon S3 Bucket managed by CxLink ABAP Suite. Sources for the attachments can be File Systems, MaxDB, or any third-party solution that uses the ArchiveLink protocol to handle the objects. Archiving Sessions will be moved in a one-by-one strategy and an integrity check will be performed each time a session is stored in the cloud.
WARNING
Before you start the migration process, ensure that no archiving sessions are running. The migration process locks a specific standard table to ensure data consistency.
Follow these to migrate your contents to the selected storage in the cloud:
Call transaction SA38/SE38.
Enter report
/LNKAWS/CONTENT_REP_MIGRATIONand press F8 or Execute.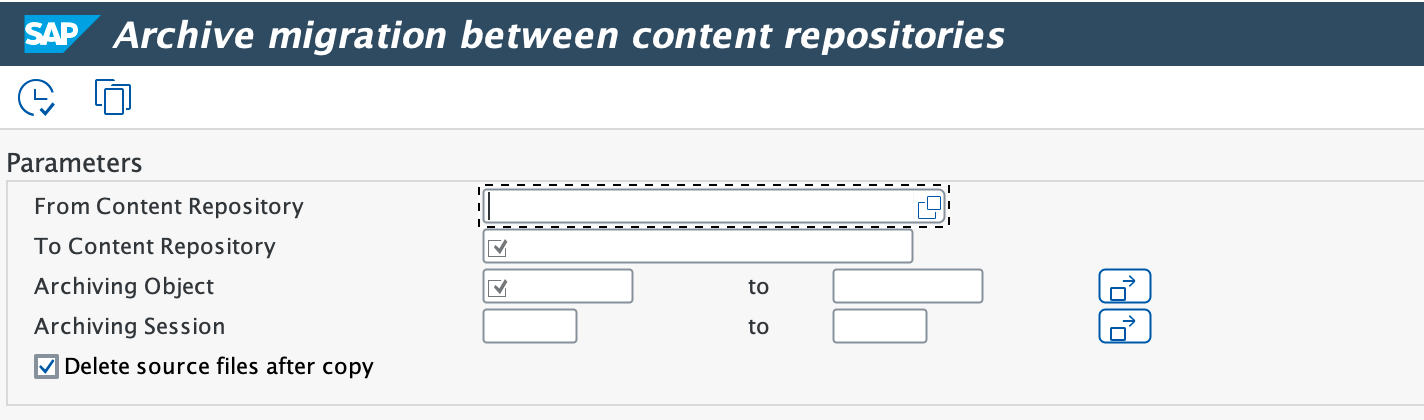
Enter the correct parameters:
- From Content Repository: Select the Source Content Repository where your archiving sessions are currently stored
- To Content Repository: Select the Content Repository managed by CxLink Archive
- Archiving Object: Select one or more archiving objects that you want to migrate
- Archiving Session: Select one or more archiving sessions per Archiving Sessions. Leave blank for all archiving session
- Delete Source files after copy:
- Check this option if you want to delete the files in the source Content Repository after they have been succesfully migrated.
- Uncheck this option if you want to keep the original documents in the source Content Repository (SAP Server will not be able to access them after the migration, but you will be able to access them from your original Content Repository management tools).
Execute the report in dialog or background (Background processing is recommended if you select to migrate a large number of documents)
Check for the output to ensure that all sessions have been succesfully migrated:
